
Azure Purview is a Microsoft Data Governance service which enables an organisation to map their data infrastructure including data lineage and link these assets to a business glossary. An organisation can then use Azure Purview to search for and discover data across the organisation in a single service. People across an organisation can search for relevant data and see glossary information including terms relevant to that data.
Azure Purview supports scanning and cataloguing many data platforms including (but not limited to) Power BI, Azure SQL Database, On-Premises SQL Server, Azure Data Lake, AWS S3 buckets, and Azure Synapse Analytics. In this blog post we’ll walkthrough:
- Creating an Azure Purview account
- Connecting to and scanning a Serverless SQL Pools database
- Creating Glossary terms
- Linking these terms to the Serverless SQL Pools objects
Thank you to Wolfgang Strasser and Erwin de Kreuk for help in investigating connecting Azure Purview to Synapse Analytics.
Creating an Azure Purview Service
Please note that this is a paid service and is currently in preview status. For transparency, in the process of investigating connecting Purview to Synapse Analytics, scanning the Serverless SQL Pools databases, and using the service for several hours, the total cost amounted to ~£7. This particular instance of Azure Purview was deleted after this blog was created.
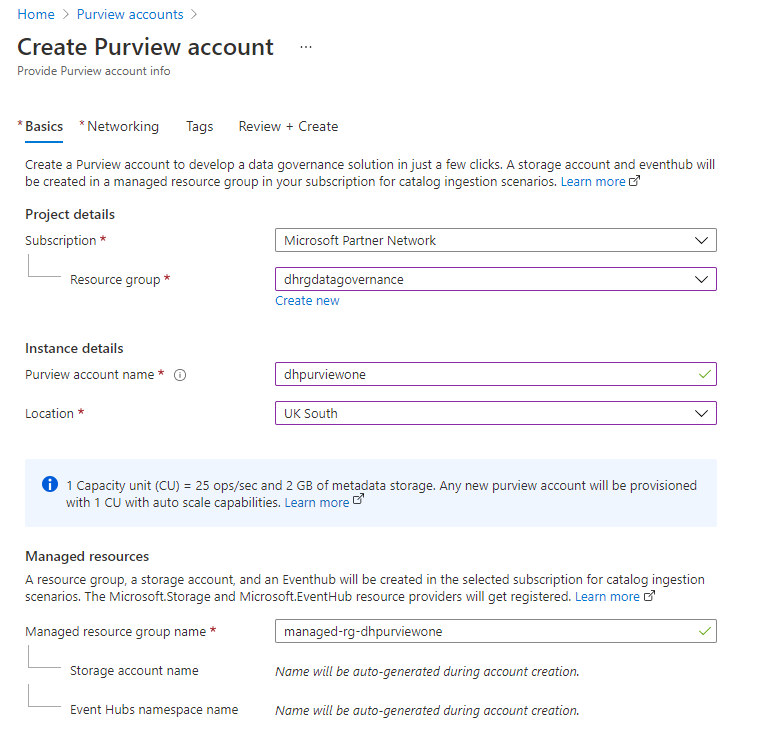
- In the Azure Portal search for purview accounts
- Click Create Purview account
- Enter the following information:
- Subscription
- Resource Group (use existing or create new)
- Purview account name
- Location
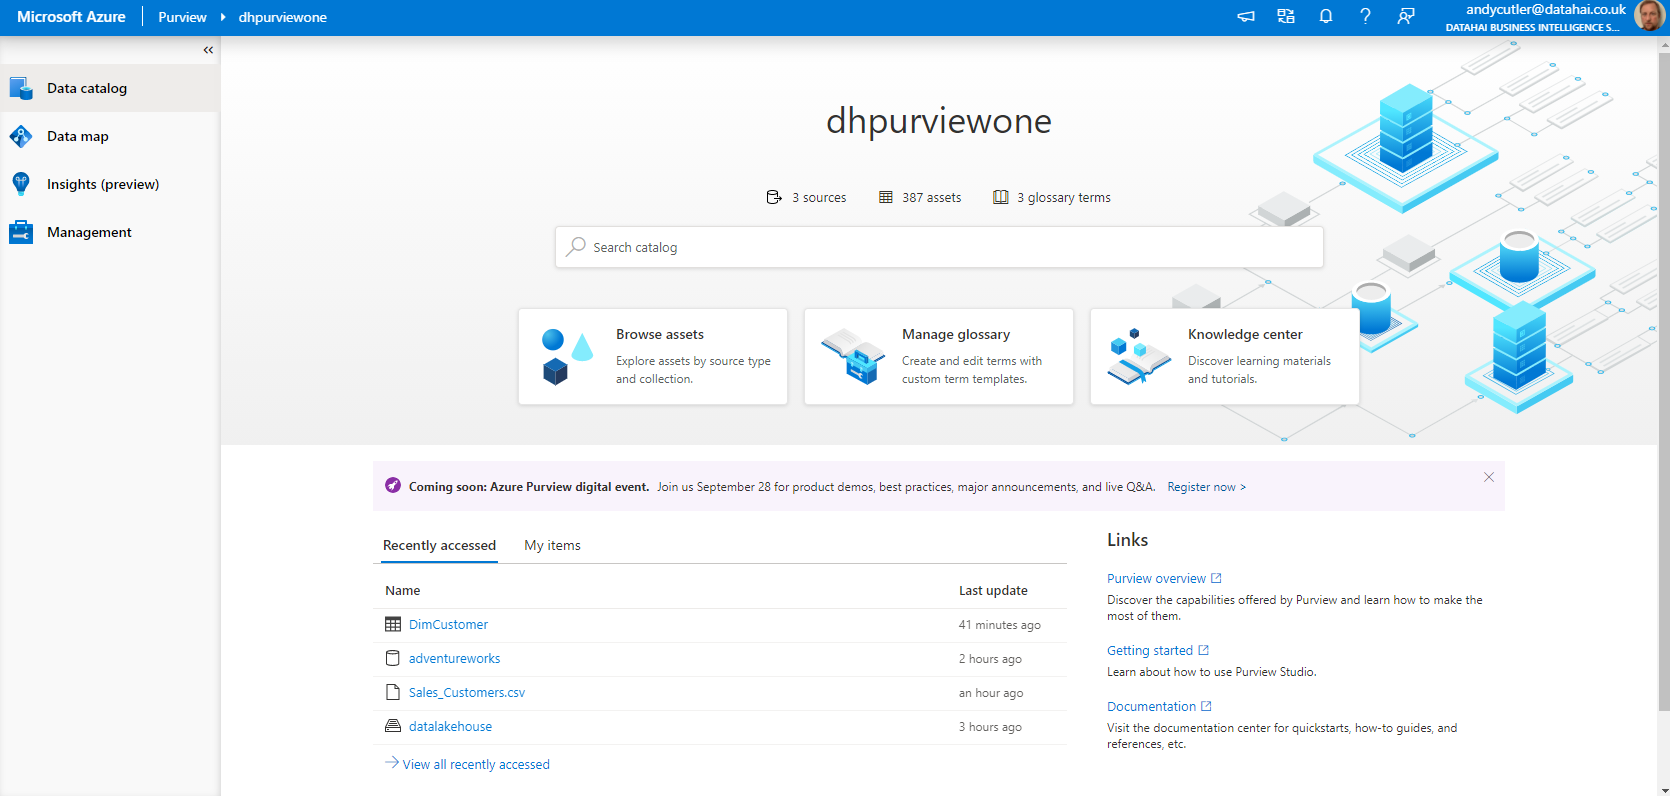
Once the Purview account has been created you’ll be taken to the Azure resource page, from here you can click the Open Purview Studio link. You can also access Purview by going to the main URL https://web.purview.azure.com/ and selecting your Active Directory account and Purview account.
Purview Studio
This is the homepage of Purview where we can browse registered assets and browse/manage the business glossary. Both administrators and users of Purview can access this studio, with relevant areas being accessible and visible depending on the user role. For the next section we’ll be working in the Data Map area.
Registering Data Sources
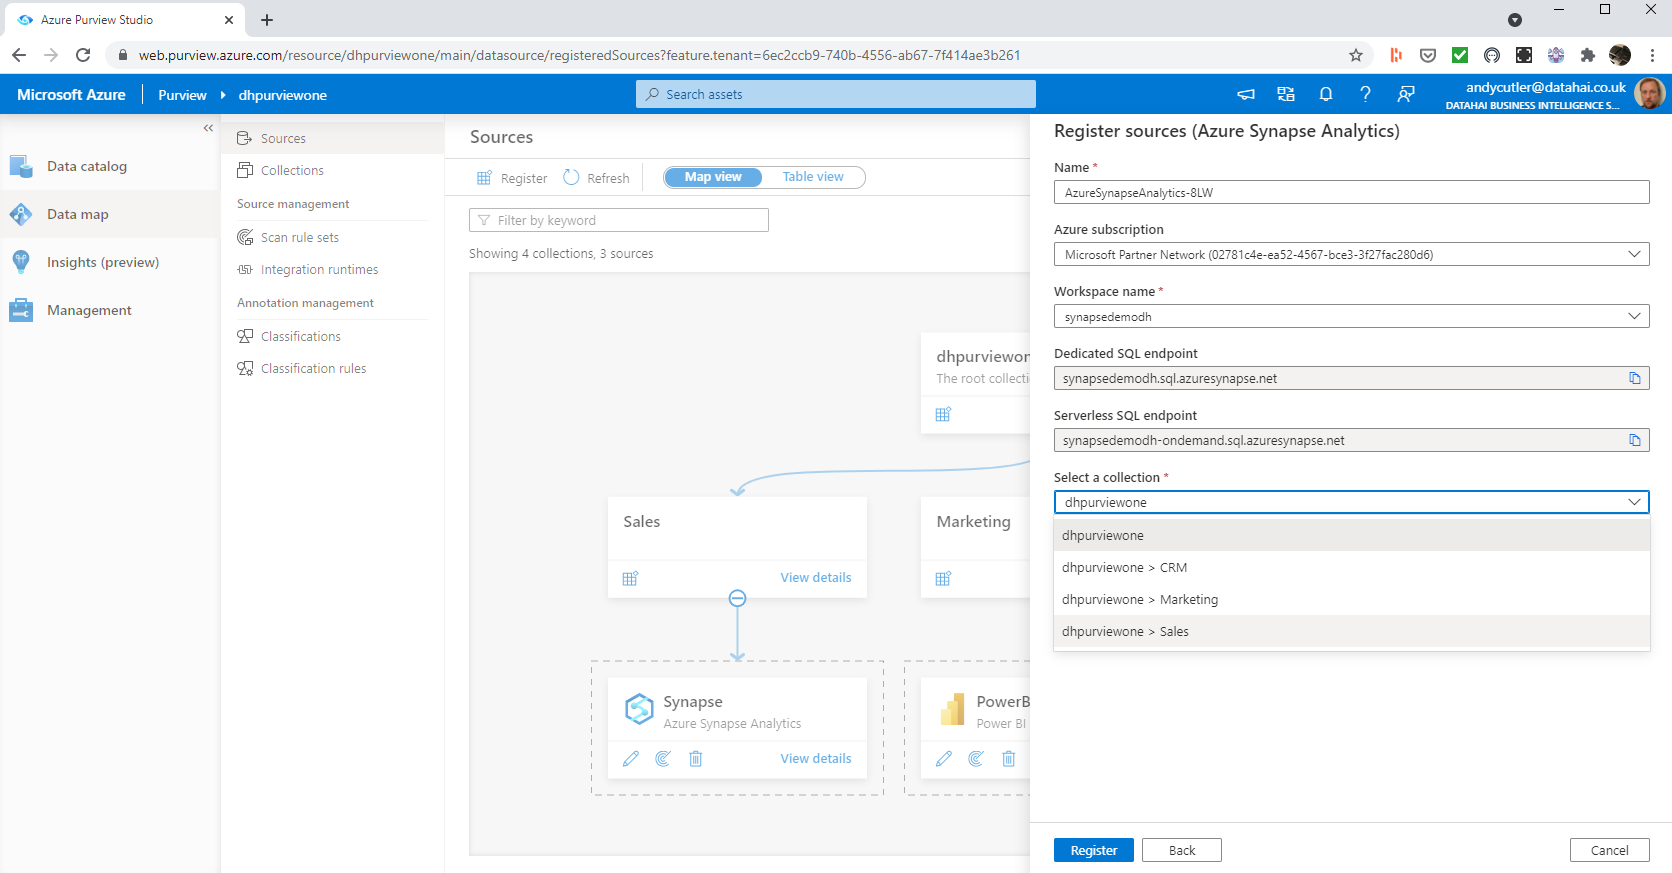
To be able to browse assets, we must first register data sources. In the following image we are registering an Azure Synapse Serverless SQL Pools instance within the Sales collection.
- Click Data Map on the left menu
- Click Collections and add a new collection under the root collection, call this new collection Sales
- Click Sources then click Register
- Select Azure Synapse Analytics
- Enter an appropriate name for the datasource
- Select the relevant subscription and workspace for the Synapse Analytics workspace
- Select the appropriate collection to register the Synapse instance, in this case the Sales collection under the root collection
- Click Register
Show Collections Hierarchy and Registered Data Sources
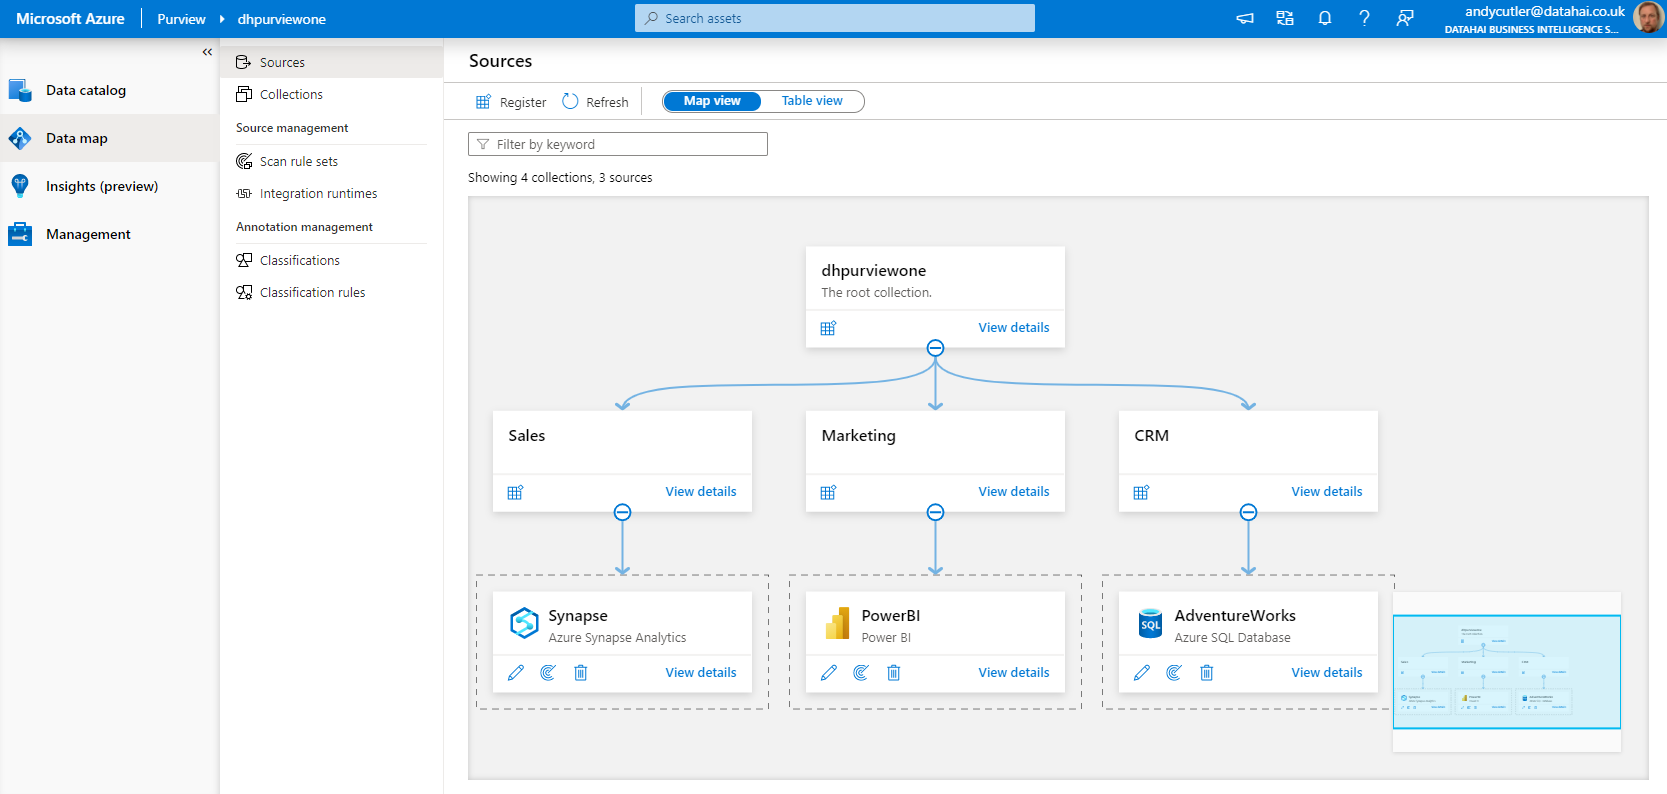
Once we have registered the Synapse Analytics workspace, we can see the hierarchy of collections and the data sources registered within each collection. In this example we have also added 2 other collections and registered Power BI and an Azure SQL Database (out of scope of this blog post). Please note we are able to register a data source with a single collection only. E.G. the Synapse Analytics workspace we have registered to the Sales collection cannot also be registered with the Marketing collection. In the following image we can see the Azure Synapse Analytics data source registered earlier, and also 2 other data sources: a Power BI tenant and an Azure SQL Database.
Scan Data Source to Discover & Classify Assets
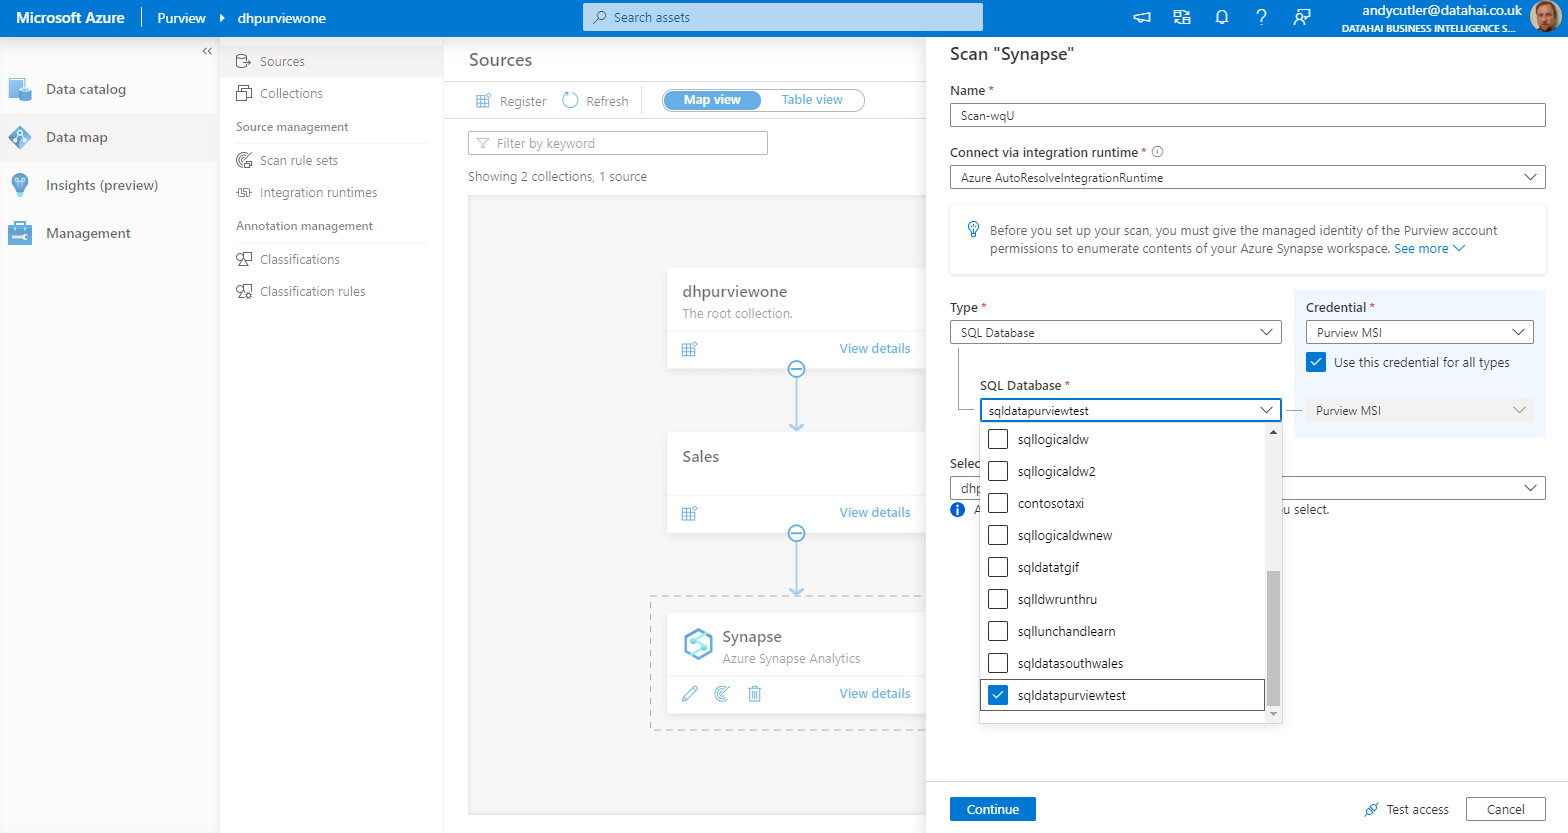
Once we have registered a data source, we can initiate a scan and instruct Purview what to scan. By clicking the New Scan icon on the Synapse data source, we can now enter a name for the scan and select the Serverless SQL Pools databases we would like to scan. However, we are instructed to add the Managed Identity of the Purview account to the Synapse Analytics workspace.

To allow Purview to connect to and scan the Serverless SQL Pools databases, we must do the following. Please note that the instructions below are taken from Microsoft’s official documentation available here. The steps below are relevant to Serverless SQL Pools.
Add Purview Account to the Synapse Workspace
- Make a note of the Managed Identify, in the case of this particular account it is called dhpurviewone
- In the Azure portal https://portal.azure.com, go to the relevant Azure Synapse workspace resource you added to Purview.
- On the left pane, select Access Control (IAM).
- Select the Add button.
- Set the Reader role and enter your Azure Purview account name (the Managed Identity name)
- Select Save
Add Purview Account as a Storage Blob Data Reader
Purview must have access to any storage accounts that contain data that Serverless SQL Pools references.
- In the Azure portal, go to the Subscription that the Azure Synapse workspace is in. You can also go to Resource Groups to localise permissions, but in this blog post we are assigning permissions at the subscription level.
- On the left pane, select Access Control (IAM).
- Select the Add button.
- Select the Storage blob data reader role and enter your Azure Purview account name (the Managed Identity name).
- Select Save
Create Login for Purview Account
- Go to your Azure Synapse workspace and open the Synapse Studio.
- Select the Data tab on the left menu.
- Create a new SQL Script and run the command below on the master database, change the LOGIN name to the appropriate Purview account you created.
CREATE LOGIN [dhpurviewone] FROM EXTERNAL PROVIDER;Add Purview Account as User to Databases
We must now add the Purview Login as a User to each database we wish to be scanned. To do this:
- Go to your Azure Synapse workspace and open the Synapse Studio.
- Select the Data tab on the left menu.
- Create a new SQL Script and run the command below on any appropriate database
CREATE USER [dhpurviewone] FOR LOGIN [dhpurviewone];

ALTER ROLE db_datareader ADD MEMBER [dhpurviewone];
If there are a number of databases to scan then use the following script to enumerate over each database to assign permissions:
CREATE TABLE #Databases (DatabaseRowNumber INT, DatabaseName VARCHAR(255))

INSERT INTO #Databases
SELECT row_number() OVER (ORDER BY database_id), [name]
FROM sys.databases
WHERE [name] NOT IN ('master','default')
AND is_auto_create_stats_on = 1
ORDER BY database_id

DECLARE @mindatabase INT,
        @maxdatabase INT,
        @sqltext NVARCHAR(4000)

SELECT @mindatabase = MIN(DatabaseRowNumber) FROM #Databases
SELECT @maxdatabase = MAX(DatabaseRowNumber) FROM #Databases

WHILE @mindatabase <= @maxdatabase
BEGIN
    SET @sqltext = '; CREATE USER [dhpurviewone] FOR LOGIN [dhpurviewone]; ALTER ROLE db_datareader ADD MEMBER [dhpurviewone];'

    SELECT @sqltext = CONCAT('USE ',DatabaseName,@sqltext)
    FROM #Databases
    WHERE DatabaseRowNumber = @mindatabase

    PRINT @sqltext

    EXEC sp_executesql @tsl = @sqltext

    SET @mindatabase = @mindatabase +1
END;

DROP TABLE #Databases
Once permissions have been set, we should now be able to select the databases we wish to scan. In this example we have a database called sqldatapurviewtest which contains several Views and an External Table that references an Azure Data Lake Gen2 storage account.
We’ll then click Continue, accept the default scan rule set set, the scan trigger to Once, then finally click Save and Run. Once the scan is running we can click the View Details link on the Synapse Analytics data source in the Data Map view.
Show Results of Scan
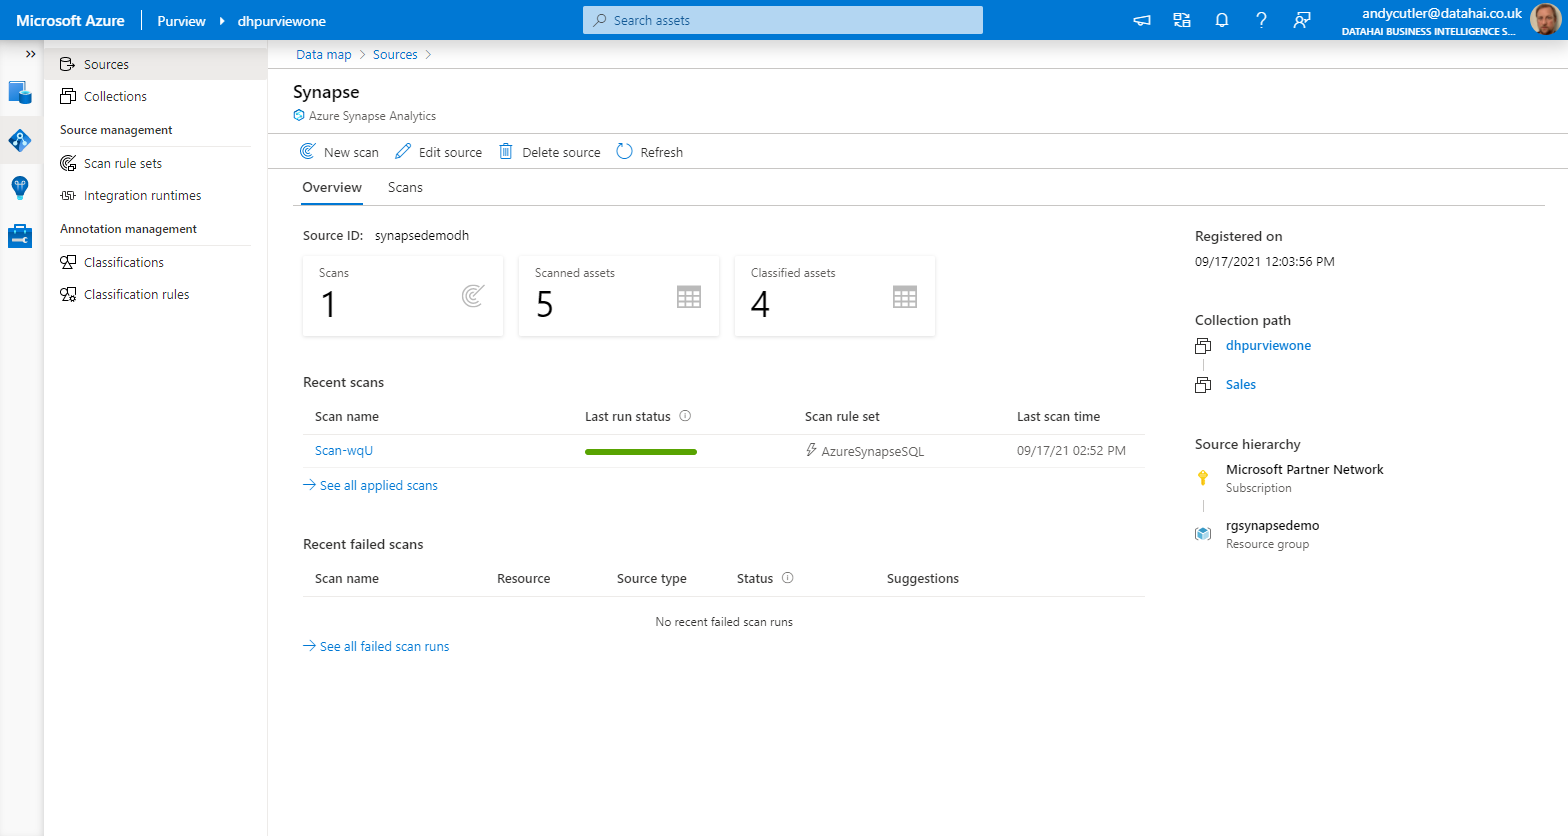
Once the scan has completed we can see a results page showing us the success/failure status of scans, how many scans have been initiated, how many assets (eg External Tables and Views) have been scanned, and how many of those assets have been automatically classified.
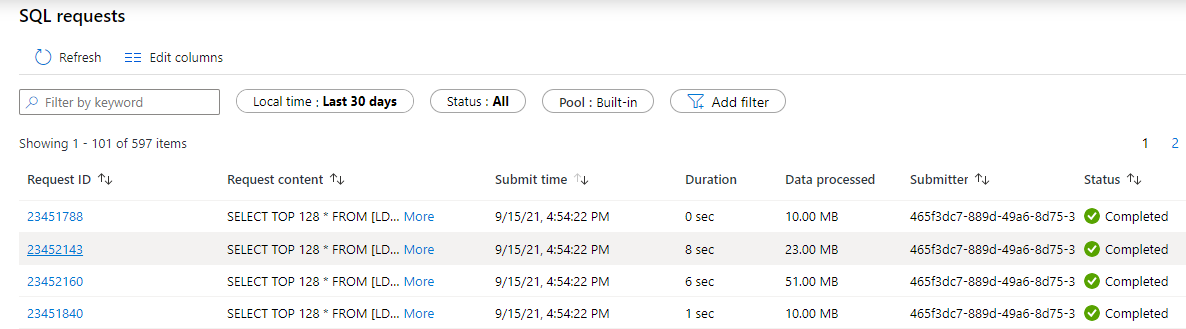
Serverless SQL Pools Data Processed
As Purview is scanning Serverless SQL Pools databases for objects to register, it will incur data processed charges so please be aware of this. All queries have a minimum of 10MB data processed. In our example, we have a total of 94MB data processed.
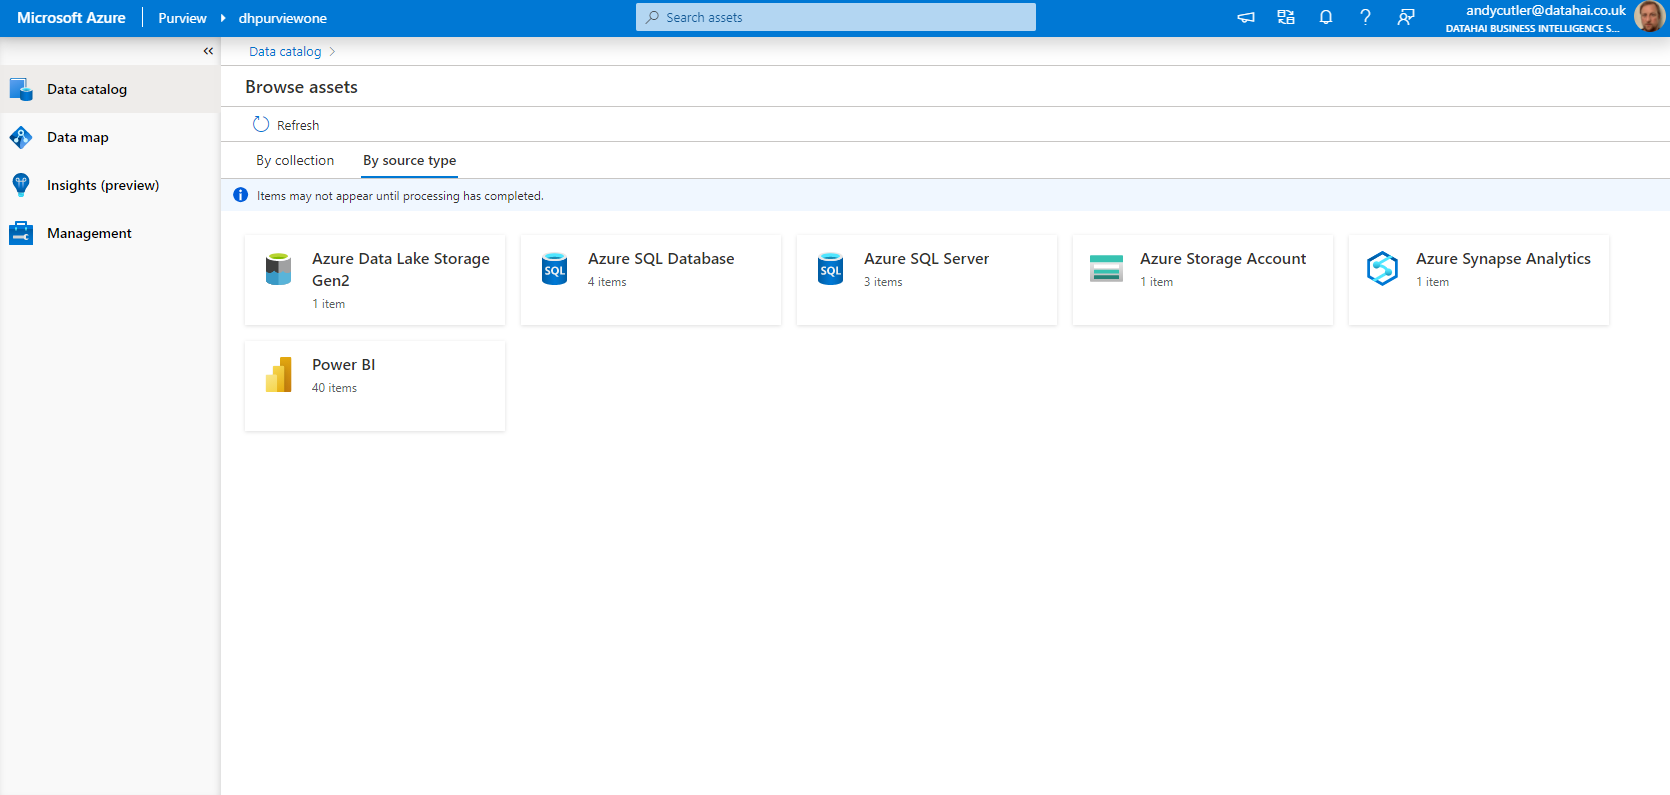
Browse Data Catalogue (Catalog) by Data Source
Once we have scanned our Synapse Analytics instance, we can see the data source in the Browse Assets area of the Data Catalog. By clicking on the By Source Type tab we can see the Azure Synapse Analytics data source. If we click this, we’ll be able to browse the assets that have been registered during the scan.
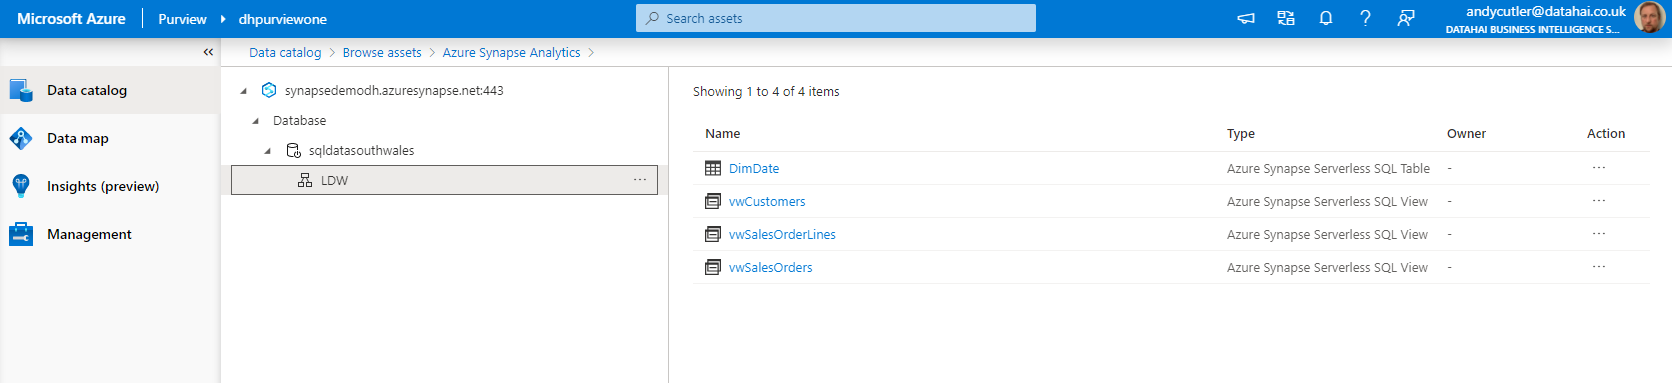
We can drill down from the Serverless SQL Pools connection to a database, then to a schema. By selecting the schema we can see the objects within that schema. For our Serverless SQL Pools database we have 3 Views and 1 External table that Purview has scanned and registered.
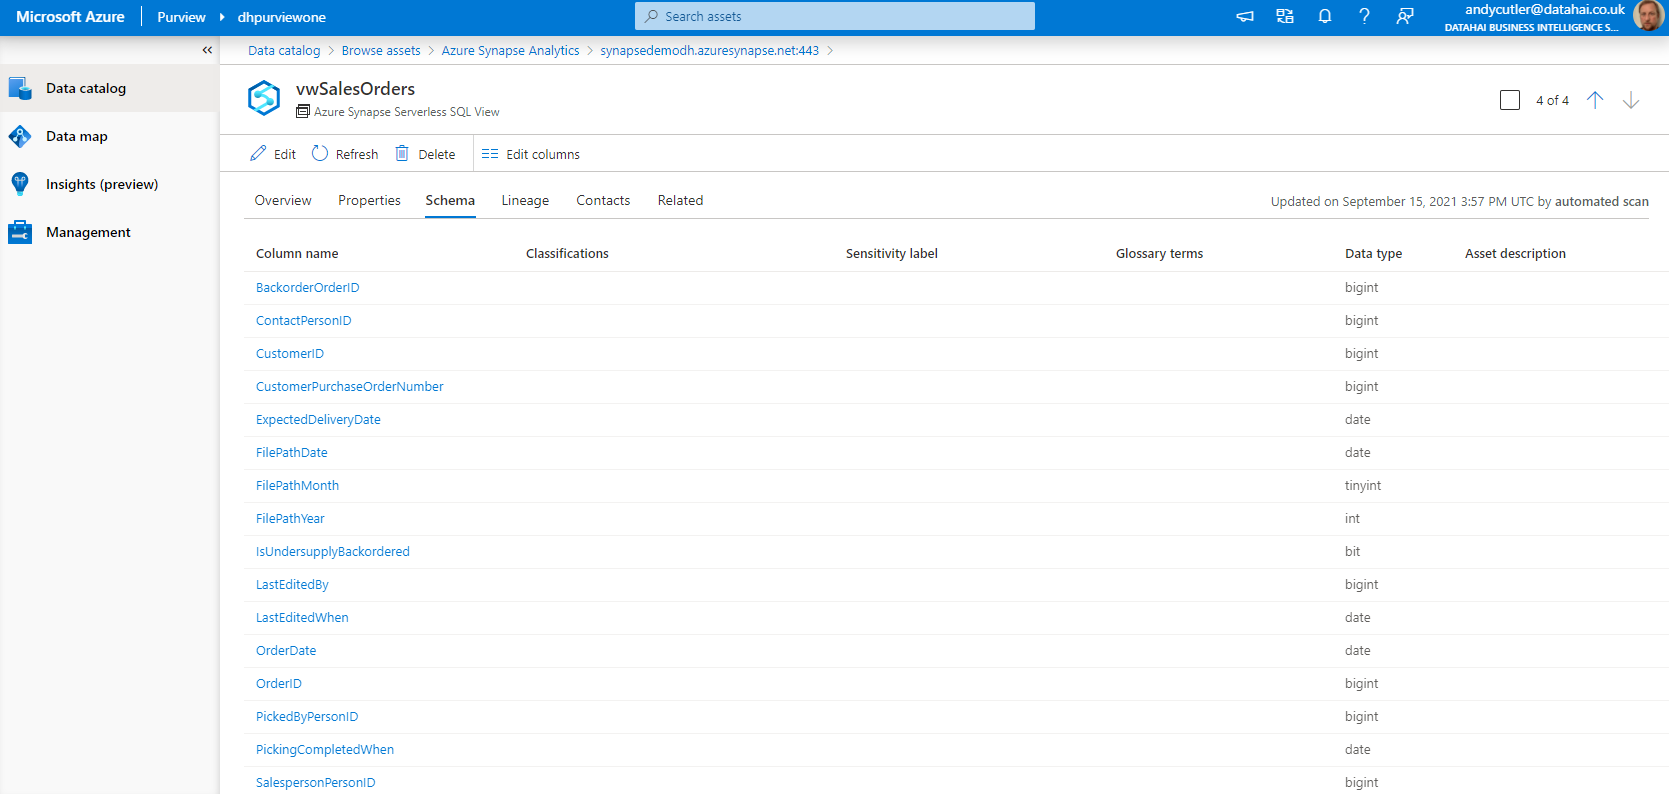
If we select one of the assets, in this case the vwSalesOrder view, we can see the information about this View including the schema, including Column Name and Data type.
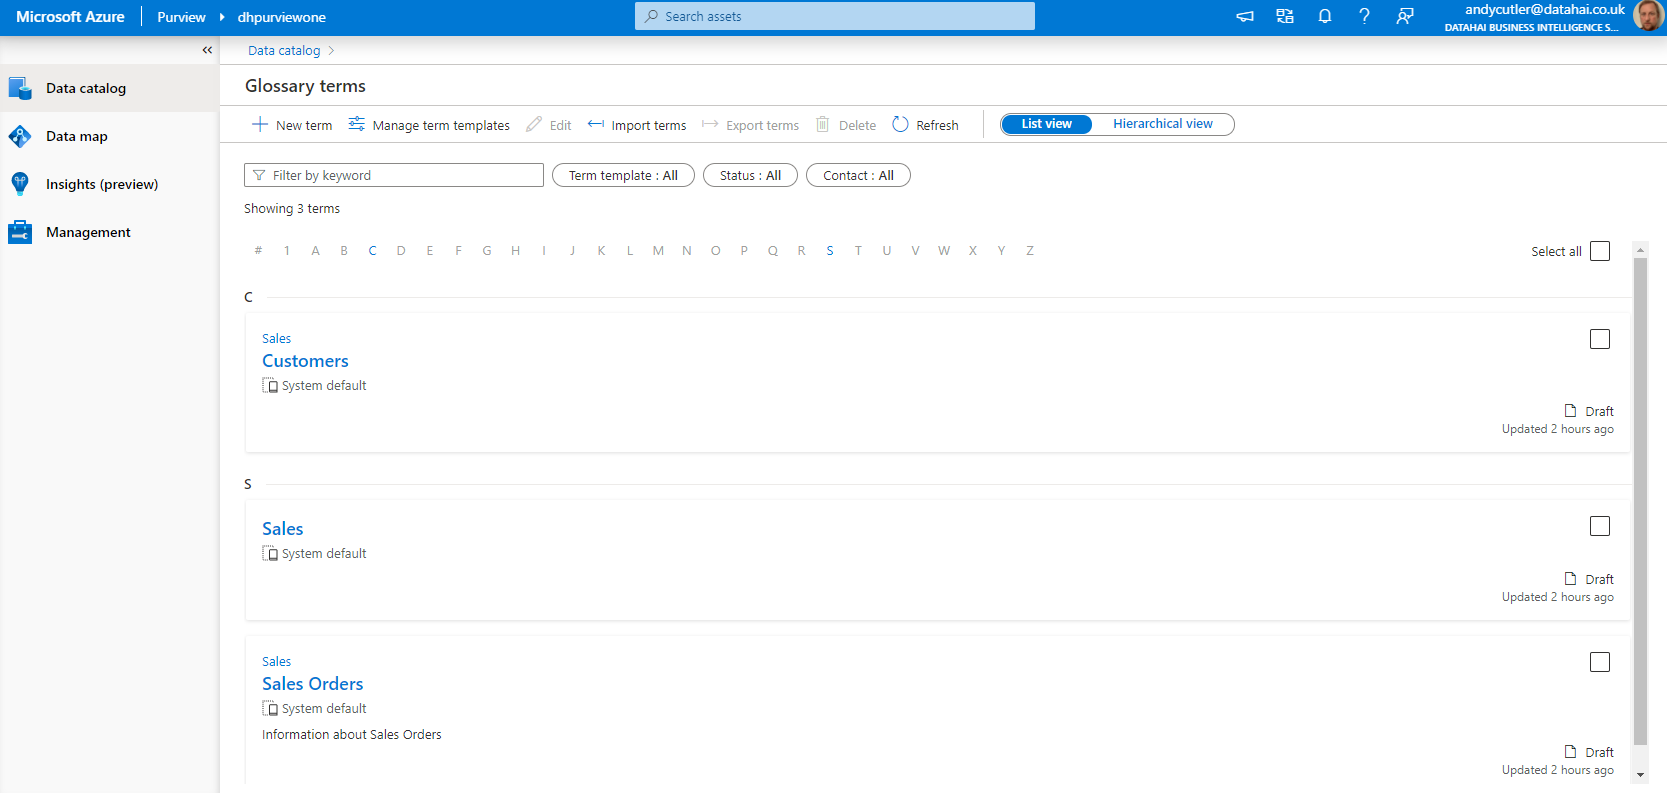
Glossary
We can now turn our attention to the glossary which is a defined list of business terms. These terms can be linked to parent terms, in the following example the Customer and Sales Order terms are linked to a parent term called Sales. Users in the business can browse this glossary and search for terms they are interested in and would like information about and data associated to the term.
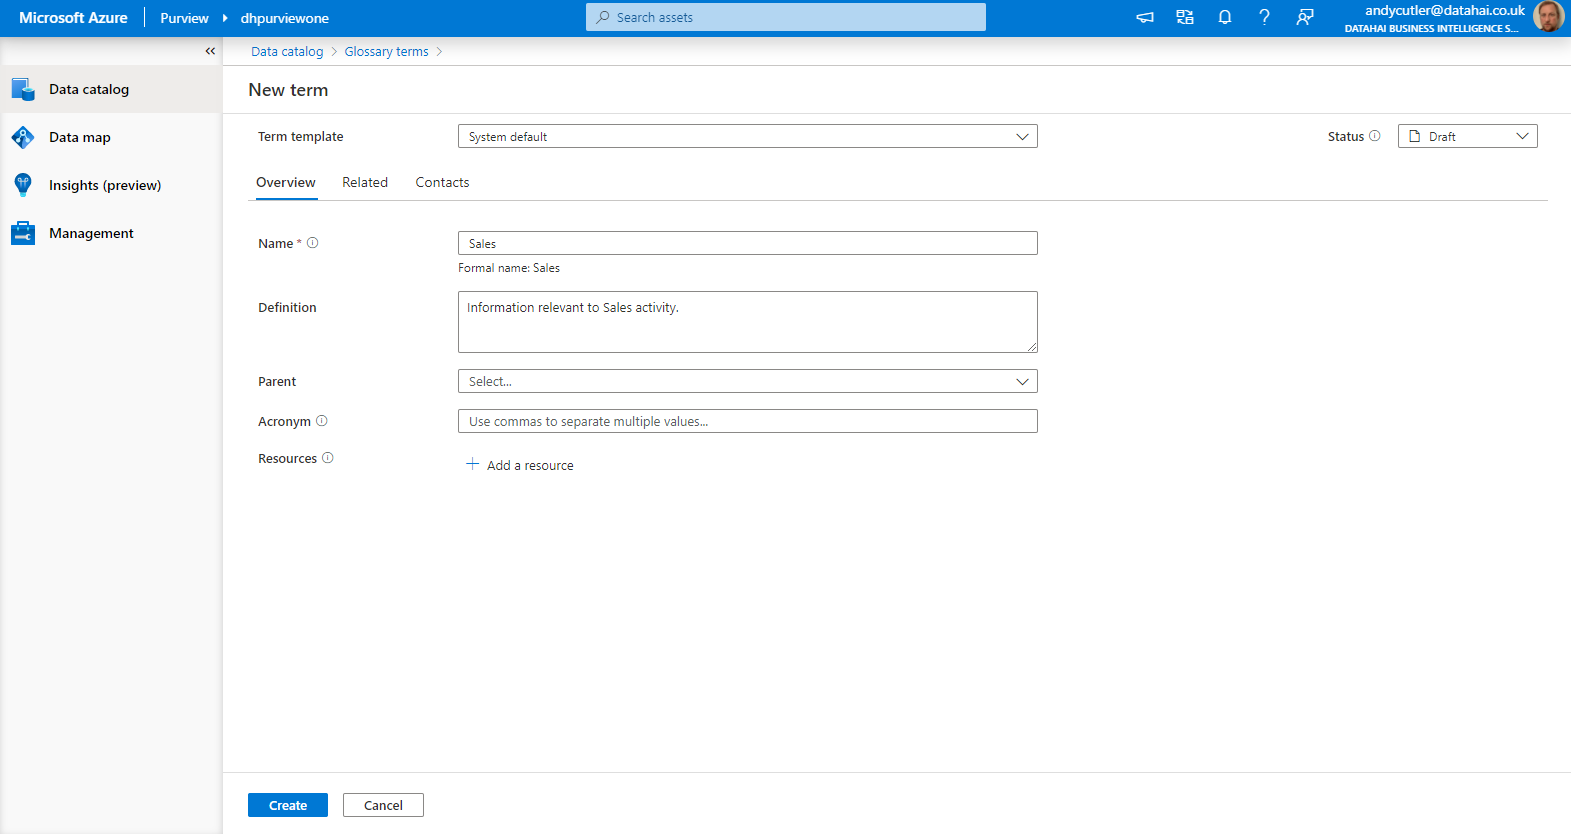
Creating Terms
To create the example terms above, we do the following:
- Go to the Data Catalog area and click Manage Glossary
- Click New Term and accept the system default term template
- Enter the term name Sales
- Enter the definition of Information relevant to Sales activity.
- Click Create
Follow the same process to create 2 more terms called Sales Orders and Customers. For both of these terms select the Sales term as the Parent.
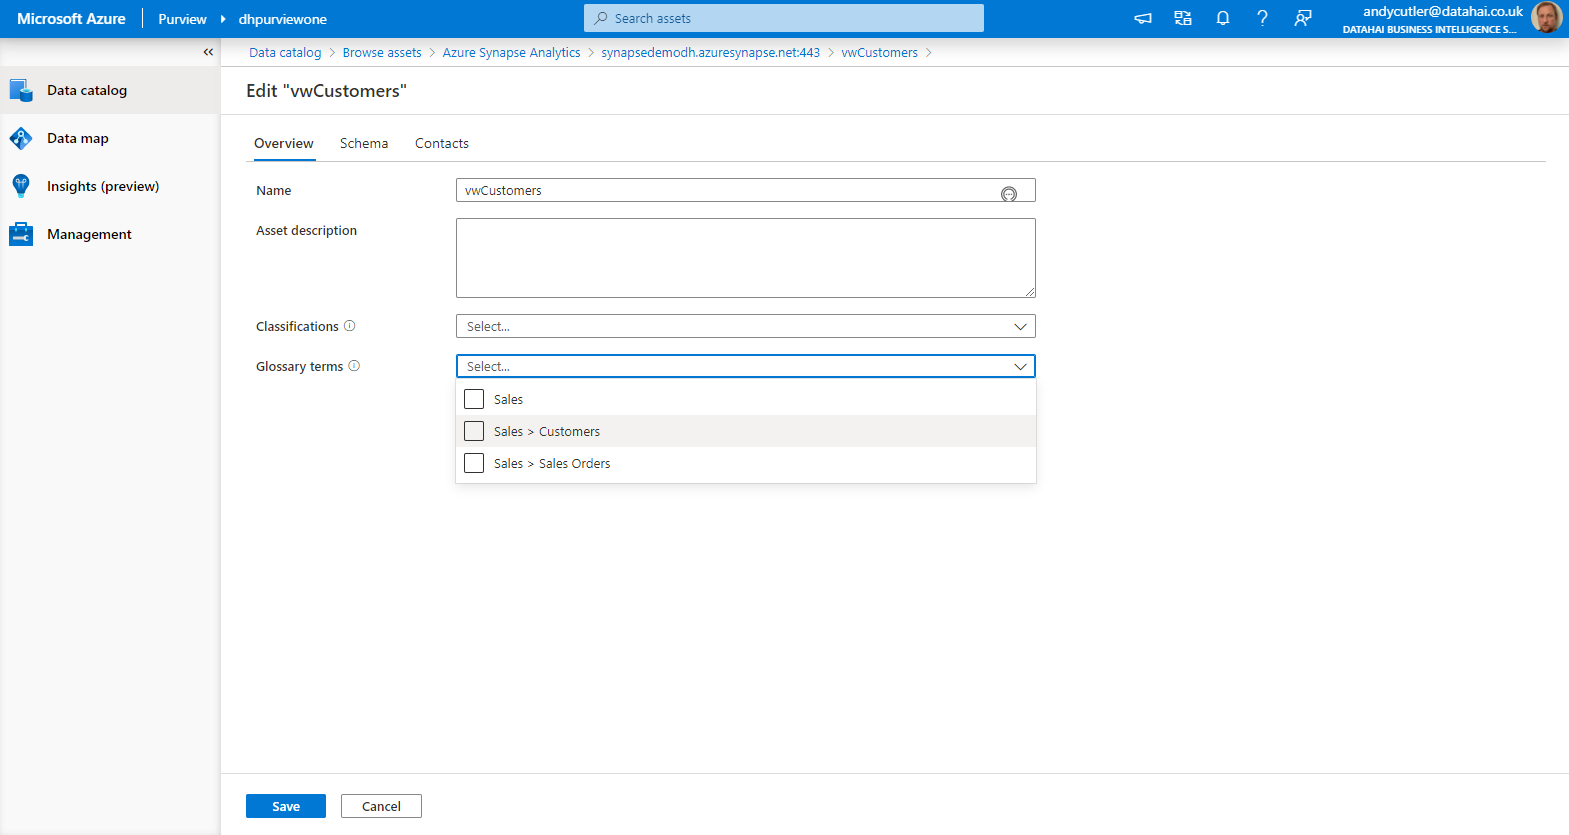
Linking Terms to Assets
Now that we have terms in our business glossary, we can link the data assets previously scanned to these terms.
- In the Data Catalog, select Browse Assets
- Select the Azure Synapse Analytics data source
- Drill-down to the schema level to show the list of Views and External Tables
- Select a View, in this example we’ll select the vwCustomers view
- Click Edit and we can now select a glossary term to link to.
- We’ll link the vwCustomers view to the Sales > Customers glossary term
- Click Save
We’ll follow the same process for the following objects:
- Edit vwSalesOrderLines and link to the Sales > Sales Orders glossary term
- Edit vwSalesOrders and link to the Sales > Sales Orders glossary term
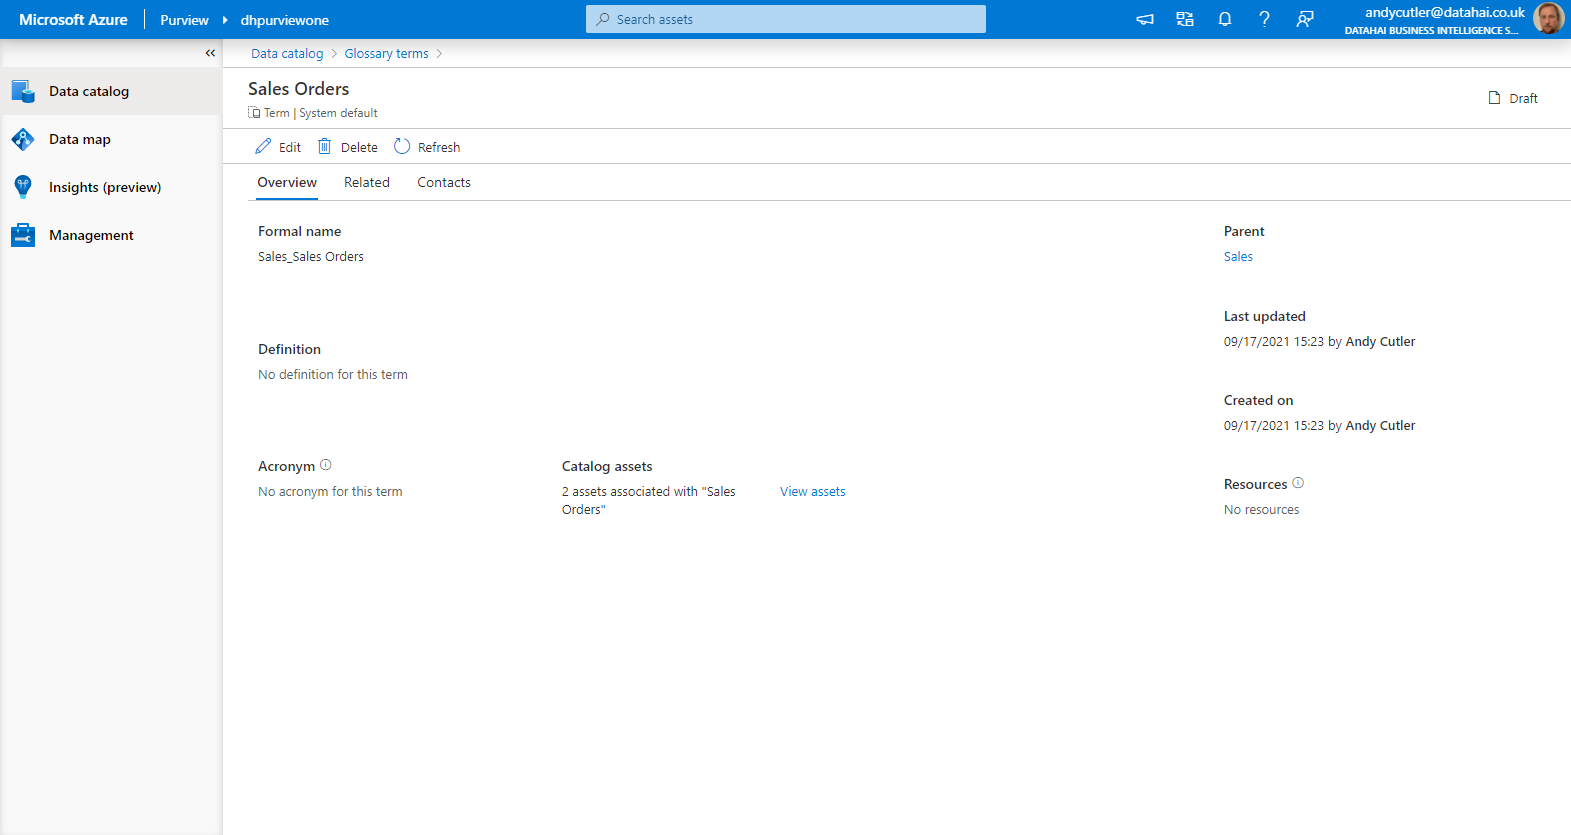
Browsing Terms
After linking data assets we can now go to the Data Catalog area and select Manage Glossary. By selecting a term, in this case the Sales Order term we can see details associated with the term, including Catalog assets linked to the term.
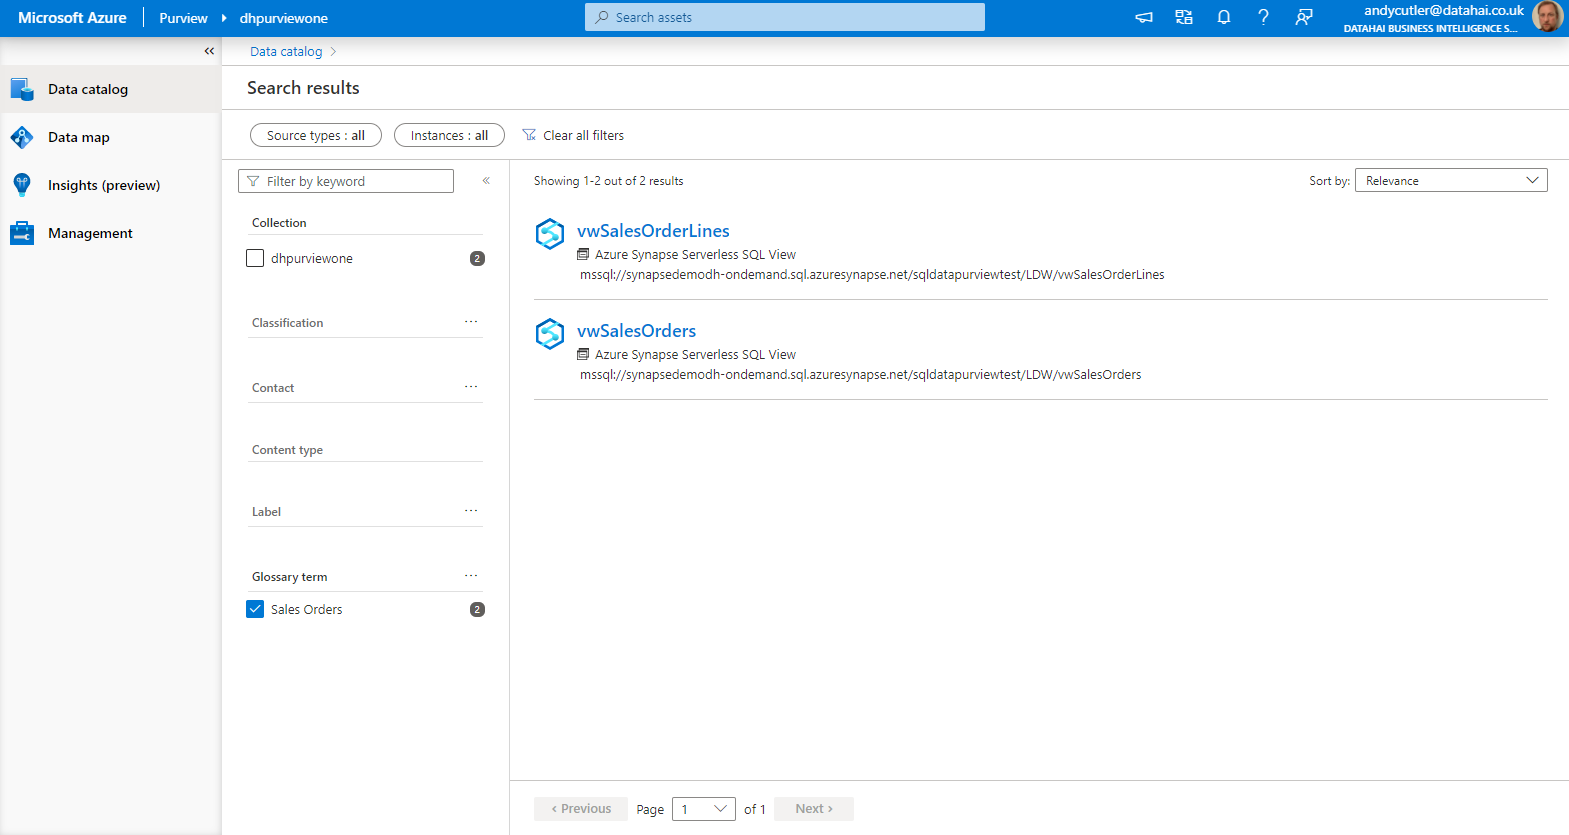
By clicking the View assets link we are able to see the data source assets that have been linked to the glossary term. In this case, the user has browsed the Sales Order glossary term. We can now see the vwSalesOrder and vwSalesOrderLines Views from the Serverless SQL Pools database are associated to the term. The user now has the knowledge where Sales Order data is stored.
Conclusion
In this blog post we have walked through the process of creating an Azure Purview account, assigned the relevant permissions to the Purview account’s Managed Identity to connect to Synapse Analytics and scan the Serverless SQL Pools databases. We have then created glossary terms and linked the data assets scanned to these terms to allow business users to search for and obtain information about Sales data.
References
- https://docs.microsoft.com/en-us/azure/purview/register-scan-synapse-workspace
- https://docs.microsoft.com/en-us/azure/purview/
- https://azure.microsoft.com/en-gb/services/purview/
 Andy
Andy