
This blog forms part of the DP-500 blog series on this site here and also from Data Mozart’s blog here.
Summary
Part of the DP-500: Designing and Implementing Enterprise-Scale Analytics Solutions Using Microsoft Azure and Microsoft Power BI (official link here) is understanding how Azure Synapse Analytics integrates into source control systems. This is vital in ensuring artefacts within Synapse Analytics can be version controlled throughout the development lifecycle. Although this is a skill being measured within the DP-500 exam, it is still relevant outside of certification – having your Synapse workspace connected to source control is extremely useful in the development process.
In this part 1 of 2 blog on source control, we’ll look at how to integrate Azure Synapse Analytics into Azure DevOps Git. This forms part of the skill measured “Commit code and artifacts to a source control repository in Azure Synapse Analytics”
As of December 2022, the only source control provider available is Git and 2 platforms are available: Azure DevOps Git and GitHub. In part 1 we’ll be walking through how to integrate an Azure Synapse Analytics workspace into Azure DevOps Git. Part 2 we’ll look at using GitHub.
Prerequisites
If you’d like to follow along with the tutorial then you’ll need the following prerequisites in place:
- An Azure Synapse Analytics workspace which is not connected to source control
- An Azure DevOps account and a project created. You can create a Git repo in the project or create one during the Synapse repo configuration.
Artifacts Supported
The following is a list of the Synapse artifacts that are supported in source control:
- SQL scripts
- Notebooks
- Pipelines
- Mapping Data Flows
- KQL script
- Spark Job Definition
- Datasets (Pipelines)
- Integration Runtimes
- Linked Services
- Triggers
- Credentials
Configuring Source Control Walkthrough
We’ll now walkthrough the steps necessary to connect a Synapse workspace to an Azure DevOps projects.
Open Synapse Workspace
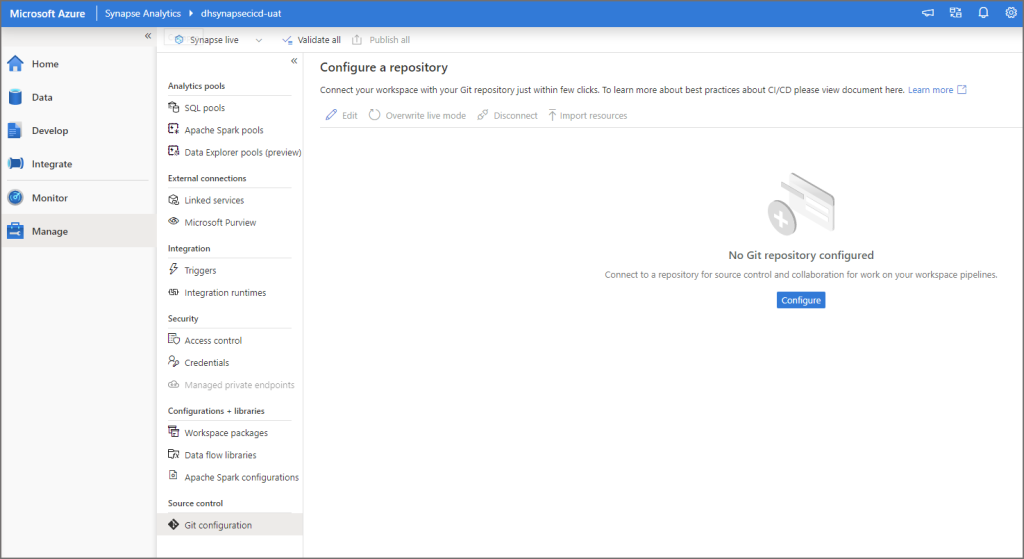
- Login to Synapse Analytics at https://web.azuresynapse.net/
- Click Manage from the main left menu
- Under the Source Control area, click Git Configuration
- You should see a screen similar to the image below stating No Git repository configured
Connect Synapse to Azure DevOps
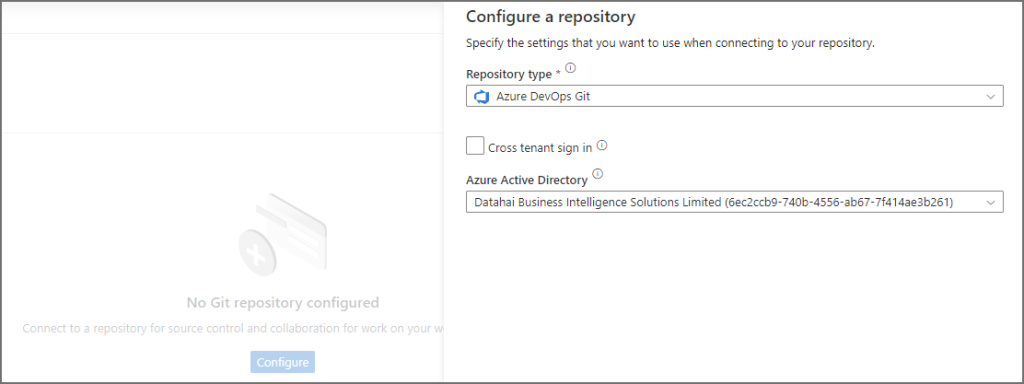
- Click Configure and under the Repository Type select Azure DevOps Git
- Unless the Azure DevOps account is hosted under a different active directory tenant than the Synapse workspace, leave Cross Tenant Sign In unchecked.
- Under Azure Active Directory, select the appropriate tenant and click Continue
Configure Repo Settings
There are 2 options to connect to the Azure DevOps Git repo: Select Repository or Use repository link. Please note that using either option, you will still always set a working branch – this step is described in the Set Working Branch section after the option 1 and 2 sections below.
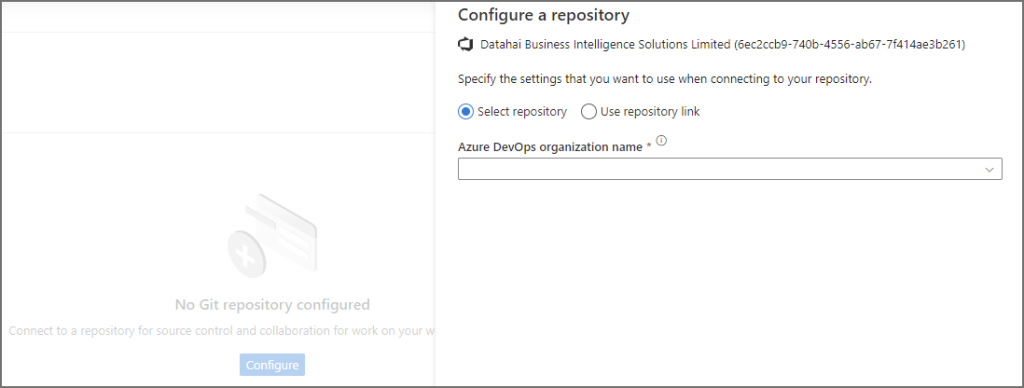
Option 1: Select repository
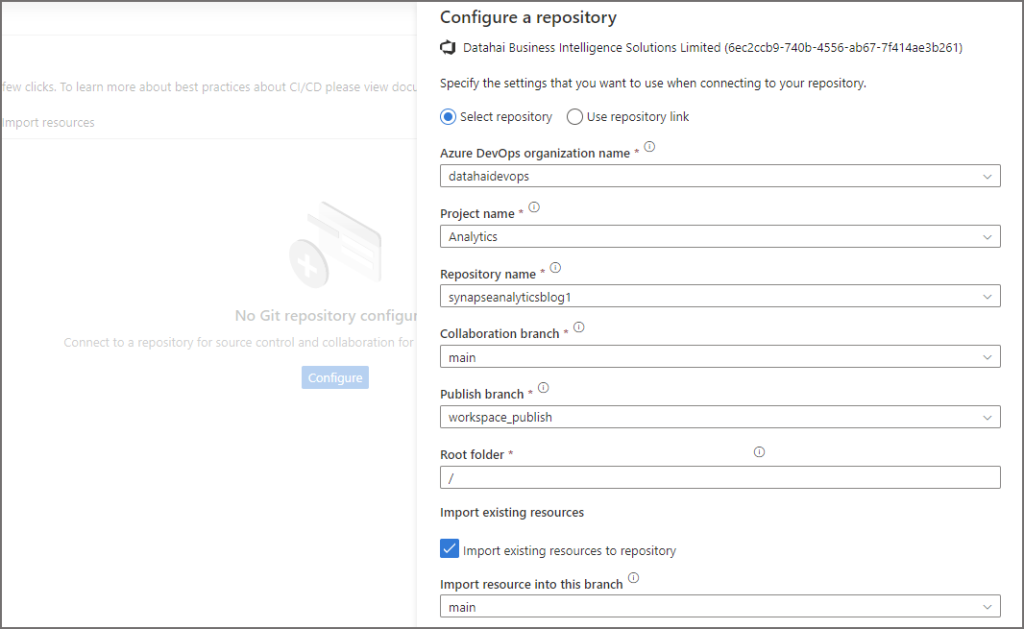
We can also use the Select repository option and select the appropriate options from the drop-down menus. In the following example we have:
- Selected the organisation name
- Selected the Project name
- Selected the existing synapseanalyticsblog1 Git repo, we are also able to create a new repo by entering a new Git repo name.
- The collaboration branch is set to the default main branch but this can be changed by entering a new branch name.
- We’ve set the Publish branch to the default workspace_publish branch
- By selecting Import existing resources this will add all the supported Synapse workspace artifacts to source control.
- After selecting the appropriate options, click Apply.
Note that the collaboration branch is the only branch that can publish changes to the Publish branch (the branch that makes the artefacts live in the current workspace).
Option 2: Use repository link
We can select Use repository link and paste in the Git repo link. We can find the link by selecting the repo in Azure DevOps, clicking Clone and copying the HTTPS link. Note that the repo must already exist to use this option.

The Clone option is available in the Git repo in the top right. Click the Clone button to bring up the clone repository options.
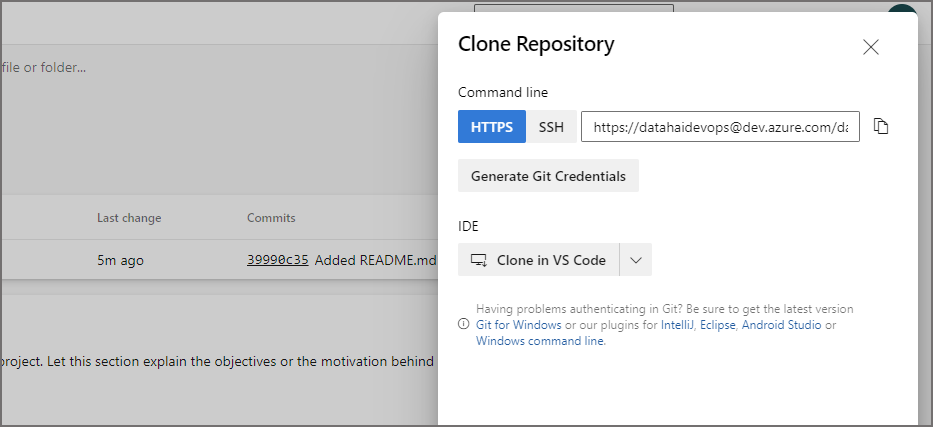
Copy the Git repo URL into the Azure Devops link text box. We now have the same options as the Select repository in which we can select the collaboration branch.
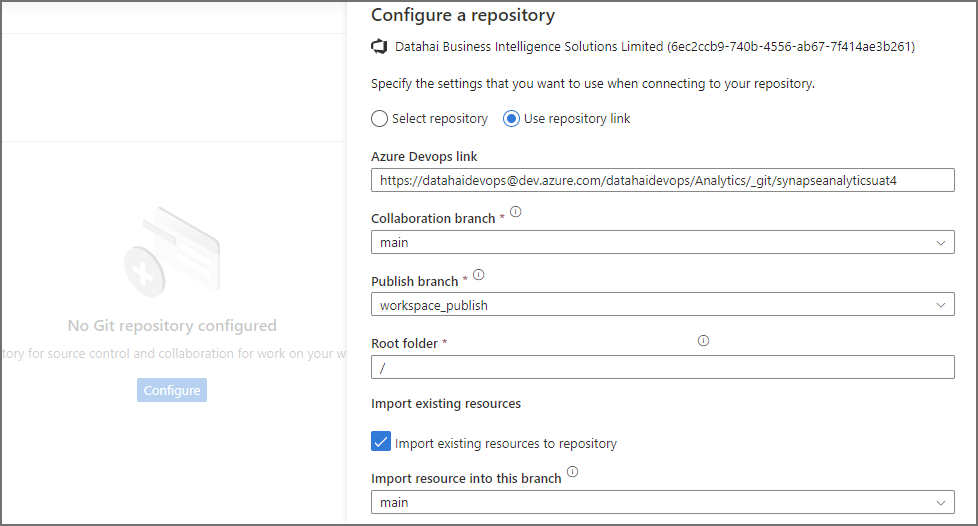
Once the appropriate options have been entered, click Apply.
Set Working Branch
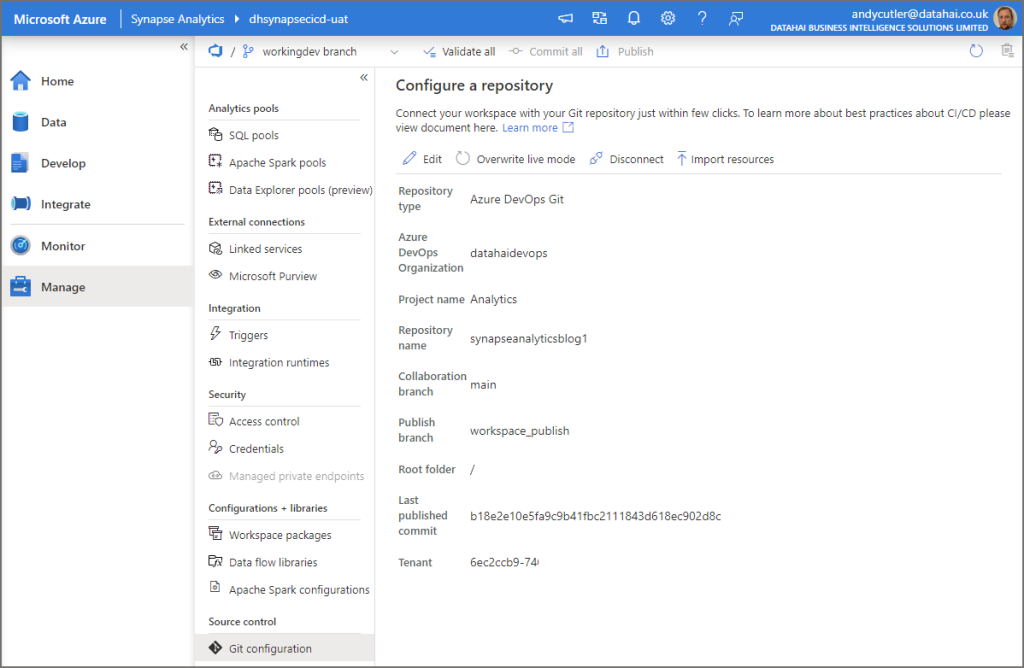
After connecting to the Azure DevOps Git repo using either option 1 or 2, you can now either use the main branch for the working version (the branch to develop in), or create a new branch. In this scenario we’ll click Create new and enter workingdev as the new branch. Click Save once ready to complete the process.
The configuration should look similar to the image below.
Working with Source Control
Now that the Azure Synapse Analytics workspace is connected to an Azure DevOps Git repo, we are now able to commit and publish development work.
Workflow
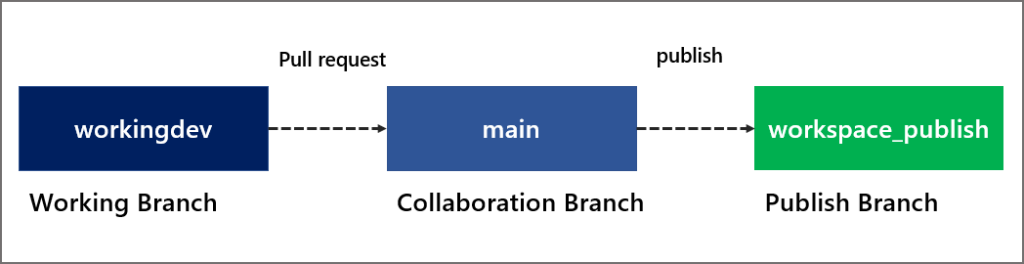
In the following workflow example, we have a branch called workingdev where development is taking place, this is then merged into the main branch via a pull request. This then allows the main branch to publish to the workspace_publish branch, which makes the change “live” in the current Synapse workspace. The workingdev branch can be deleted once the changes have been merged into the main branch.
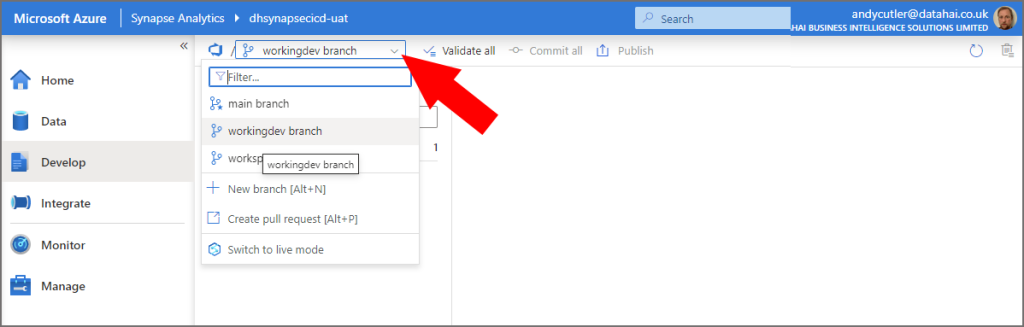
To select between branches, and the current live published artifacts, click into the source control drop-down menu at the top of Synapse Studio. Note that the workspace_publish branch can’t be selected as this the live branch. To select the live branch, click Switch to live mode.
In part 2 we’ll look at using GitHub for source controlling a Azure Synapse Analytics workspace.
References
- Source control in Synapse Studio – Azure Synapse Analytics | Microsoft Learn
- Git branching guidance – Azure Repos | Microsoft Learn
 Andy
Andy