
Synapse Analytics allows the creation of External Tables and Views within a Serverless SQL Pools database and also a Spark database. These objects can be shared between Spark and Serverless using shared metadata. An example is an External Table created using a Spark Pool that can be queried by using a Serverless SQL Pool.
During Ignite November 2021, Microsoft released a new tool within Synapse Studio called the Database Designer. This allows the creation of a Lake Database which can be used by both Serverless SQL Pools and Spark Pools. Of particular interest is that during the creation process, no Spark cluster is required to create the shared database and tables.
The Database designer allows for the visual creation of a data model including External Tables, setting column data types, defining relationships and primary/foreign keys. Although the data model shows these relationships, they are not actually represented in the objects themselves.
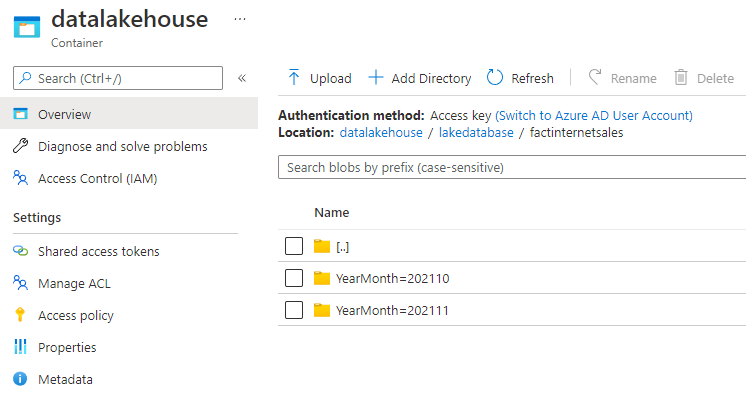
The Lake Databases are present in a top level folder called Lake database. Serverless SQL Pools and Dedicated SQL Pools databases are within the SQL database folder.
Database Designer Overview
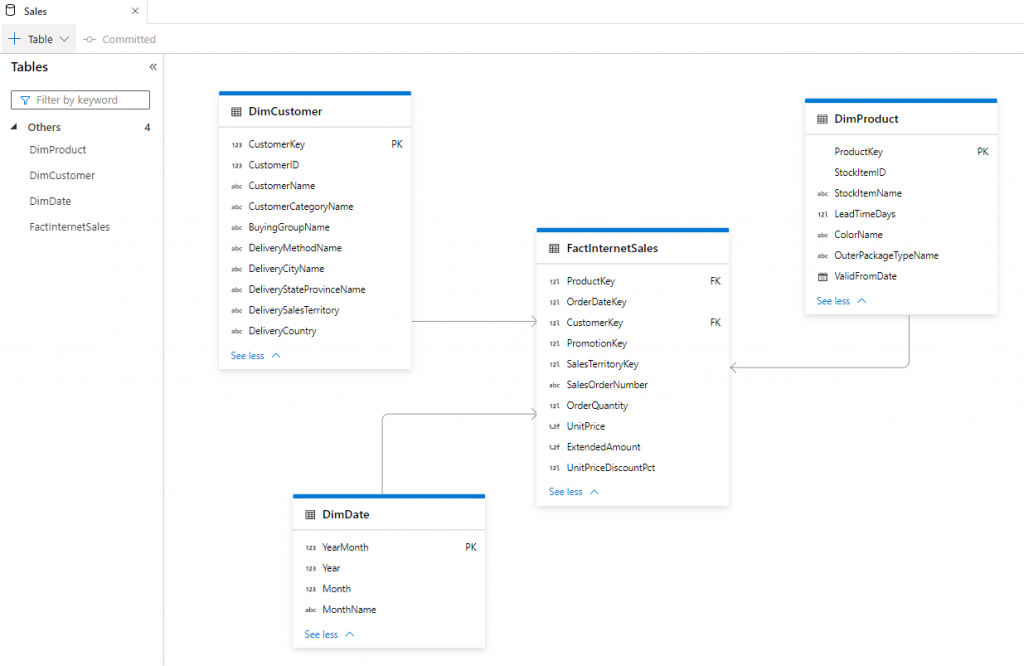
The image below shows an example of a data model created in a Lake Database with 4 External Tables which point to Azure Data Lake Gen2. We’ll create a subset of this model in this blog post.
Create a New Lake Database
We’ll now create a new Lake Database and create External Tables using the Database Designer.
- Login to https://portal.azure.com
- Browse to an existing Synapse Analytics workspace and open Synapse Studio
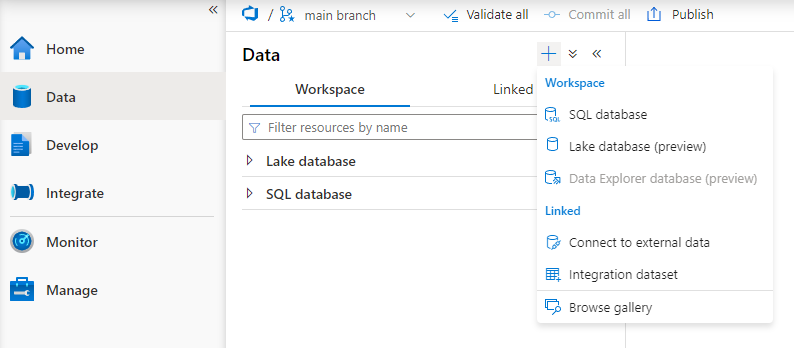
- On the Data tab, click the + (plus) icon and select Lake database (preview)
- Provide a Name for the database.
- Select the Linked Service which is a connection to Azure Storage.
- Select the Input Folder location within the Azure Storage container/folder. This is a default location for External Tables, however we will overwrite this when creating external tables
- Select a default Data format, this again will be overwritten when creating External Tables.
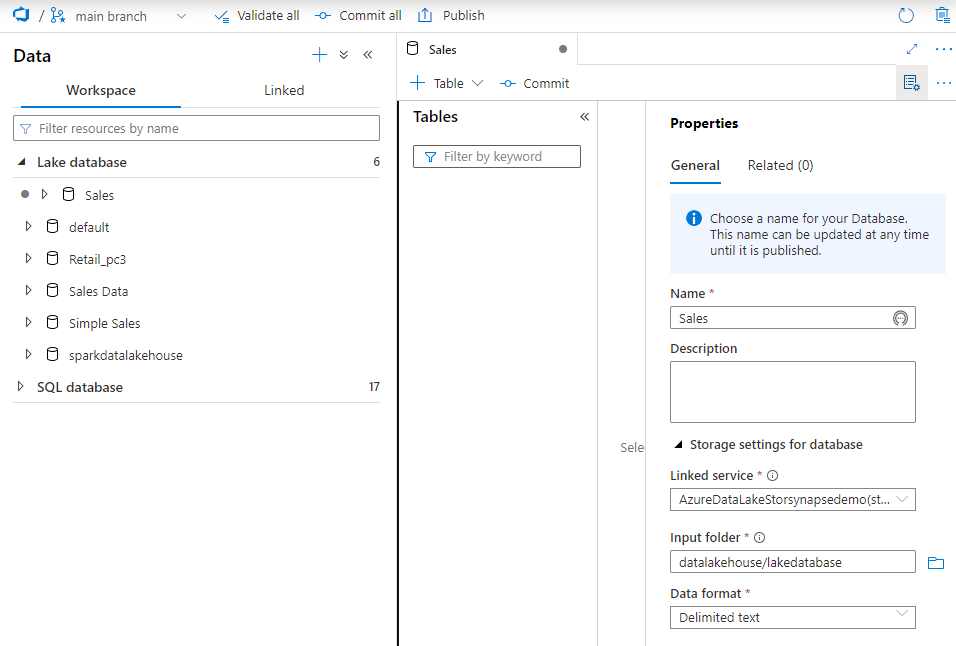
We can now click Publish to deploy the new database, which can be seen in the list of Lake databases.
Create External Table with Partition Scheme
We can now create an External Table in the new Lake database and point towards data in Azure Storage. As the data in the Data Lake is partitioned using a folder structure, we’ll add this to our External Table to allow partition pruning. We’ll create 2 External Tables using FactInternetSales CSV data (Fact table) and a Date Parquet file (Dimension table).
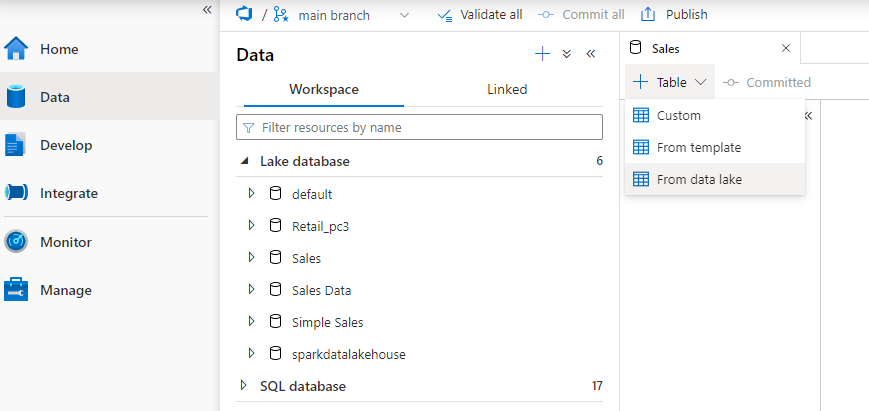
- In the Database Designer click Table then From Data Lake
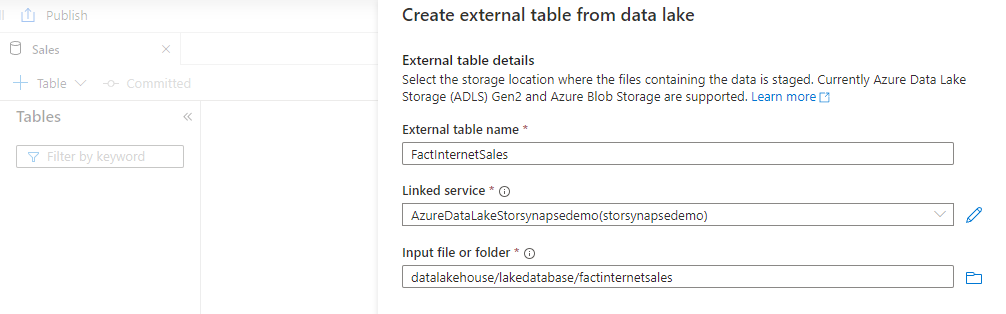
- Enter a name, E.G FactInternetSales
- Select the appropriate linked service to Azure Storage
- Select the root folder where the data resides
- Click Continue
For this example, the CSV files have a header row with column names and the fields are separated by a pipe delimiter. The settings have been updated accordingly.
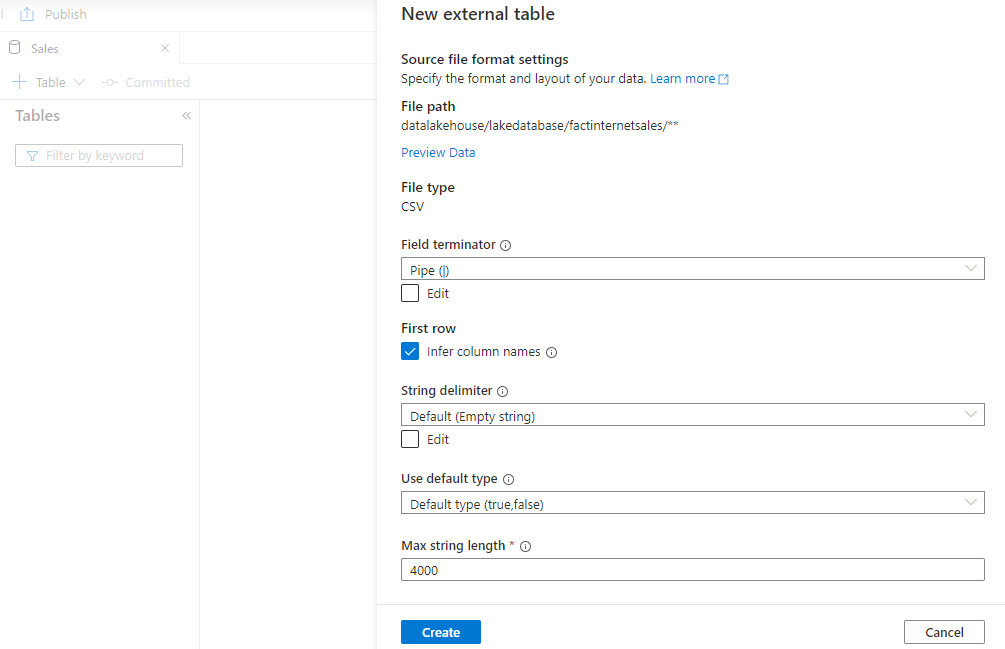
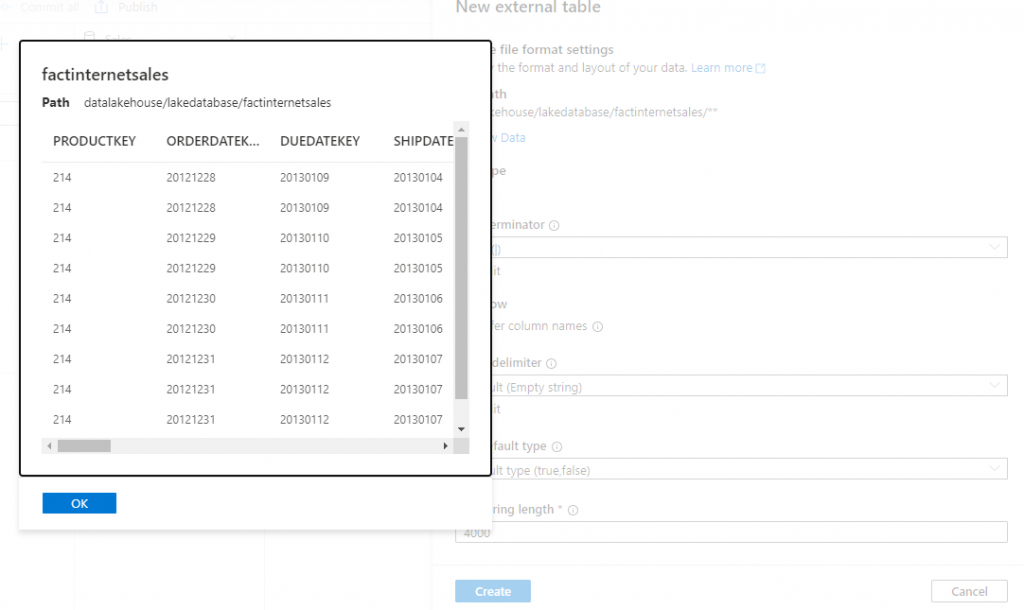
By clicking Preview data we can check to ensure these settings are correct.
- Click Create to confirm creation of the External Table.
- If we click Publish then the External Table will be deployed to the Sales Lake database.
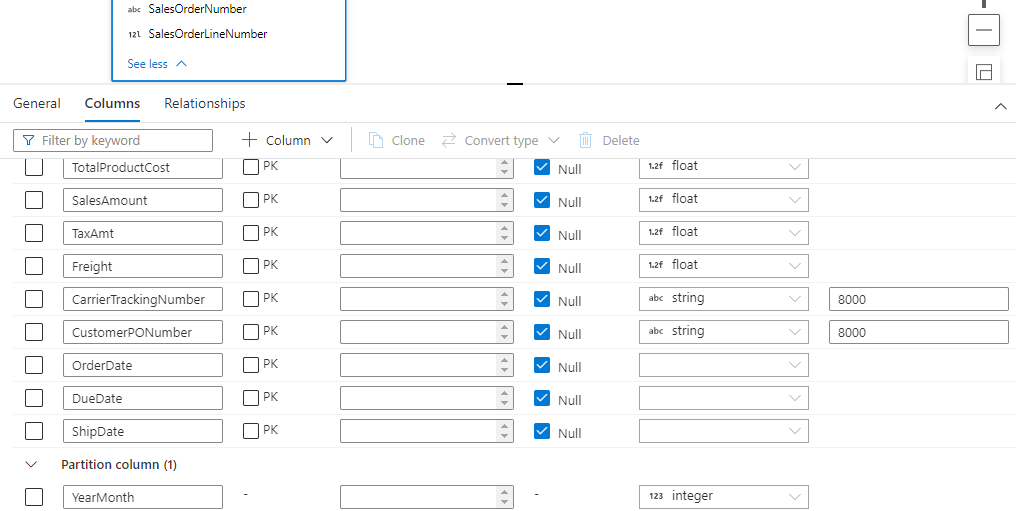
Please note that the underlying folder structure for this External Table is partitioned. We will therefore create a Partition Column on the External Table.
- In the Database Designer select the table, in this case FactInternetSales
- Click the Columns tab in the bottom window
- Click + Column then Partition Column
- Enter the name of the partition column, in this case it is YearMonth to match the folder structure.
- Set the appropriate data type, in this case Integer.
Adding another External Table
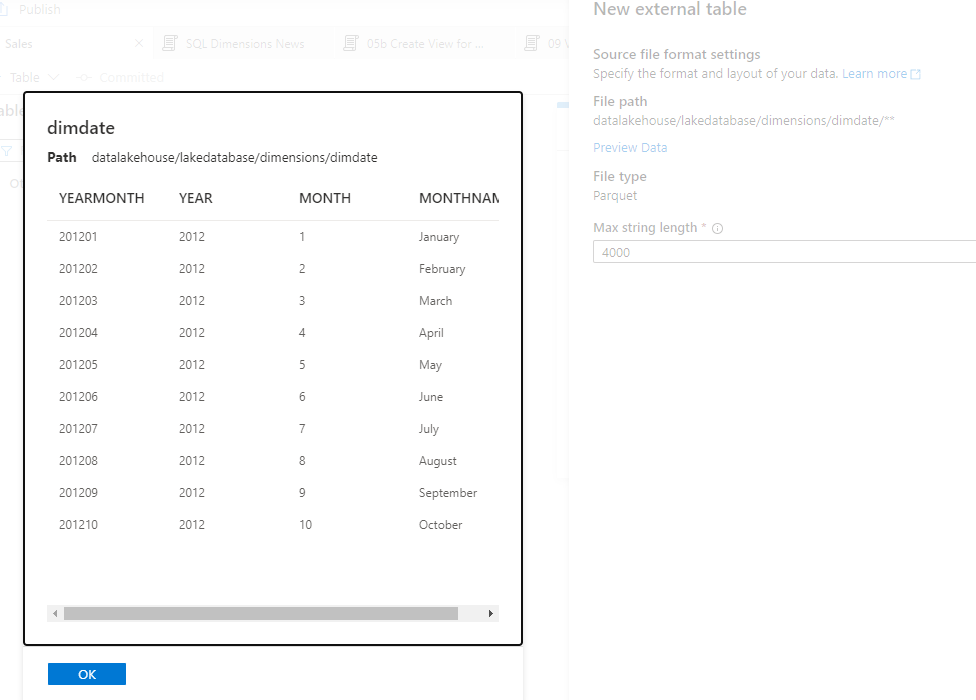
We’ll now add another External Table which contains Date dimension data, this is used to provide further date analysis to the sales data.
- In the Database Designer click Table then From Data Lake
- Enter an appropriate name such as DimDate and specify the Linked Service and location of the data.
- In this case it is a single Parquet file stored in the Data Lake with a simple structure of individual Years and Months per row (no specific dates/days)
We’ll now create a relationship between the DimDate and FactInternetSales External Tables.
- Click the DimDate table and select the Columns tab
- Select the PK checkbox on the YearMonth column
- Select the Relationships tab then click + Relationship then From table
- Set From Column to YearMonth
- Set To table to FactInternetSales
- Set To column to YearMonth
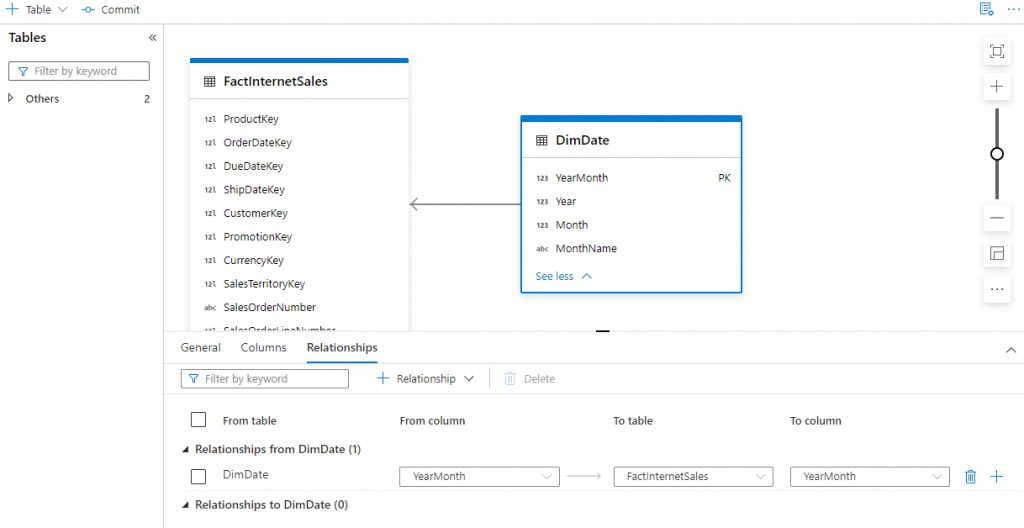
With the available information to date, this relationship creation process is to aid a visual understanding of the data model.
Testing Partition Pruning
Please note that an External Table created using Serverless SQL Pools only does not support partition pruning. By creating External Tables with a partition scheme in Spark, we are able to partition prune when querying using Serverless SQL Pools however this requires a Spark pool to be configured and running when creating the External Table. However, a Spark pool does not need to be running for Serverless SQL Pools to query the table.
The process is the same with the database designer, when we create an External Table we can specify a partition column. This partition column (or multiple columns) is based on the underlying folder structure and can be used by both Spark and Serverless SQL Pool.
Simple Count
SELECT COUNT(*)
FROM dbo.FactInternetSales
This results in 603,980 rows and 38.00 MB data processed.
Simple Count with Filter on Partition Column
SELECT COUNT(*)
FROM dbo.FactInternetSales
WHERE YearMonth = 202110
This results in 301,990 rows and 20.00 MB data processed. We can see that partition pruning has been successful as the data processed has been reduced.
Join to Date Table and Filter using Date Table
SELECT DD.MonthName,
COUNT(FIS.ProductKey) AS SalesCount
FROM dbo.FactInternetSales FIS
INNER JOIN dbo.DimDate DD ON DD.YearMonth = FIS.YearMonth
WHERE DD.[Year] = 2021 AND Month = 10
GROUP BY DD.MonthName
We now join onto the partition column. This results in 301,990 rows and 38.00 MB data processed. We can see that partition pruning has not been successful as we have the reduced number of rows returned by the filter, but the data processed is higher.
Join to Date Table and Filter using Sales Table
SELECT DD.MonthName,
COUNT(FIS.ProductKey) AS SalesCount
FROM dbo.FactInternetSales FIS
INNER JOIN dbo.DimDate DD ON DD.YearMonth = FIS.YearMonth
WHERE FIS.YearMonth = 202110
GROUP BY DD.MonthName
Although we’re joining on the partition column, we are not filtering using the Date table as we are filtering directly on the partition column YearMonth. This results in 301,990 rows and 20.00 MB data processed. We can see that partition pruning has been successful as the data processed has been reduced.
Conclusion
As we have seen, using the new Database Designer is a simple process and enabling partitioned columns is intuitive but we have little control over the file formats. Although creating relationships between tables helps visually understand the data model, will these relationships be available to other services such as Power BI. It remains to be seen how this feature evolves over time.
References
- https://docs.microsoft.com/en-us/azure/synapse-analytics/database-designer/concepts-lake-database
- https://docs.microsoft.com/en-us/azure/synapse-analytics/database-designer/concepts-database-templates
- https://docs.microsoft.com/en-us/azure/synapse-analytics/database-designer/create-empty-lake-database
 Andy
Andy
[…] is a getting started blog post I wrote here which walks through creating a new Lake […]