

Part of the Azure Synapse Analytics suite of services is Synapse Link. This enables synchronization of data from sources including Cosmos DB, SQL Server, Azure SQL Database, and the Dataverse into a Synapse Analytics workspace and makes it available for querying. This is very useful to consolidate several data sources into a Synapse workspace without needing to setup custom data loading processes.
For example, Synapse Link for SQL enables synchronization of data from Azure SQL Database and SQL Server into Dedicated SQL Pools. Now with Synapse Link for Dataverse we are able to setup data synchronization from Power Apps (including Dynamics 365) into a Synapse Analytics workspace and the data will be available for querying using Serverless SQL Pools and Spark.
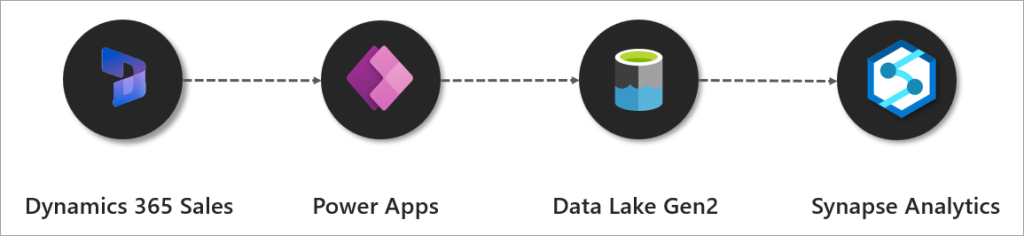
Synapse Link for Dataverse allows near real-time synchronization of data from Power Apps like Dynamics 365 Sales.
In this blog we’ll be looking at setting up a Synapse Link for Dataverse and synchronizing Dynamics 365 Sales data with a Synapse Analytics workspace. We’ll also be looking at what is created when the initial setup is run and look at what “near real-time” actually means, plus any issues we encounter.
There is also a video of this blog on YouTube here.
Azure Synapse Link Options
There are currently 2 options when configuring Synapse Link. Please note we’ll be configuring Synapse Link with Synapse Analytics in this blog.
- Sync with Synapse Analytics (which includes syncing to an Azure Data Lake Gen2 account)
- Sync with Azure Data Lake Gen2 account
Sync with Synapse Analytics
This option will synchronise Dataverse data to an Azure Data Lake Gen2 storage account and deploy a Lake Database in Synapse Analytics. This Lake Database will hold the Dynamics tables that have been configured for export. There are 2 tables for each entity, a “near-real-time” table, and a “per hour” snapshot table. The “per hour” snapshot table is to minimise any locking during reading (this may occur on the “near-real-time” tables as data is written to CSV files).
What’s useful about the Synapse Analytics sync is that each table synchronised from Dynamics is created in the Lake Database with all column names and data types specified. We’ll look at the metadata associated with these tables later in this blog.
Sync with Data Lake
This option will synchronize Dataverse data to an Azure Data Lake Gen2 storage account, this data can then be queried or loading using any service that can connect to an Azure Data Lake Gen2 account and read/process CSV files.
Considerations
It’s worth noting that currently the only supported file format when exporting is CSV, this is set to change however with support for Parquet format coming soon (Q4 2022/Q1 2023). It’s also worth noting that currently Synapse Link cannot be setup with private endpoints, this is again coming soon (Q4 2022/Q1 2023). I will update this blog and future Synapse Link blogs with further information about these upcoming features.
Dynamics 365 Sales
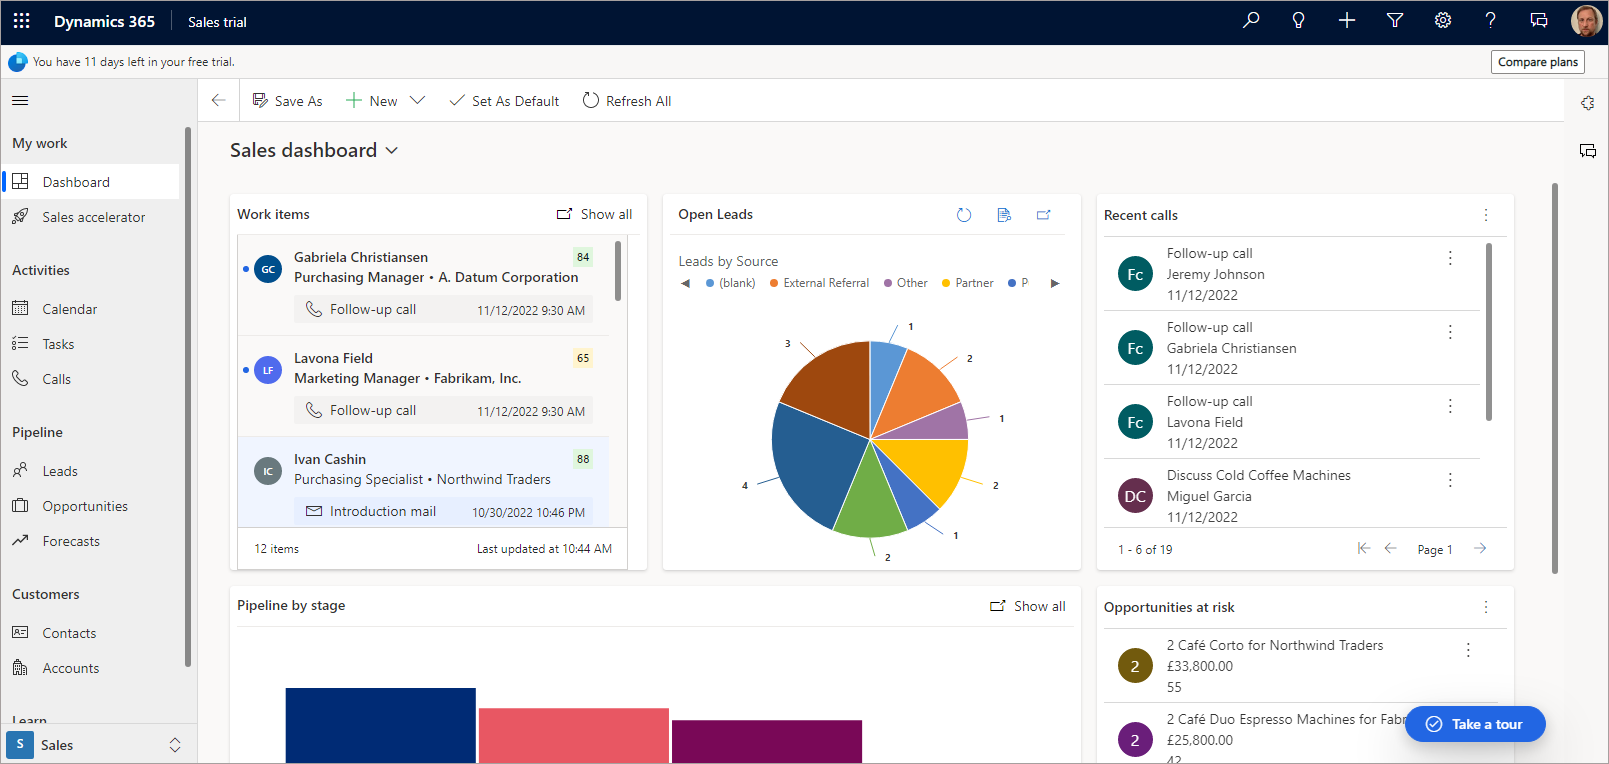
For this walkthrough, I’ll be using Dynamics 365 Sales as this is a model-driven app and uses the Dataverse. I created a Dynamics 365 Sales trial (30 days) from here. We’ll be using the Contacts area to add new data and amend existing data, we’ll then see this data synchronised in Synapse Analytics.
Walkthrough: Configuring Synapse Link with a Synapse Workspace
In this section we’ll walkthrough how to setup a Synapse Link for Dataverse with a Synapse Analytics workspace. This includes the licensing and permissions required to perform the setup.
Security Requirements & Pre-requisites
An Azure Synapse Analytics workspace is required for this walkthrough, please refer to this blog in how to setup a new Synapse workspace.
An Azure storage account setup as a Data Lake Gen2 account needs to be created and added as a linked service to the Synapse workspace.
A Dynamics 365 Sales environment is also required, for this tutorial I created a 30 day Sales trial in my own tenant. The Dynamics environment must be in the same region as the Synapse workspace and the Azure Data Lake Gen2 account. E.G for this tutorial the Dynamics/Power Apps environment is in UK West and the Synapse/Storage account is in UK South region.
The user who logs into Power Apps to perform the configuration needs to be licensed via the Office 365 admin portal, and the user requires a license to access Dynamics 365.
Licensing
- Power Apps Developer (free) – this can be assigned to the user from the Office 365 admin area.
- Dynamics 365 – a license was automatically granted when I created a trial.
Permissions
The following permissions across Dynamics 365 and Azure are required for the user setting up the Synapse Link with Synapse Analytics.
Dynamics 365
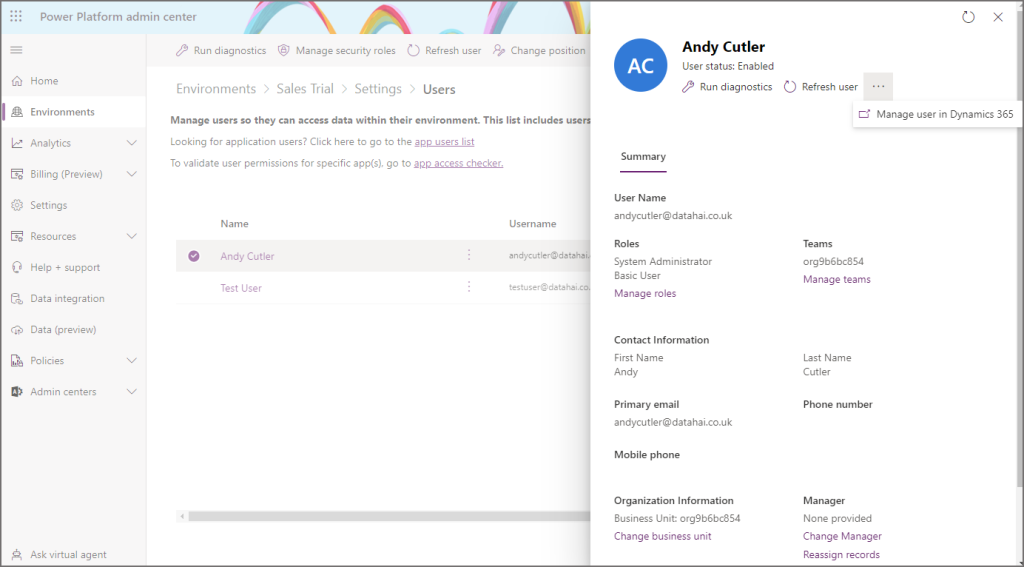
For this tutorial, the user was allocated to the System Administrator role in Dynamics 365, in a future blog post we’ll look at a minimum set of permissions required in Dynamics. You can see user permissions for Dynamics within the Power Platform admin centre in Environments > Your Environment > Settings > Users + Permissions > Users. Then if you select a user, you can click the Manage user in Dynamics 365. Once in Dynamics, click Manage Roles on the top menu bar.
Azure & Synapse Analytics
- Resource Group: Reader
- Storage Account:
- Owner or Role Based Access Control Administrator (Preview)
- Storage Blob Data Contributor.
- Synapse Workspace: Workspace administrator
Owner is specified in the documentation here, but I have found that giving the user the Role Based Access Control Administrator (Preview) is enough and provides the lowest level if security. However, as this role is in preview, you may not wish to use it. The user can be removed from the Resource Group/Storage Account/Synapse Workspace after setup as it’s no longer required.
Setup Synapse Link
- Login to Power Apps
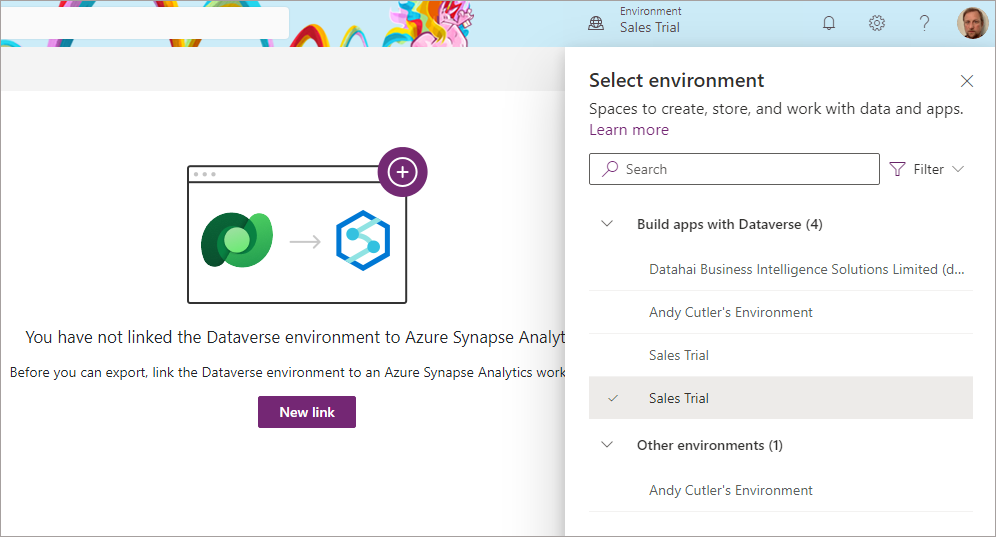
- Select the relevant environment from the top-right menu
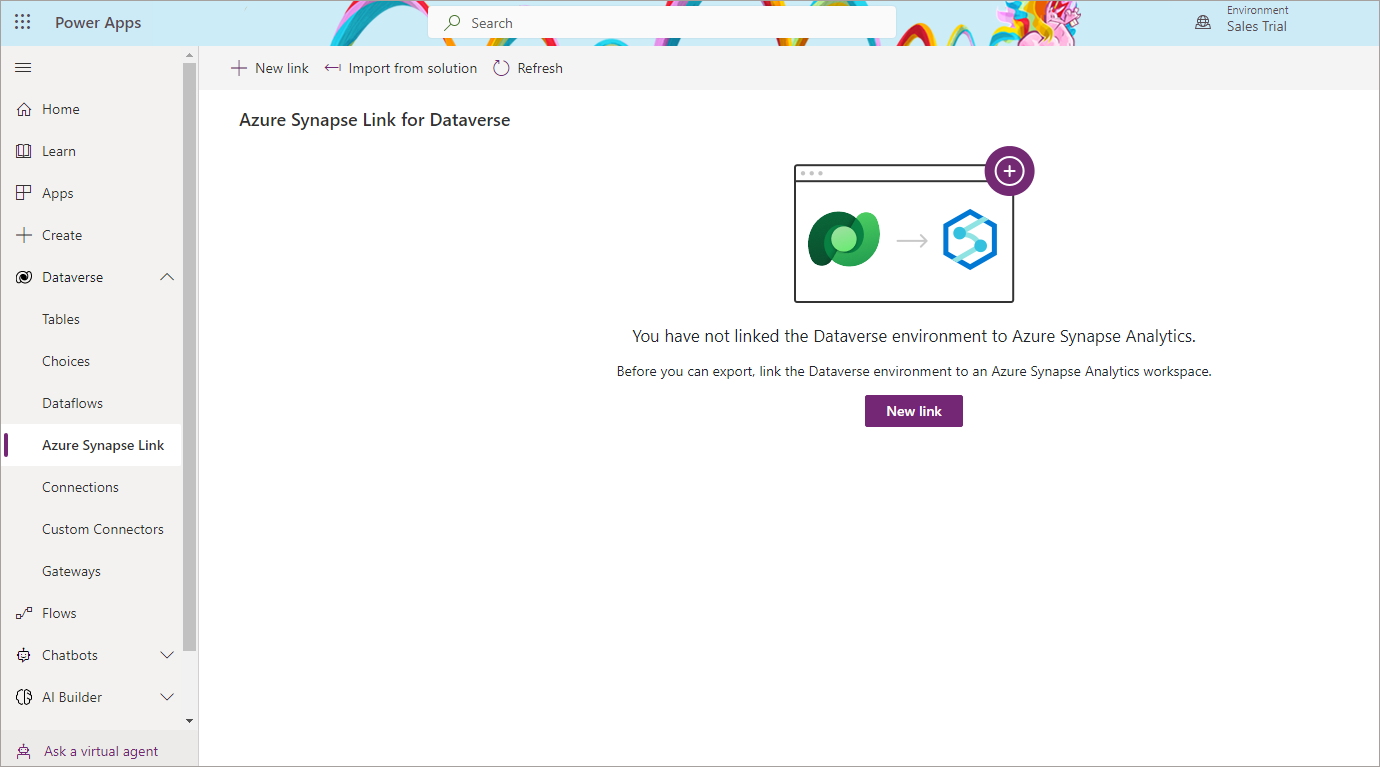
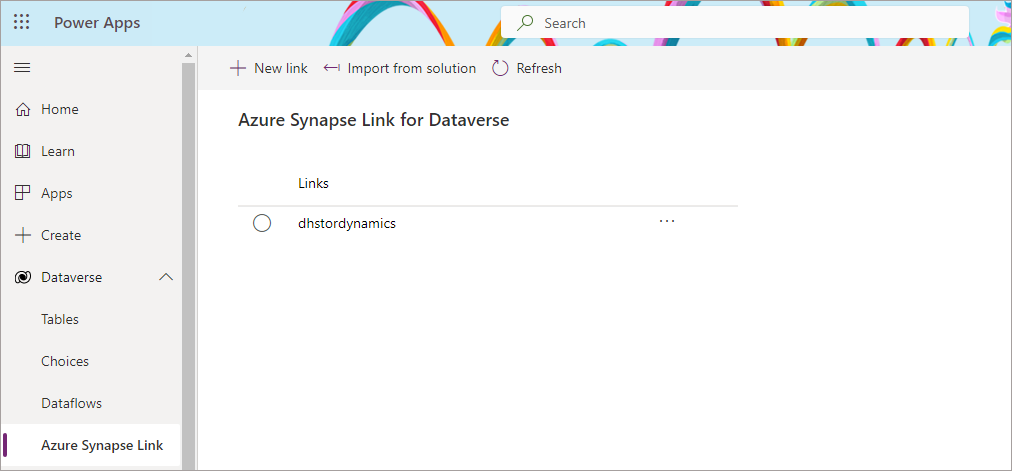
- On the left menu, select Dataverse -> Azure Synapse Link
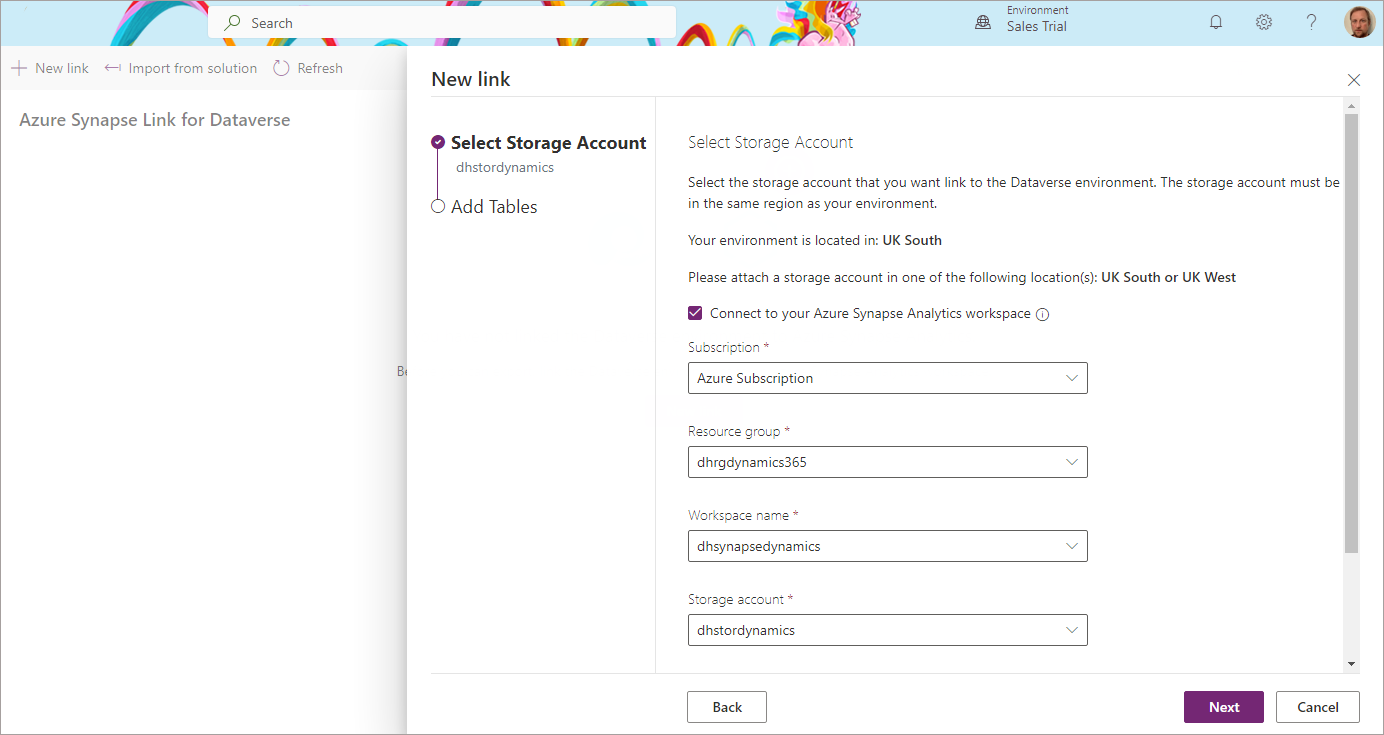
- Click New Link and enter the following information:
- Enable Connect to your Azure Synapse Analytics workspace
- Subscription: Select the appropriate subscription
- Resource group: Select the resource group the Synapse workspace is in
- Synapse workspace: Select the specific Synapse workspace
- Storage account: Select the appropriate storage account to use
- Click Next
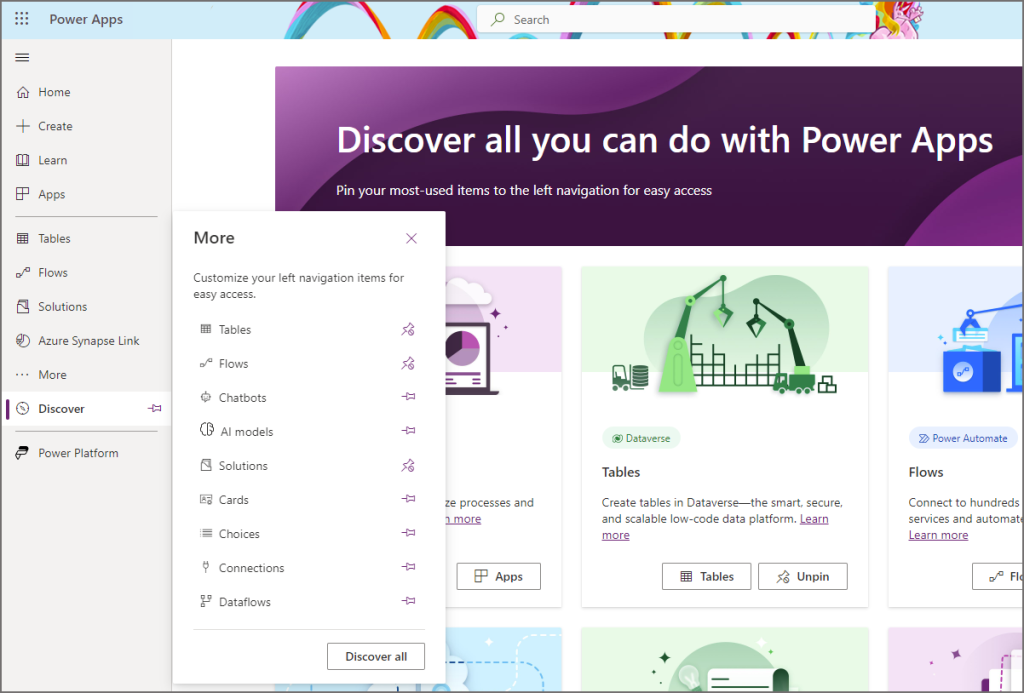
** Update April 2023 **
The location of the Synapse Link item may not be immediately available on the left side menu. Hover over Discover then click the Discover all button. You should then see Synapse Link under Data Management, you can then pin the item to the menu.
Scroll through images for setup example.
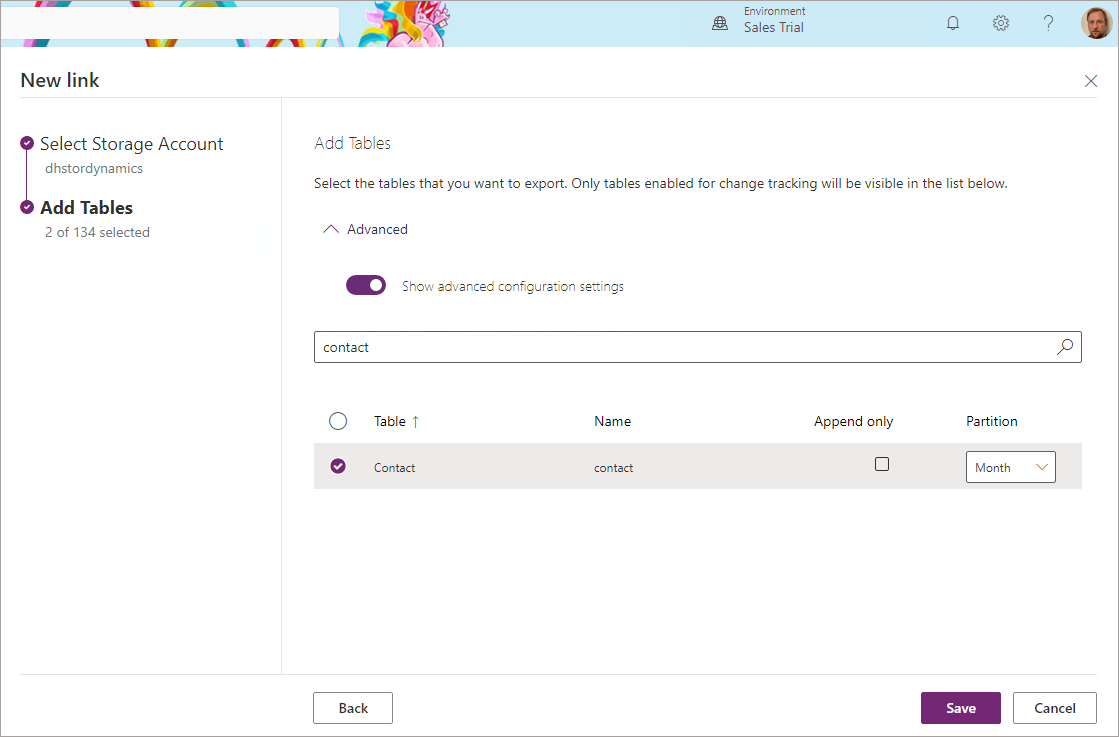
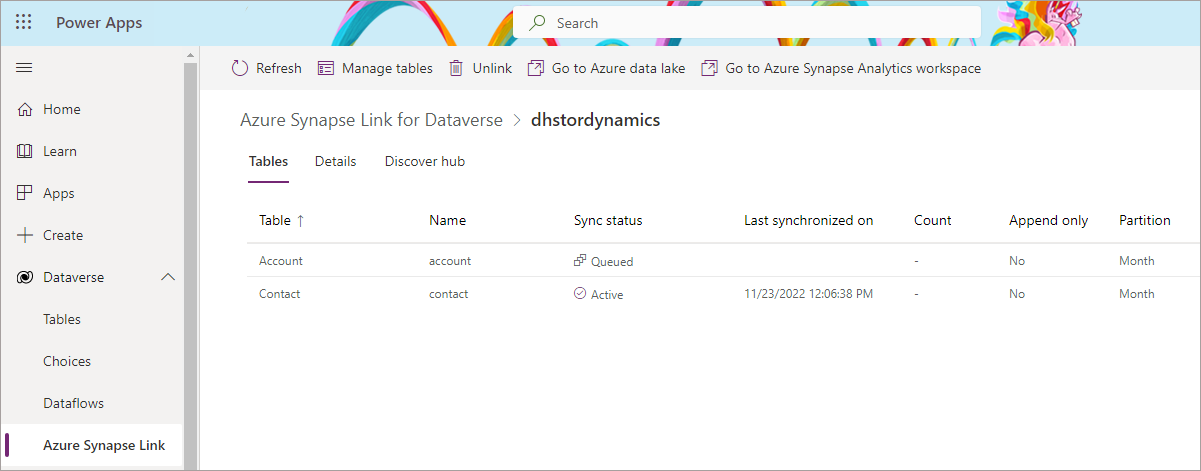
- On the Add Tables screen, add relevant tables for synchronisation. In this scenario we’ll select the Contact table.
- Please note we’ll look at Advanced configuration in another blog as this deals with Append only setup (no data gets deleted from Synapse/Data Lake when source Dynamics data is deleted).
- Once all relevant tables have been selected, click Save.
If the setup has been successful, we’ll see the link visible in the Azure Synapse Link area.
Initial Synchronisation
Once the initial setup has been started, we can click on the Synapse link name and look at the status of the table synchronisation. Now I have seen initial synchronisations take up to 45 minutes if there are alot of tables, I tested with ~300 tables in one scenario and the total time to sync was around 1 hour. So be warned that the number of tables can affect the initial sync time. It may be better to start with a few tables and then add more tables at a later date (thanks to Scott Sewell at Microsoft for advice).
Subsequent Refreshes
Once the initial synchronisation has completed, the sync status should show as Active. Any data changes within Dynamics 365 will then be automatically synchronised. The time taken to synchronise data will depend on how much data has changed, this is a push process so changed data gets added to a queue before being synchronised with Synapse/Data Lake. In my testing a small set of data changes (handful of rows in the Contacts table) took around 1 minute. Bulk data changes in Dynamics may make the “near real-time” appear a little slower, this could be up to 15 minutes.
Viewing Data in Synapse Analytics Lake Database
When the Synapse Link is created, it will create a Lake Database in Synapse Analytics that we can use to query using Serverless SQL Pools (we can also use Spark, out of scope of this blog). To do this:
- Log into the Synapse Analytics workspace (link)
- Click on the Data tab on the left menu
- Expand Lake database and you should see the lake database that was created during the synapse link setup.
- Expand Tables and you should now see the tables selected for export, plus metadata tables (E.G StateMetadata)
- We can now click on the Develop tab and create a new SQL script and start querying the tables.
Scroll through images for setup example.
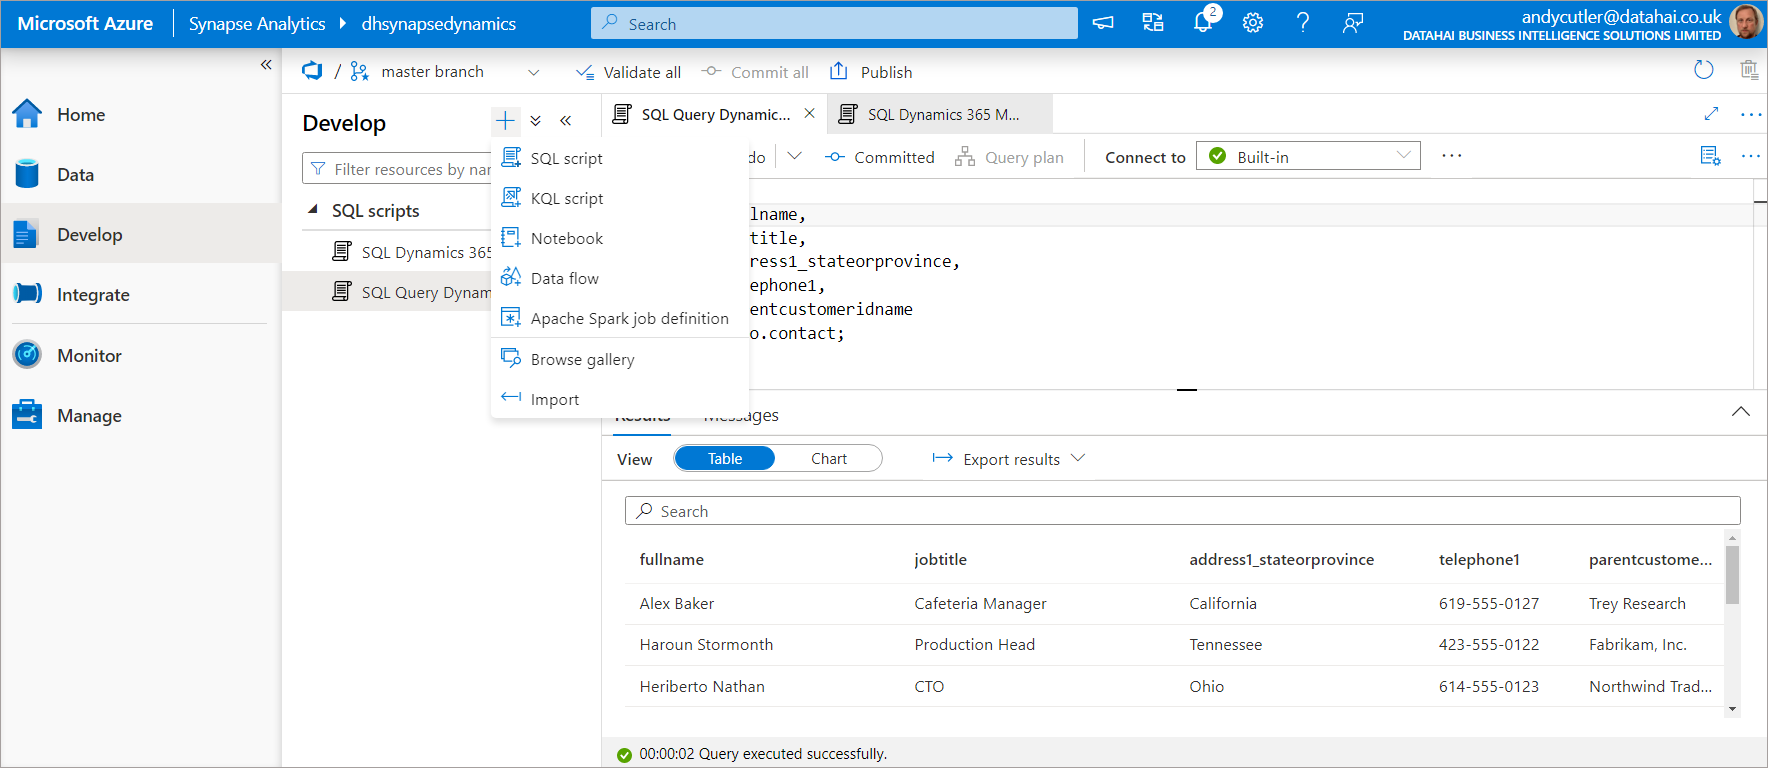
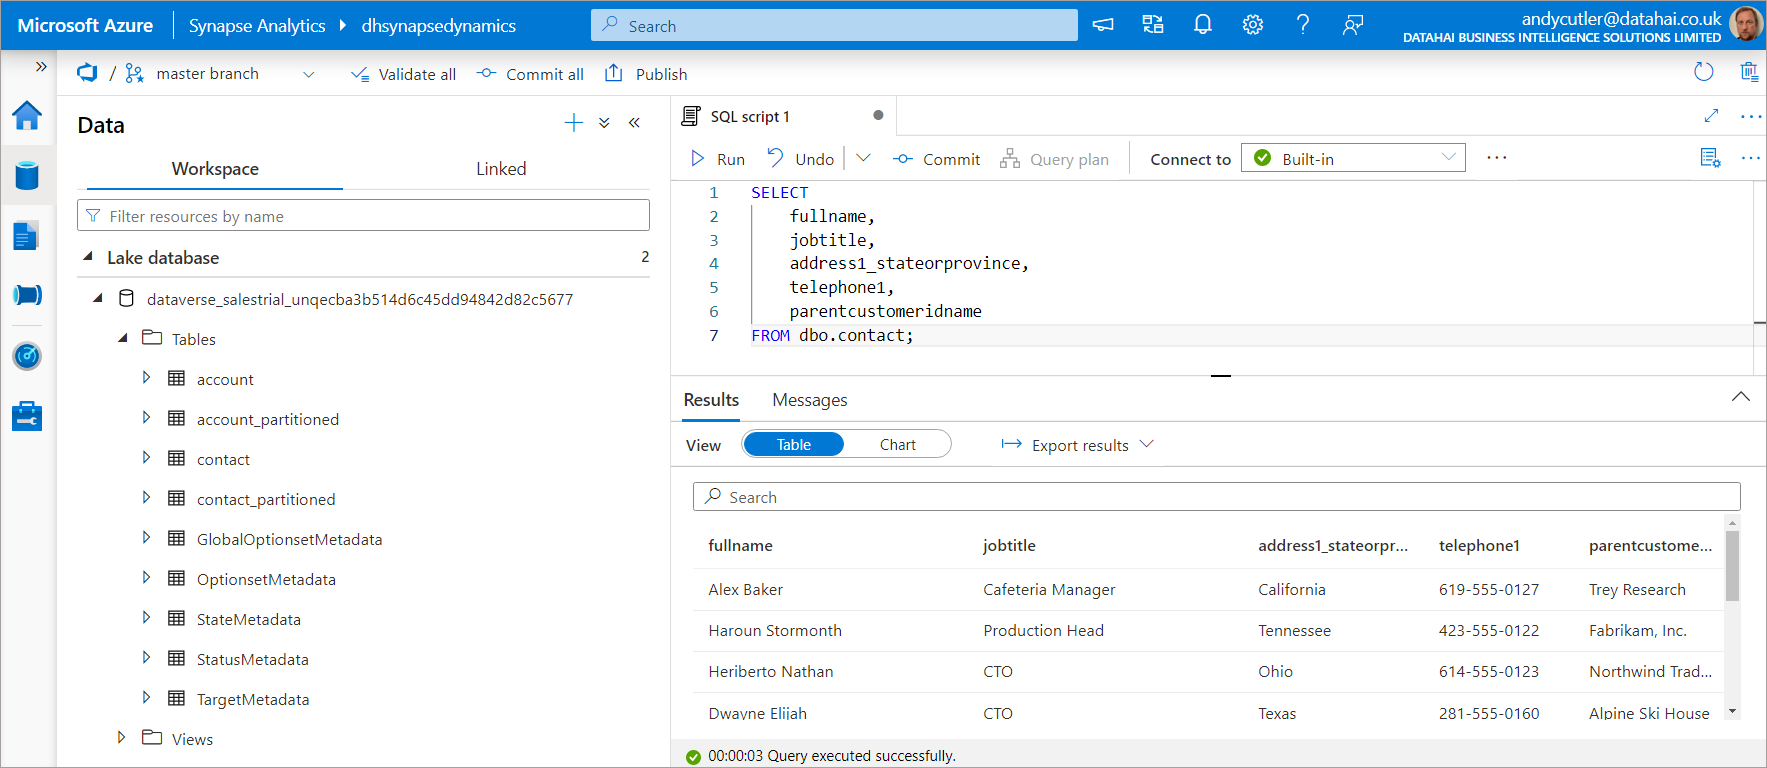
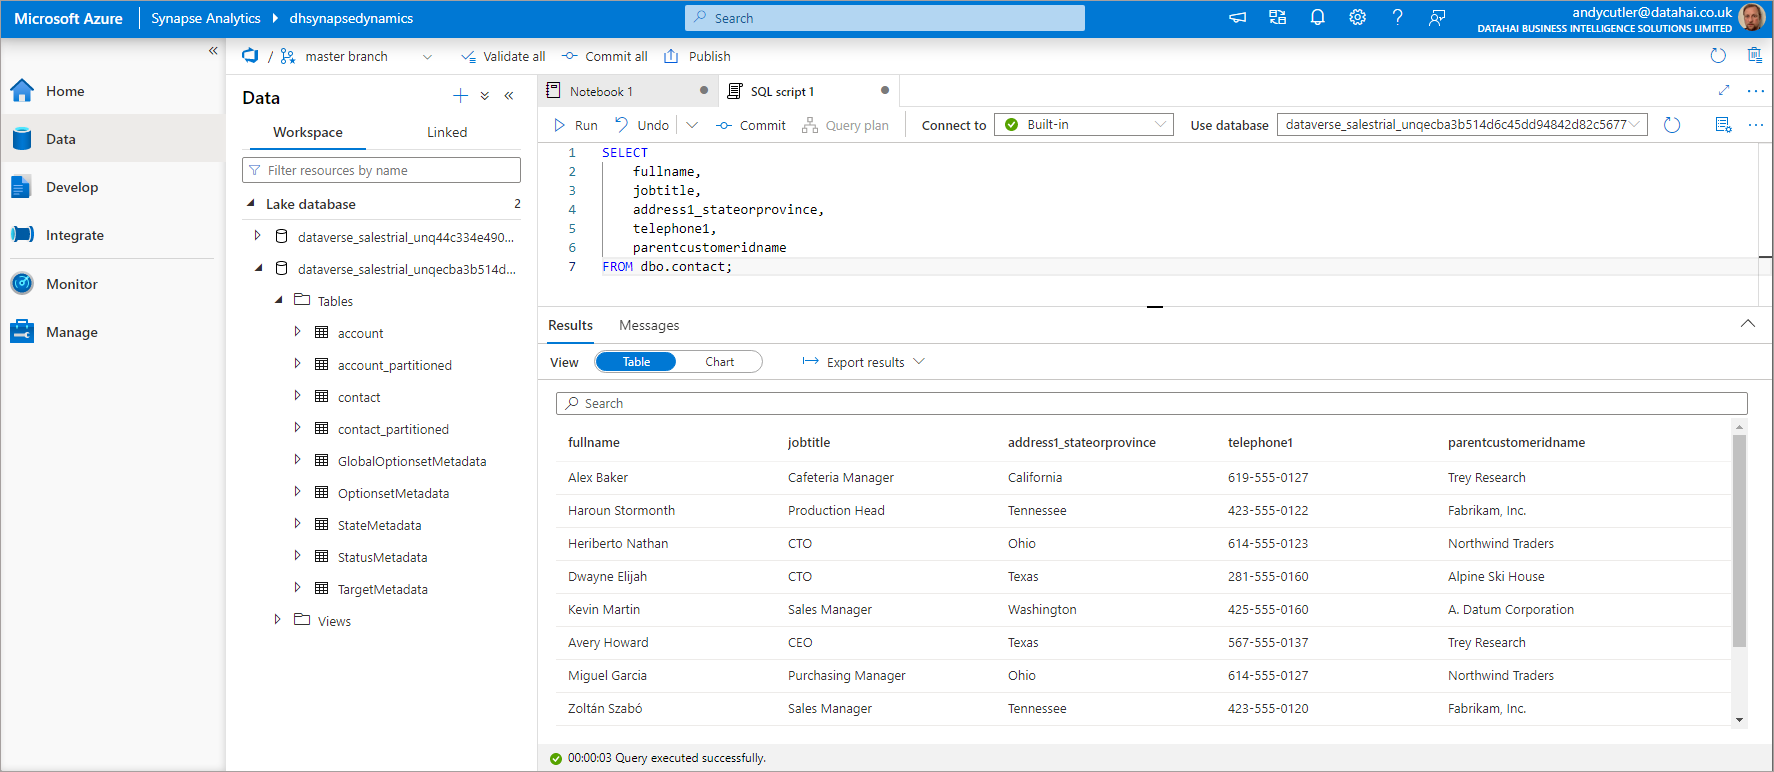
Table Metadata
There are 2 tables for each source table in Dynamics, we can see that both the account and contact tables exist in the Lake database, and we also have account_partitioned and contact_partitioned. The partitioned tables exist to limit any potential locking issues when reading data from the near real-time tables as the synchronisation window is much larger, usually each hour.
We can actually look at the metadata associated with each table to understand which location/folder in the data lake it is referencing. NB the _partitioned tables are not visible via the system views (I have an outstanding question about this). The SQL script below is part of my serverlesssqlpooltools script library on GitHub here called externaltablemetadata.sql
Contact Table Metadata
If we run the SQL below on the Lake database, we can use the relevant system views to view the table metadata including its source data format and its location in the data lake.
SELECT
    et.[name] AS TableName,
    et.[location] AS TableLocation,
    ef.[format_type] AS FileFormatType,
    es.[location] AS DataSourceLocation
FROM sys.external_tables et
INNER JOIN sys.external_file_formats ef ON ef.file_format_id = et.file_format_id
INNER JOIN sys.external_data_sources es ON es.data_source_id = et.data_source_id
WHERE et.[name] = 'contact'
ORDER BY et.[name]

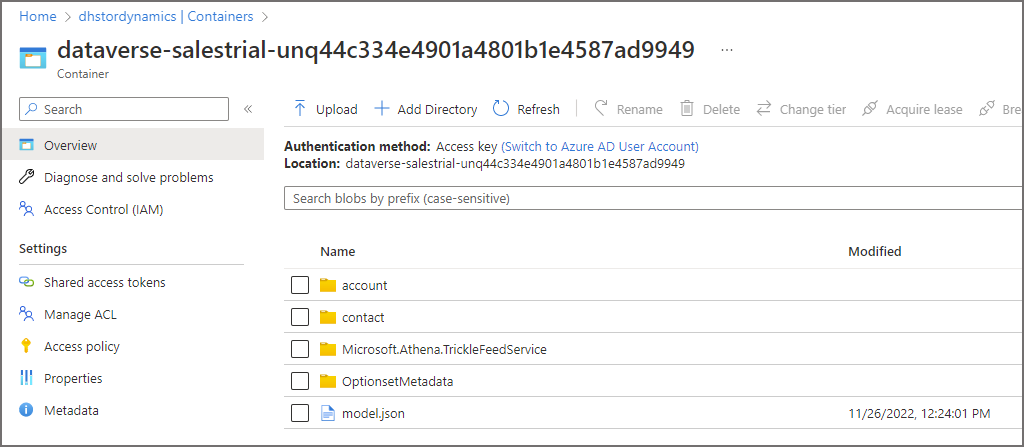
We can see the location of the CSV files in the Data Lake, within the contact folder. If we look at the storage account itself, we can see the CSV files within the folder. If we browse to the container within the Azure storage account, we can see folders that represent each table we chose to sync.
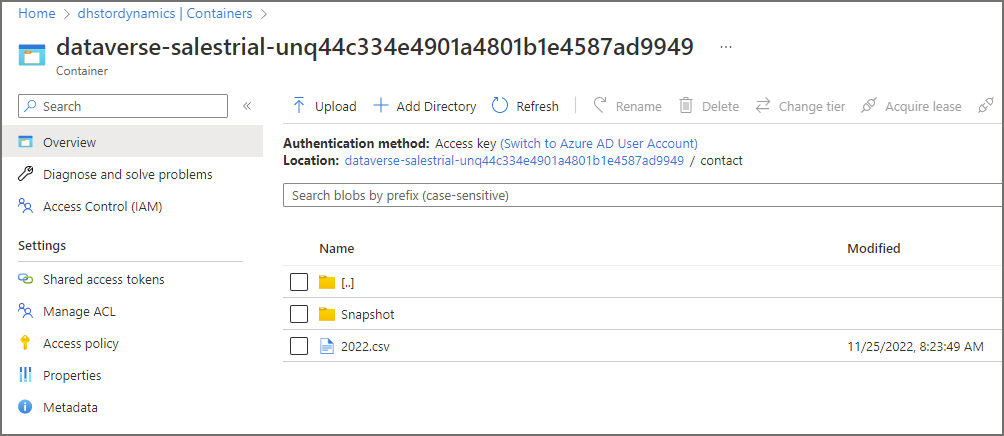
The snapshot folder is ignored by the base table but is used by the _partitioned tables, we’ll look into this in a future blog.
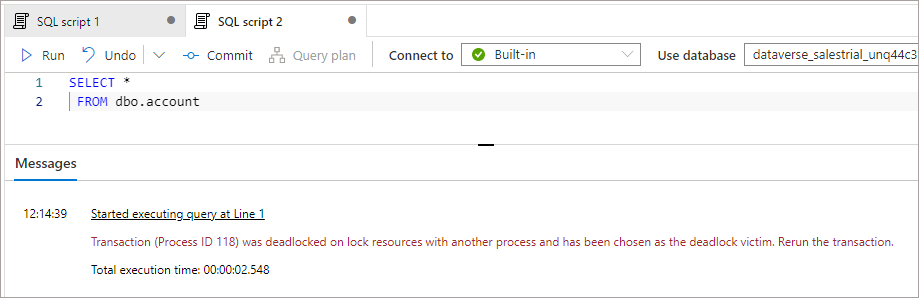
Locking
Yes…the dreaded locking. And it happens here too… As the data format in the Data Lake is CSV, when this is being written to by the Synapse Link process it will be locked while writing. There is no way to control this locking behaviour using the Lake Database tables that are created. However, there is the ability to query the CSV data using OPENROWSET which has options to specify reading uncommitted data. This isn’t very desirable though and it’s best to have some form of retry policy for any services connecting to Synapse to query the data.
What is “Near” Real-time?
The documentation talks about near real-time but what can we expect in terms on source data in Dynamics being available for querying in Synapse? The answer….it depends… Synapse Link is a push-based process which adds changed data to a queue. How fast this appears in Synapse depends on how much data is added to the queue. In my testing a handful of record changes such as adding a new Contact and amending an Account sees the data being available in Synapse in under 1 minute. Bulkier updates may see this take longer.
Re-Synchronisation
What happens when it all goes wrong? We’ve all been there in terms of these “black box” data synchronisation issues, “something” happens and the data stops replicating, or there’s an issue with the destination synced data…
Upcoming Blog Topics
In upcoming blogs we’ll look at Append Only (suppressing deletes in Synapse/Data Lake) and dive a little deeper into the snapshotting of data in the Data Lake. Reach out to me on Twitter for any further info on this blog.
References
- Create an Azure Synapse Link for Dataverse with your Azure Synapse Workspace – Power Apps | Microsoft Learn
- Start a Free Trial for Microsoft Dynamics 365| Microsoft Dynamics 365
- Predefined security roles for Sales (Dynamics 365 Sales) | Microsoft Learn
 Andy
Andy