
In the first part of this blog series we looked at how to configure Synapse Link for Dataverse with Dynamics 365 Sales data and synchronise this data with an Azure Synapse Analytics workspace. A useful feature which automates near real-time data exporting from the Dataverse (Dynamics 365 Sales etc.) into an Azure Data Lake and creates external tables within a Synapse Lake Database ready for querying using standard T-SQL.
In this blog we’ll look at the advanced configuration settings available when selecting the Dataverse tables we would like to export via Synapse Link.
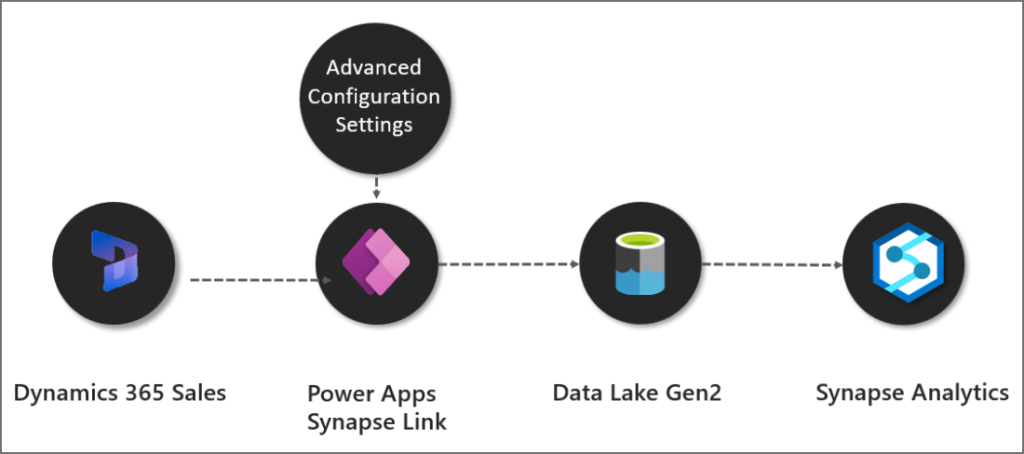
Advanced Configuration Settings
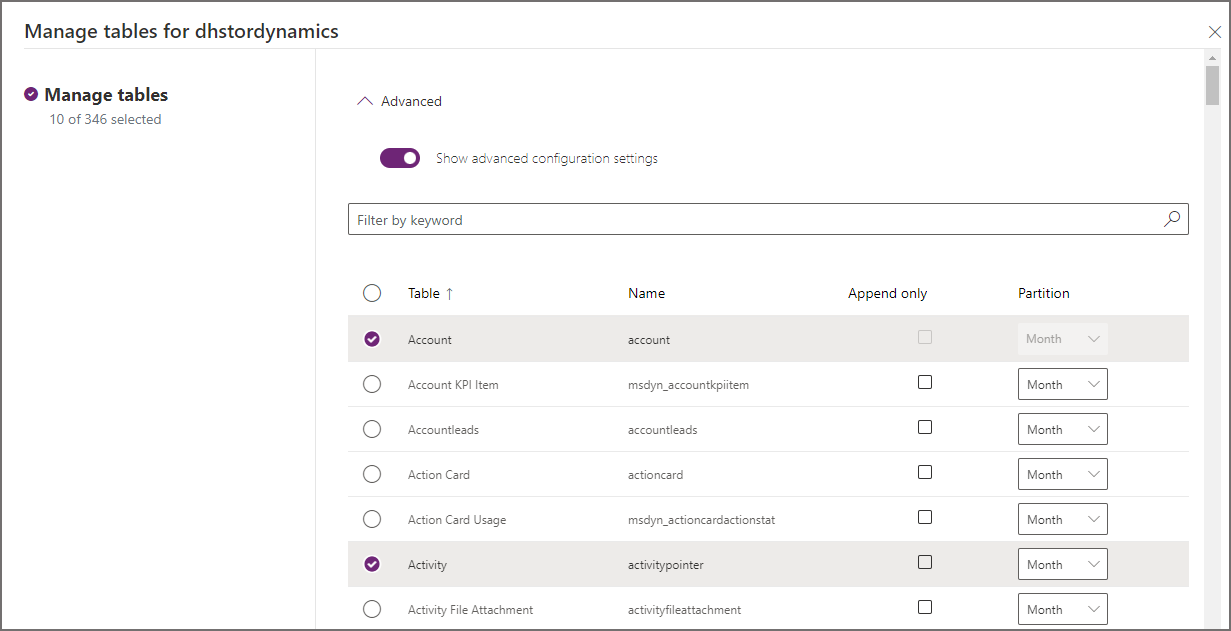
When configuring Synapse Link for Dataverse in the Power Apps portal, there is an option Show advanced configuration settings which when enabled, shows 2 extra column options:
- Append Only
- Partition
Partition
We’ll look at Partition first as it’s also relevant to the Append Only section. The partition option specifies how the CSV files will be partitioned in the Azure Data Lake. There are 2 options available:
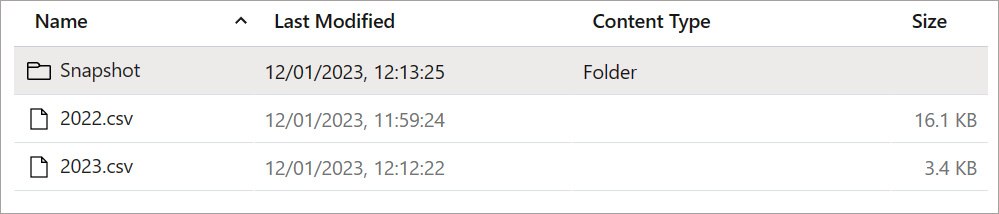
- Month (example 2021-12.csv, 2022-12.csv)
- Year (example 2021.csv, 2022.csv)
The partitioning is based on the createdOn date column in the source Dataverse table, the date the record was created in the dataverse table dictates which partition file it is written to.
Note that when Append Only is enabled, the Partition value will default to Year and cannot be changed.
And yes, the only option at the moment is CSV files… Parquet support is coming Q1 2023 apparently, I am on the case with this as it’ll be a great option to have.
Partition by Year
Partition by Month

Append Only vs In Place Update
To understand Append Only we’ll also look at In Place Update which is the default setting. At it’s most basic, Append Only does not delete any data from Azure Data Lake when it is deleted from the dataverse environment. Rather, it is marked as deleted. When data is updated, the original row is kept in the Data Lake and a new row with the updated data is added. We’ll look at this with examples below.
Append Only is the recommended choice if you wish to use point-in-time data for historical analysis or as part of a Data Warehousing loading process (think Slowly Changing Dimensions). As an aside, the snapshot data (we’ll cover this in a future blog post) does contain changed data but this is not readily accessible.
Note that when Append Only is enabled, the Partition value will default to Year and cannot be changed.
Also note that Append only is also the default setting for Dataverse tables that don’t have a createdOn value.
In Place Update (Default)
Let’s now work through examples for new, updated, and deleted data. For In Place Updates we’ll show the logic in the diagrams, for Append Only we’ll dive deeper into the data itself.
Insert New Row
When a new record is added to the Dataverse, the createdOn date will determine which yearly partitioned file it is written to. The record is then inserted into the appropriate file. The examples below are based on the partition being set to Year.

Update Existing Record
When an existing record is updated, the createdOn date determines which file will be scanned for an existing record. It is then updated if the record exists.

Delete Existing Record
When a record is deleted, the createdOn date determines which file will be scanned for an existing record. Is is then permanently deleted from the file.

Append Only
Let’s now look at the Append Only feature, with data examples for inserting, updating, and deleting data in the dataverse tables. We’ll be using the contact table as an example.
Insert New Row
This is the same as In Place Update, when a new record is added to the Dataverse, the createdOn date will determine which yearly partitioned file it is written to. The record is then inserted into the appropriate file.
Update Existing Record
If we update an existing contact record in Dynamics 365 Sales, E.G. update Carla Yates Job Title from Procurement Manager to Procurement Director, the new row plus the existing row is written to the end of the relevant partition file based on original createdOn date. The modifiedon datetime will indicate when the change occurred in the source system so this can be used in any downstream ETL/ELT solution. The original row will not have its values updated, the new row will contain the relevant data including the modifiedon datetime.

Let’s now query the contacts table in the Lake Database using Synapse Serverless SQL Pools.
SELECT
    fullname,
    jobtitle,
    SinkCreatedOn,
    SinkModifiedOn,
    modifiedon,
    createdon
FROM contact
WHERE fullname = 'Carla Yates';
We can see the results below, we have 2 rows: the existing unchanged row, and the new “updated” row. We can use the modifedon column in any data loading/etl/elt process to determine changed data. Also, we can use the Id column (not in the example below) to correlate the rows together. We’ll see the use of Id later.

Delete Existing Record
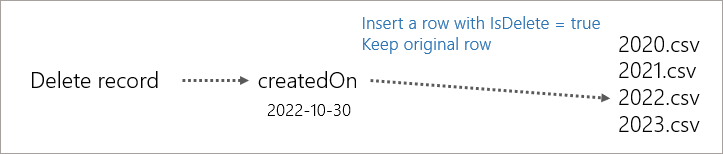
If we hard-delete (not just disable) the record from Dataverse/Dynamics, then we still see the original row unchanged in the partitioned file and we also see a new row added with IsDelete set to true. The rows are correlated on the Id column. Note that most of the column values for this new record are now NULL. This can now be used in any downstream ETL/ELT solution. BTW the official documentation states the column is called isDeleted, but during my testing the column is actually called IsDelete.
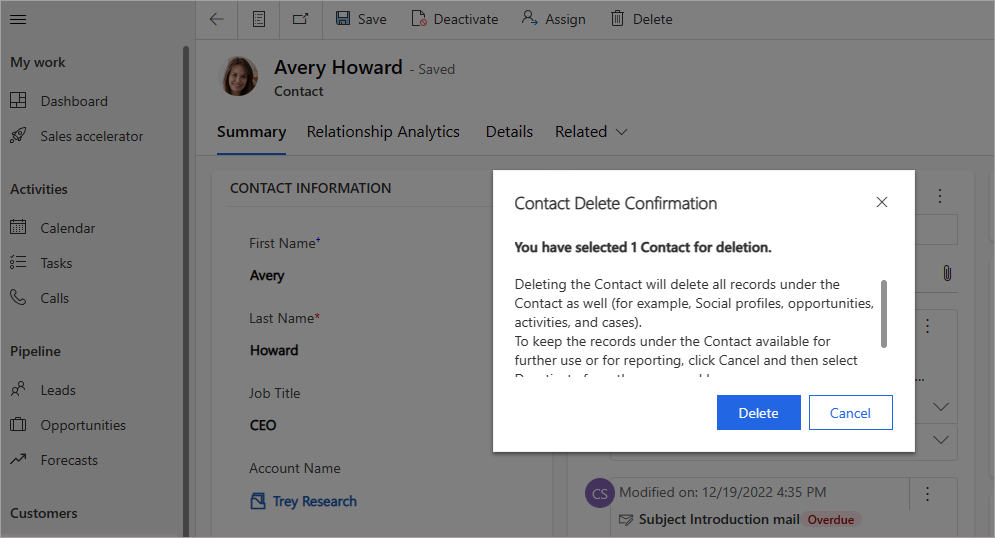
The logic for an Append Only delete is to keep the original row and insert a new row with the IsDelete flag set to true.
If we run a SELECT using Serverless SQL Pools for the specific Id, we can see the results below.
SELECT
    Id,
    contactid,
    fullname,
    SinkCreatedOn,
    SinkModifiedOn,
    modifiedon,
    createdon,
    IsDelete
FROM contact
WHERE id = '79ae8582-84bb-ea11-a812-000d3a8b3ec6';
We can see the original unchanged row plus the new row with NULL for most attributes and with IsDelete set to true.

Let’s write a SQL query to get the deleted row and join back to the original row and flag as deleted.
;WITH deletedrows
AS
(
    SELECT
        Id,
        SinkCreatedOn,
        IsDelete
    FROM contact
    WHERE IsDelete = 'True'
)
SELECT
    c.Id,
    c.contactid,
    c.fullname,
    c.SinkCreatedOn,
    d.IsDelete,
    d.SinkCreatedOn AS deletedon
FROM contact c
LEFT JOIN deletedrows d ON c.Id = d.Id
WHERE c.IsDelete IS NULL AND c.fullname = 'Avery Howard'
ORDER BY c.Id;
We’ve now got a single row in the results with the original values plus the IsDelete column and the derived deleteon column we created using the SinkCreatedOn value from the new “deleted” row. This could be useful for any archiving/data loading process.

Conclusion
In this blog we’ve taken a look at the 2 advanced configuration options Partitioning and Append Only. We then went through data syncronising scenarios when using Append Only and compared with the default In-place Update.
In a future blog we’ll look at the option Enable Incremental Update Folder Structure.
 Andy
Andy