
This was originally posted on my Datahai company blog in November 2021. This blog has now been updated as of November 2022 as certain steps have changed, notably the movement of the Private Endpoint creation link in Azure SQL Database and the ability to create a Virtual Network Data Gateway in the Power BI Service.
Overview
The flexibility to connect various data services within Azure and Power BI is a powerful feature, however this flexibility does introduce risk in terms of securely connecting these data services. We can configure secure connections using authentication methods, but what happens if we want to “lockdown” an Azure data resource so that no traffic from the public internet or even within the Azure network itself can attempt a connection? We can use Private Endpoints within supported services and configure Power BI to connect to these private endpoints.
In this blog post we’ll walkthrough the steps necessary to allow a Power BI dataset/report deployed to the Power BI Service to connect to an Azure SQL Database which has no access via the public internet and also no access to Azure services. This process uses a VNet (virtual network), a Private Endpoint on the Azure SQL Server, and a VNet Data Gateway configured in the Power Platform environment.
Considerations
Please note that this walkthrough contains default settings when creating the VNet and subnets, these default settings may not conform to a particular organisations networking strategy. Therefore an Azure Network Engineer should be consulted to ensure any specific settings are configured correctly for the specific environment. The walkthrough contains generic settings, which may need modifying.
Pricing
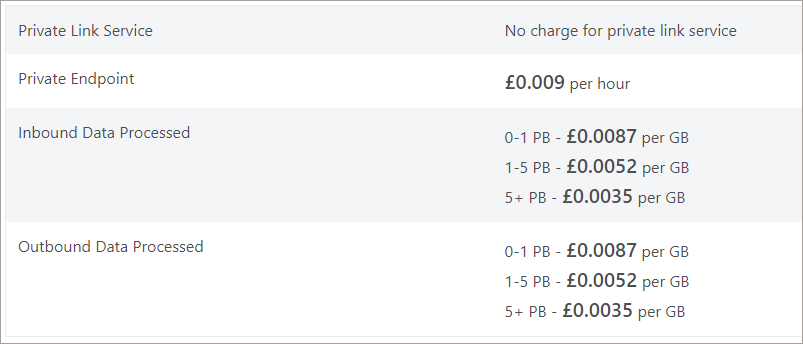
The Pricing page has a breakdown of the costs involved with Private Endpoints. E.G to run a single Private Endpoint (exclusive of inbound/outbound data processed) will be ~£6.50 per month.
Basic Sequence
In the walkthrough we’ll be going through several steps to allow the Power BI Service to communicate with an Azure SQL Server which has been configured with a Private Endpoint and all other traffic disabled.
- Create Virtual Network (VNet)
- Create Private Endpoint in Azure SQL Server and configure Network settings
- Configure VNet Subnet for Power Platform
- Create VNet Data Gateway in Power BI Service
- Configure VNet Data Gateway in Power BI and add Azure SQL Database as a data source
- Create and upload Power BI report to PBI Service
- Configure Power BI Dataset to use VNet Data Gateway
- Test data refresh
Basic Architecture
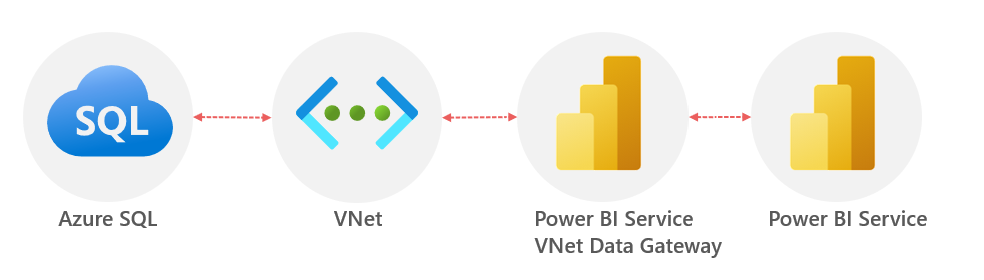
The following diagram shows a simple architectural flow from Power BI to Azure SQL using the Power BI VNet Data Gateway and a VNet.
Walkthrough
We’ll now walkthrough the steps to create a VNet and secure the connection between Power BI and the Azure SQL Database.
Create VNet
First, we’ll create a VNet which will be used to isolate the data services.
- Login to https://portal.azure.com
- Search for Virtual networks and click on the service
- Click Create and enter the following information
- Basics tab
- Select a Resource Group or create a new one
- Provide a name E.G. dhpowerbivnet
- Select the appropriate region E.G. UK South
- IP Addresses **POSSIBLY WE NEED TO CHANGE AS A DEFAULT SUBNET IS CREATED
- Accept the default IPv4 address space and ensure there is a default subnet (we’ll add another subnet).
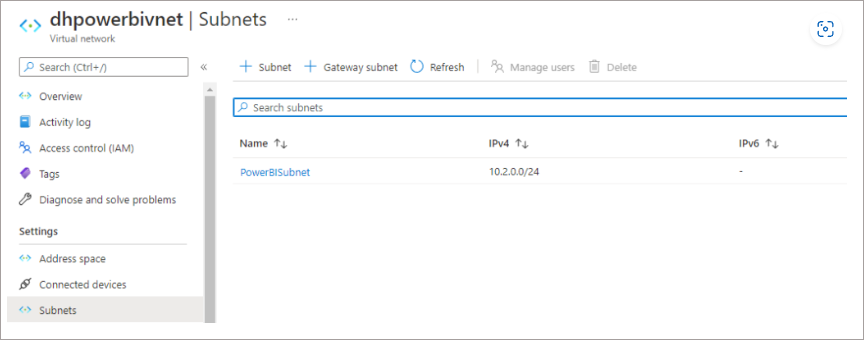
- Click Add Subnet, provide the name for the subnet E.G. PowerBISubnet and ensure the IP Address Starting Address is the same as the VNet but with a non-overlapping address. E.G if the default subnet is 10.0.0.0, then change starting address to 10.0.1.0. Ensure subnet size is set to /24 then click Add
- Click Review & Create
- Basics tab
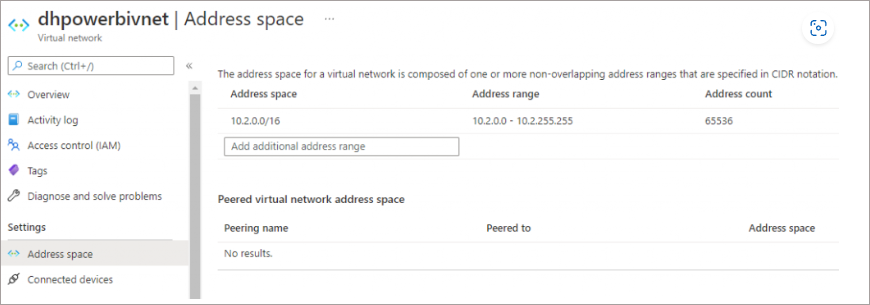
You should now have a VNet configured as follows (or similar depending on the IP range).
Configure Azure SQL Networking
Now that the VNet has been created, we can configure the Azure SQL Server. For this section we’ll be using an existing Azure SQL Server rather than creating a new server. However, the process will be the same if you need to create a new Azure SQL Server.
- In the Azure portal, browse to an Azure SQL Server (not an individual SQL Database)
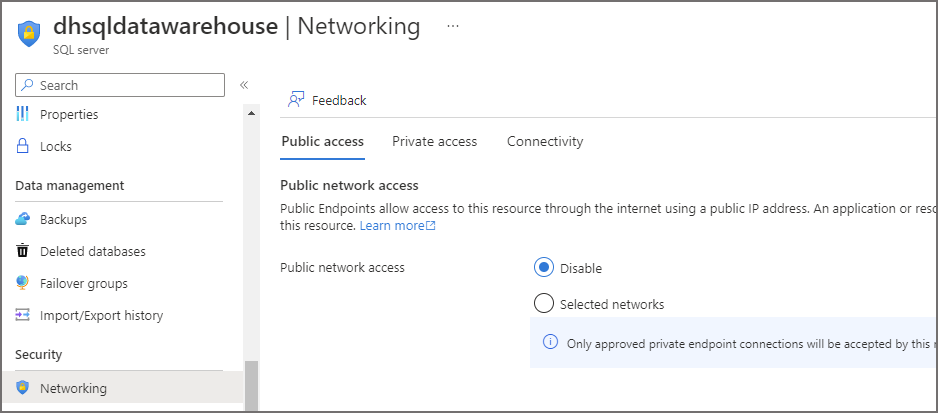
- Under the Security section, select the Networking sub-section
- Set the following:
- Public Access tab:
- Public Network Access: Deny
- Connection tab:
- Minimum TLS Version: 1.2
- Connection Policy: Redirect
- Click Save
- Public Access tab:
Create Private Endpoint in Azure SQL
- In the Azure portal, browse to an Azure SQL Server (not an individual SQL Database)
- Under the Security section, select Networking sub-section
- Click the Private Access tab
- Click + Private Endpoint to create a new private endpoint
- On the Basics tab, enter the following information:
- Select a Resource Group or create a new one
- Provide a name E.G. dhsqlprivateendpoint
- Select the appropriate region E.G. UK South
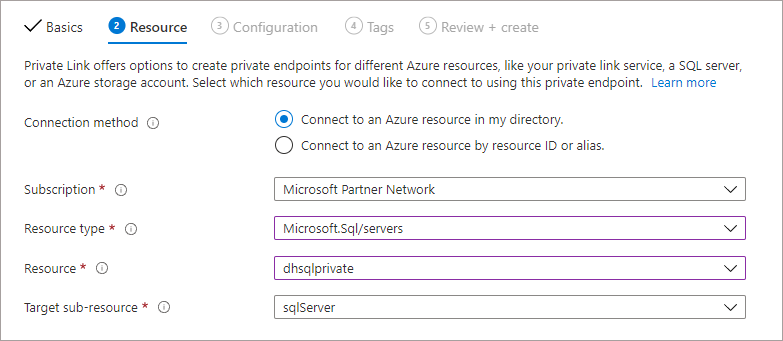
- On the Resource tab, ensure the following property is set:
- Target Sub-Resource: sqlServer
- On the Virtual Network tab, enter the following information:
- Virtual Network: Select the VNet created in the first step
- Subnet: The default subnet should be automatically selected
- On the DNS tab, ensure the following property is set:
- Integrate With Private DNS Zone: Yes
- Click Review & Create
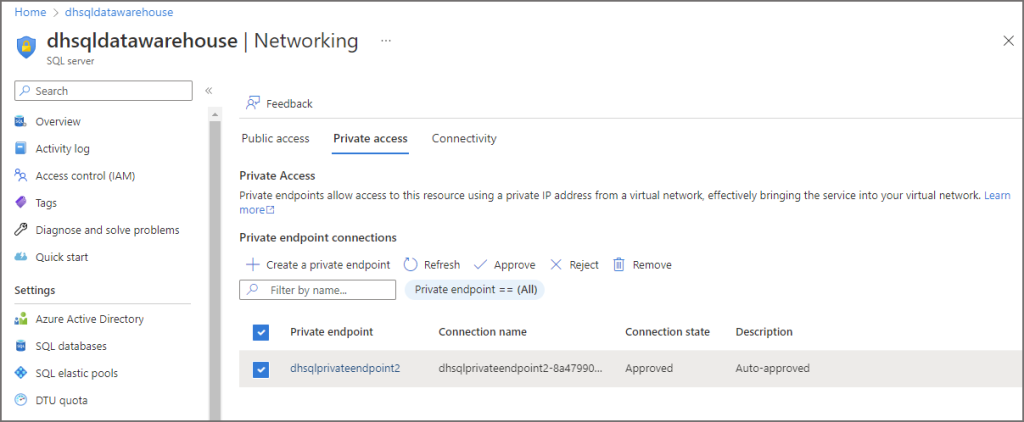
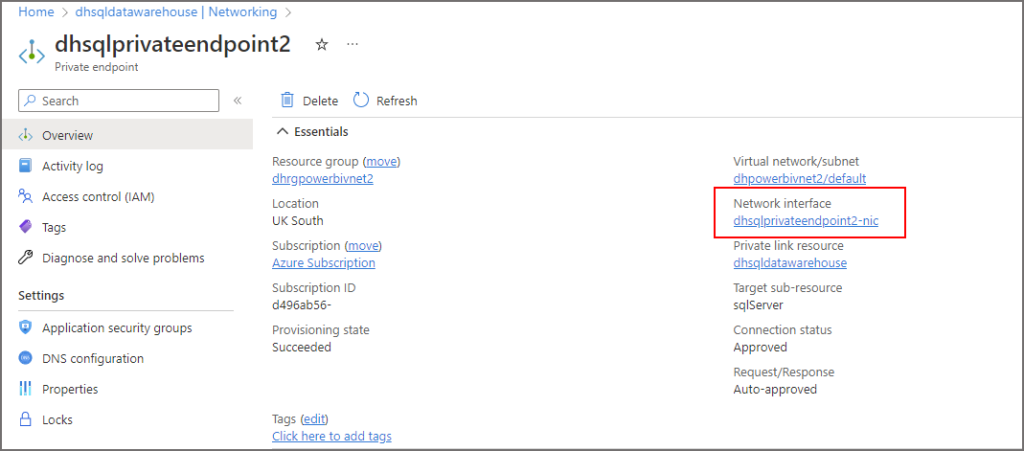
Once we have created the Private Endpoint we can see the internal IP address that the VNet has assigned.
- Browse to the Azure SQL Server resource in the Azure portal
- Under the Security section, select Networking
- Click on the Private access tab
- Click on the Private endpoint name
- Then click on the Network interface name
- You will now see the internal VNet IP assigned to the Private endpoint.

Configure VNet Subnet for Power Platform
We must now add a new Subnet to our new VNet configured for use with the Power Platform.
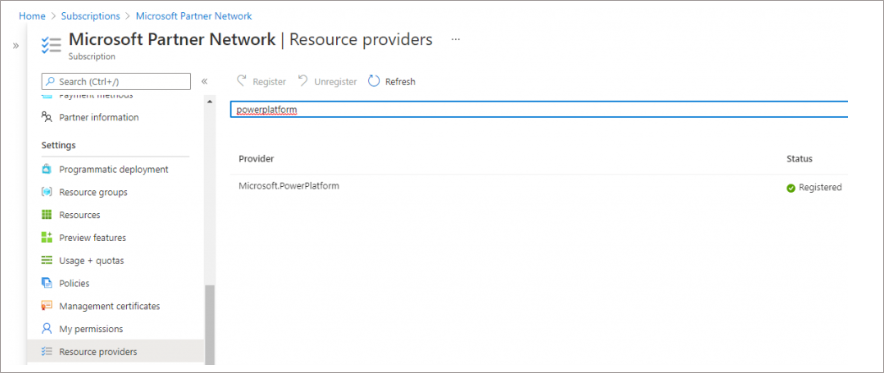
Add Microsoft.PowerPlatform as a Resource Provider
- In the Azure portal, browse to the subscription that you are using in the Subscriptions area
- Under the Settings category, select Resource Providers
- Search for Microsoft.PowerPlatform then click Register
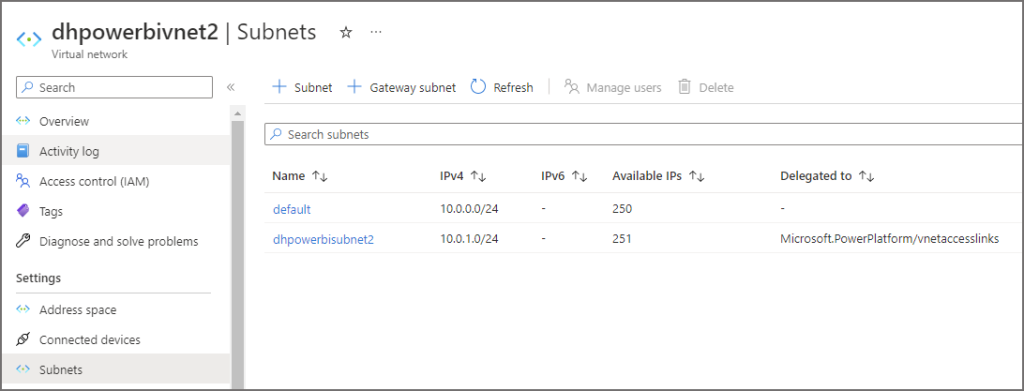
Add New Subnet
- In the Azure portal, browse to the Virtual network created in the first step
- Under the Settings section, click Subnets
- Click + Subnet to add a new subnet
- Give the subnet a name E.G. dhpowerbisubnet
- Set the Delegate Subnet to a service drop-down to Microsoft.PowerPlatform/vnetaccesslinks
- Click Save
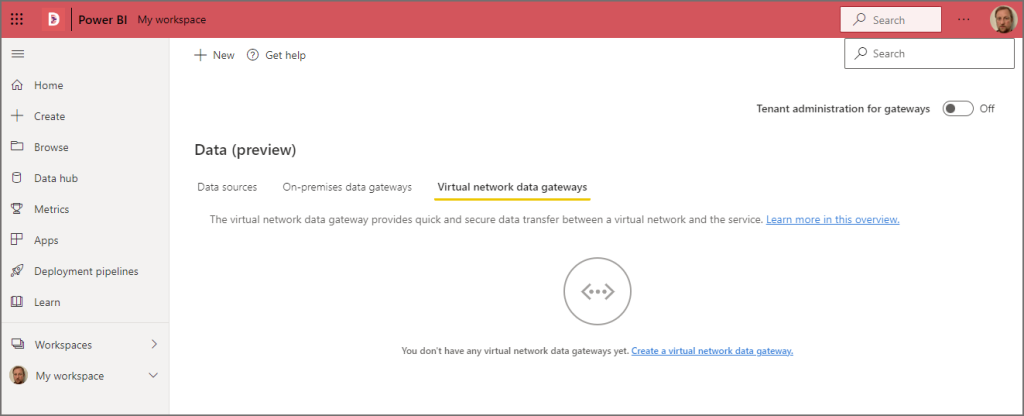
Create VNet Data Gateway in Power BI Service
We must now login to the Power BI Service and create a new VNet Data Gateway connected to the new Power Platform-specific subnet created earlier.
- Login to the Power BI Service
- From the Home screen, click on the Settings icon and select Manage Gateways
- Click on the Virtual Network Data Gateways tab
- Ensure the Tenant administration for gateways is set to Off
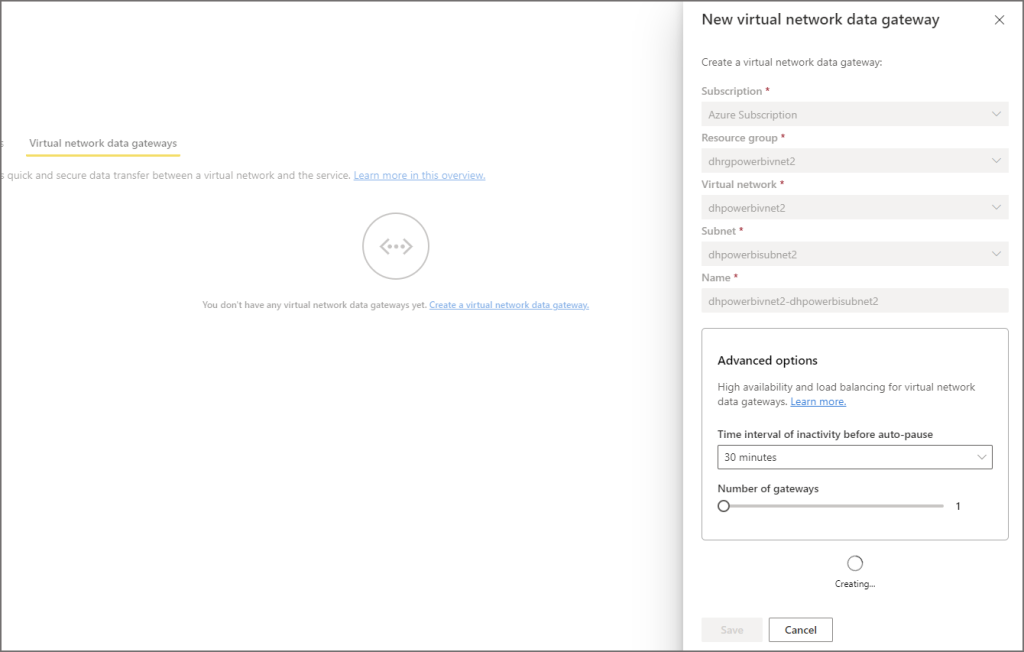
- Click on + New and enter the following information
- Select the subscription the VNet is in
- Select the resource group that the VNet was created in
- Select the virtual network that was created earlier
- Select the Power Platform specific subnet created earlier
- Provide a name for the VNet Data Gateway
- Click Save
Once the VNet Data Gateway has been created, click the icon under the Status column. This can take a few minutes to return the gateway’s status, if all has been successful during creation then the status should show as Online.
Configure VNet Data Gateway in Power BI
We now turn our attention to configuring a data source to the Azure SQL Database.
- Login to https://app.powerbi.com
- Under Settings, click Manage Gateways
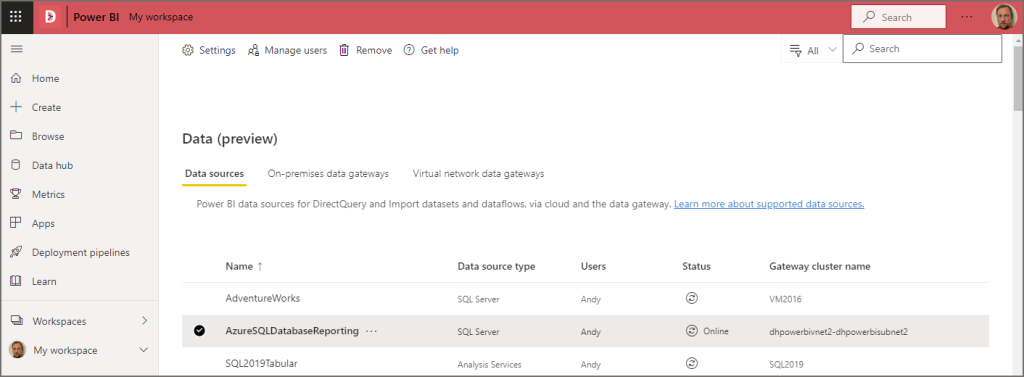
- Click on the Data Sources tab and click + New at the top
- Select the Gateway Cluster Name created in the previous step
- Enter an appropriate name for the data source E.G. AzureSQLDatabaseReporting
- Select SQL Server as the data source type
- Enter the full URL of the Server E.G. dhsqlserverreporting.database.windows.net
- Enter the database name E.G. dhsqlreporting
- Select the appropriate authentication method, E.G. OAuth.
- Click Create
Configure Power BI Dataset to use VNet Data Gateway
We can now configure the specific Power BI dataset to use the VNet Data Gateway. Please note that steps to create a report and upload to the Power BI Service is out of scope of this blog post. The Power BI report deployed to the service has an import connection to the Azure SQL Database.
- In the Power BI Service, browse to the workspace containing the relevant Power BI dataset.
- Select the ellipsis to the right of the relevant Power BI dataset and select Settings
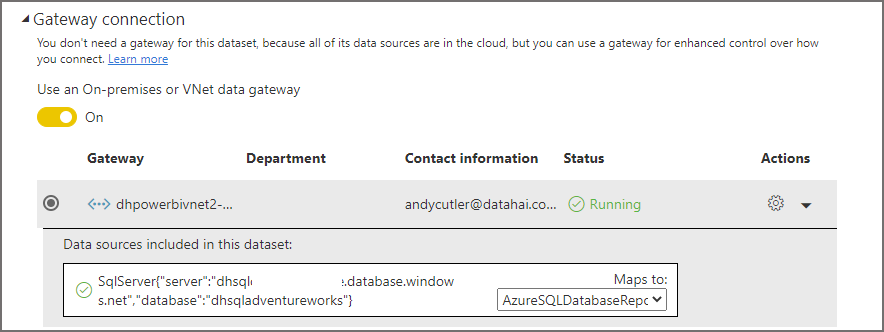
- Expand the Gateway Connection section and switch Use an On-premises or VNet data gateway to On
- In the Maps to: drop-down, select the appropriate data source connection. In this case, the Azure SQL Database.
- Click Apply
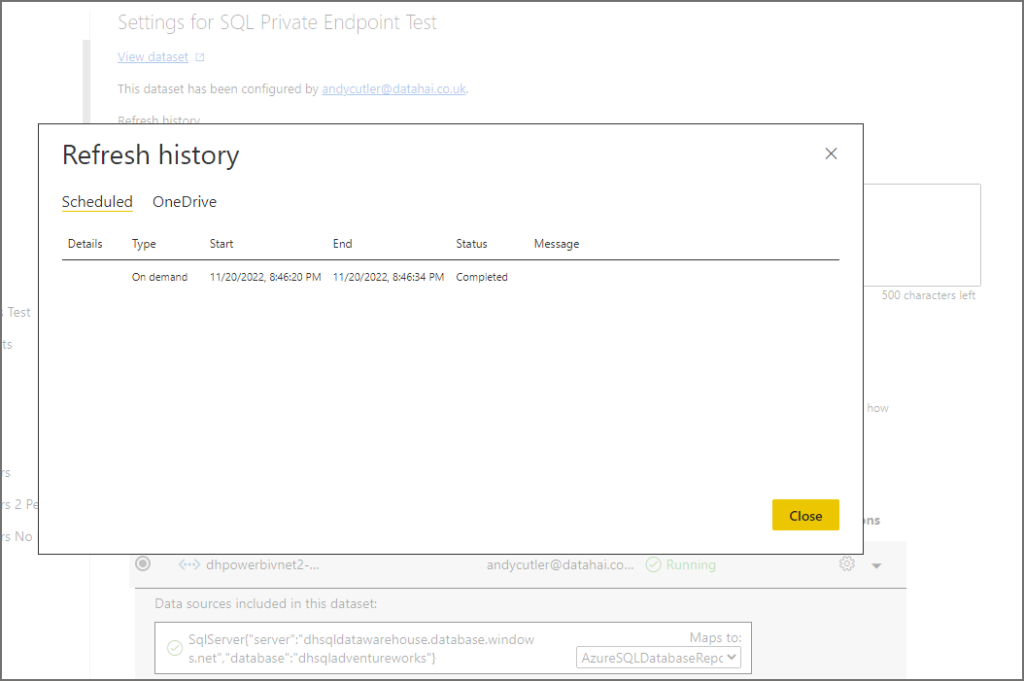
Test Data Refresh
We can now browse to the Power BI dataset and attempt a refresh, if all has been configured correctly then the dataset will refresh successfully. If the Power BI Service is unable to connect to the Azure SQL Database successfully, it is likely to result in this error message:
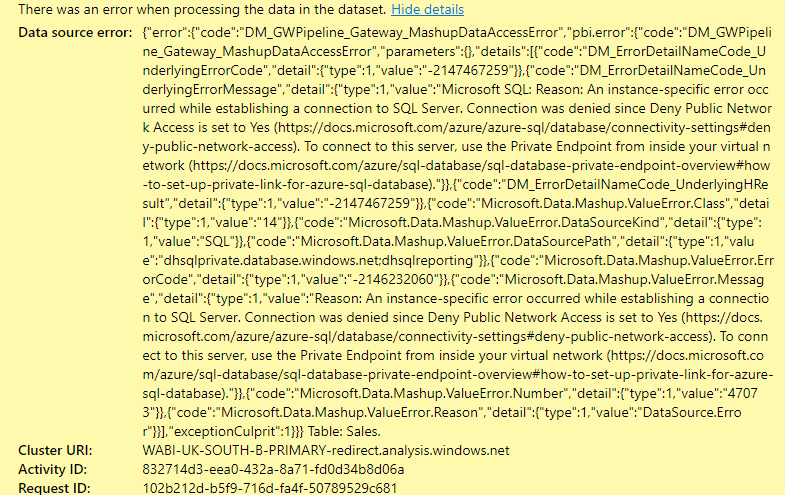
If all is working, you will see a status of Completed in the refresh history of the dataset.
Conclusion
In this blog post we have walked through the steps necessary to disable access to an Azure SQL Database, configure a Virtual Network and Private Endpoint, create a VNet Data Gateway and finally to connect a Power BI dataset to the Azure SQL Database via the VNet Data Gateway. As previously noted in the Considerations section, care must be taken when securing Azure resources and an Azure Network Engineer is best placed to confirm configurations.
References
- https://docs.microsoft.com/en-us/azure/virtual-network/quick-create-portal
- https://docs.microsoft.com/en-us/azure/private-link/create-private-endpoint-portal
- https://docs.microsoft.com/en-us/data-integration/vnet/create-data-gateways
- https://docs.microsoft.com/en-us/data-integration/vnet/use-data-gateways-sources-power-bi
- https://docs.microsoft.com/en-gb/azure/azure-sql/database/connectivity-architecture
- https://docs.microsoft.com/en-us/azure/virtual-network/virtual-networks-overview
- https://docs.microsoft.com/en-us/azure/azure-sql/database/private-endpoint-overview
- https://azure.microsoft.com/en-us/pricing/details/private-link/
 Andy
Andy
[…] Connecting Power BI to Azure SQL Database using Private Endpoints by Andy Cutler Twitter @MrAndyCutler […]