

Part of the upcoming Azure Enterprise Data Analyst Associate exam, the DP-500, is to understand how Microsoft Purview integrates with Power BI to manage assets. In this blog post we’ll cover how to create a new Microsoft Purview account, connect Microsoft Purview to Power BI, how to scan assets, and understand the results of those scans including lineage.
This blog forms part of the Mastering DP-500 exam series. A list of available blogs is here and is in association with Data Mozart.
Please note that Microsoft has renamed Azure Purview to Microsoft Purview, although the exam material currently references Azure Purview, I will reference the service as Microsoft Purview.
Learning Focus
The learning focus for this blog concentrates on the following area in the Skills Measured document published by Microsoft.
Implement and manage a data analytics environment (25-30%)
Govern and administer a data analytics environment
– Manage Power BI assets by using Azure Purview
Please note that as this blog is focused on certification, the content is based on official Microsoft documentation. The References section contains all links used in this blog.
Learning Outline
In this blog we will be going through the process of:
- Creating a new Microsoft Purview service
- Configuring security permissions to allow connection to Power BI
- Connect Azure Purview to Power BI using Azure Runtime and Managed Identity
- Scan Power BI assets
- Analyse the results
Creating a new Azure Purview Service
We’ll now create a new Azure Purview service in the Azure Portal.
- Open the Azure portal at https://portal.azure.com
- Search for purview in the search bar and click on Microsoft Purview accounts
- If your Azure tenant does not have a Microsoft Purview account you will see the following:
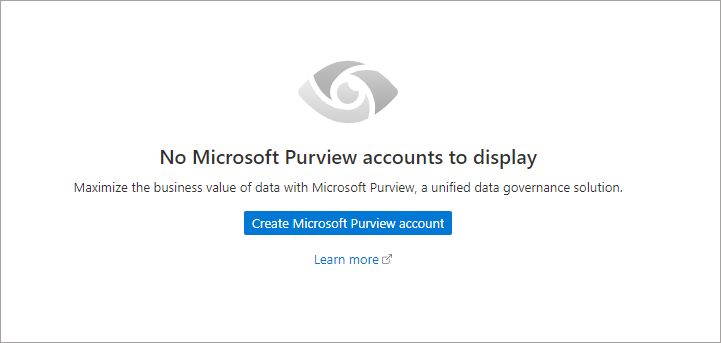
- Click Create Microsoft Purview account
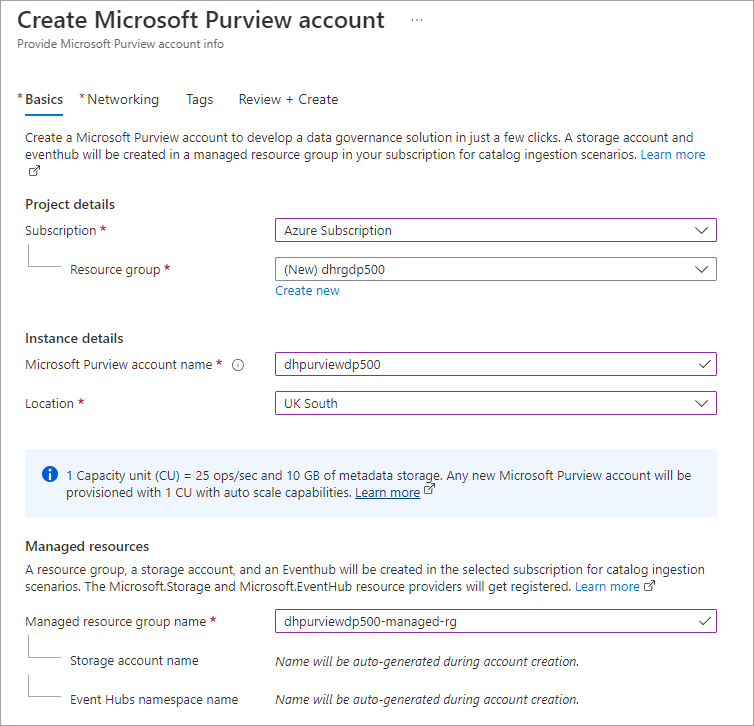
- Enter relevant information into the following fields:
- Select relevant subscription
- Select a resource group or create a new one
- Enter an account name for the Purview account
- Select the region location
- Either leave the default name for the Managed Resource Group name or rename to meet your naming convention. It’s recommended to keep “managed” in the name.
- Click Next: Networking to go to Networking, leave the defaults
- Click Next: Tags to go to Tags and enter any relevant tags you wish to add
- Click Next: Review + Create
- Once the settings have been validated, click Create
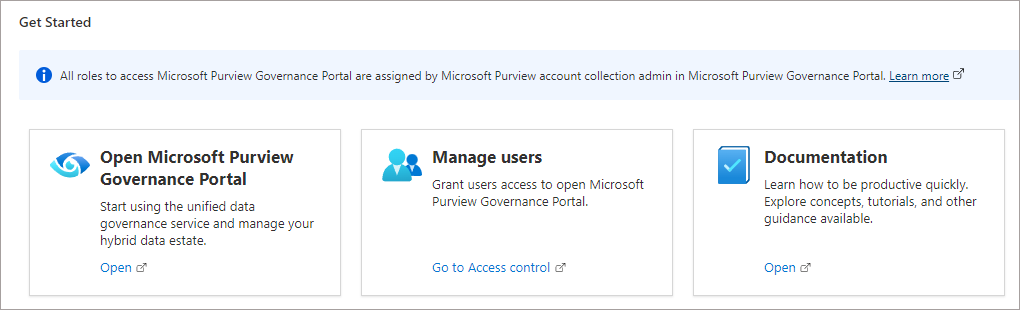
Once the Purview account has been created, browse to the account in the Azure Portal and on the Overview page, click the Open Microsoft Purview Governance Portal link.
The Purview portal main page will look similar to the following.
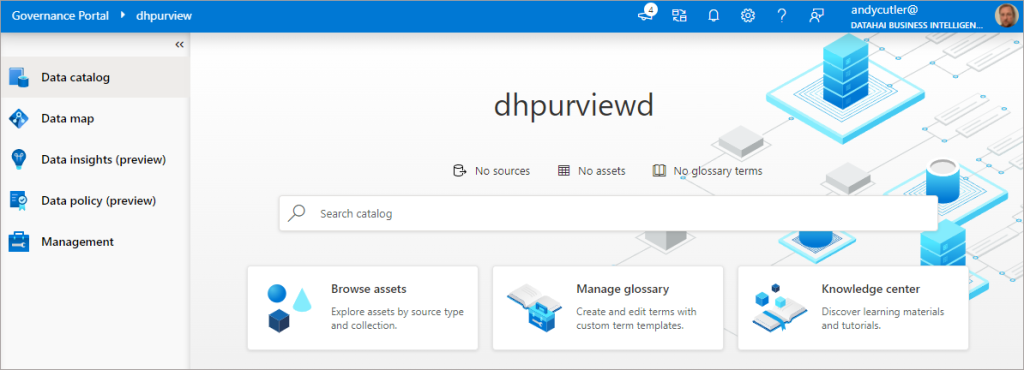
We’ll now walkthrough how to connect Power BI to Purview to enable scanning of Power BI assets. We’ll then revisit the Purview portal to understand the relevant areas on the left menu.
Connecting Microsoft Purview to Power BI
In this scenario we’ll be connecting a Microsoft Purview account to a Power BI Service which exist in the same Active Directory tenant. There are 2 options when connecting in the same tenant:
- Managed Identity (which we will be using in this scenario)
- Delegated Authentication (user must be a Power BI Admin with minimum a Pro licence)
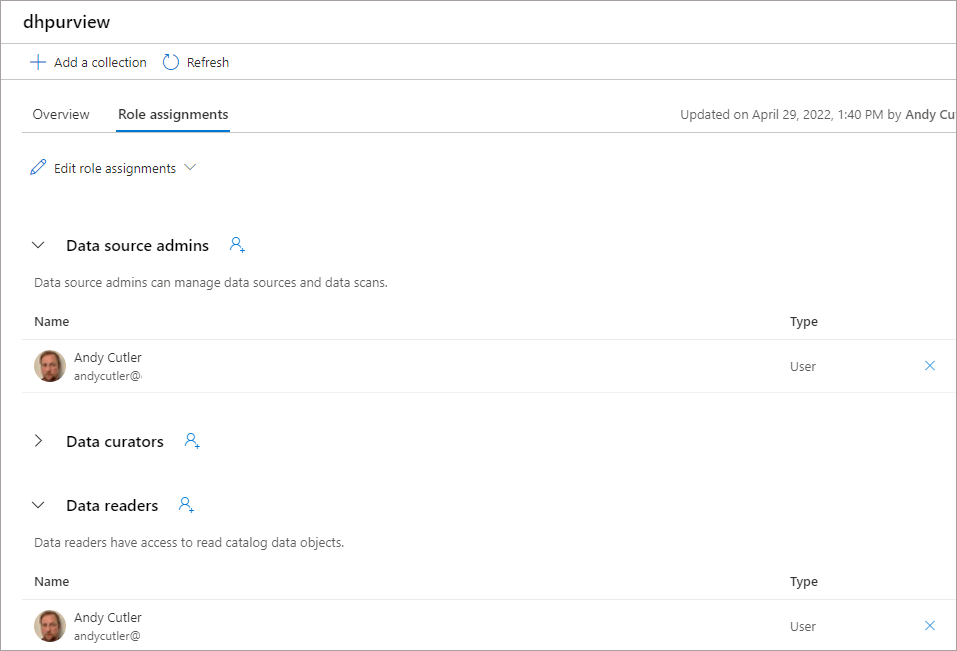
Configure Role Assignment
The user who performs the Power BI scan must be a Data Source Administrator and Data Reader. To check this:
- Click Data Map on the left navigation
- Click Collections on the sub-menu that appears
- On the root collection (same name as the Purview account), click the Role Assignments tab
- Ensure the relevant user is added to the Data source admins and Data readers roles
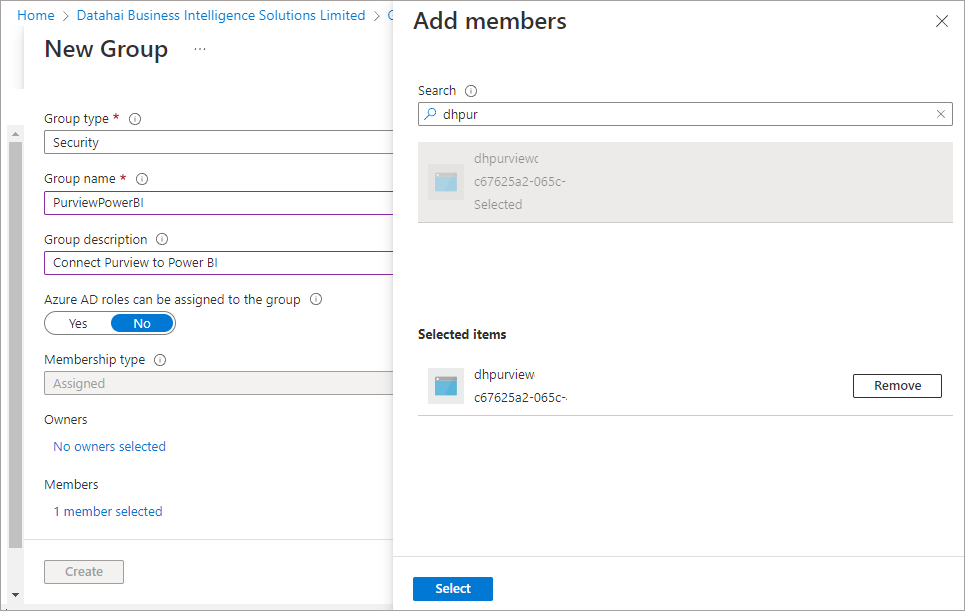
Create Active Directory Group
As we’re using Managed Identity to connect to Power BI, we need to provide access within Power BI to the Purview Managed Identity. We do this by creating an Active Directory group, adding the Purview Managed Identity to this group, then adding the AD Group to Power BI.
- In the Azure portal, search for and click on Azure Active Directory
- Click Groups under the Manage area and click New Group
- Enter the information similar to the image below, ensuring that Group Type is set to Security
- Click the Members link and search for the Managed Identity of the Purview account, which will be the account name. Select to add the MI to the Security Group.
- Click Create to create the group and assign the MI as a user within the group.
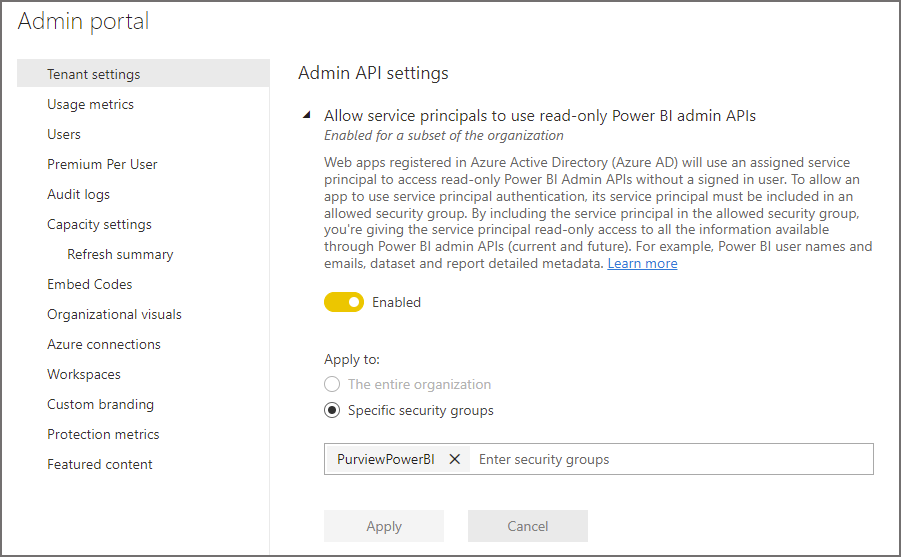
Add Active Directory Group to Power BI
We now need to login to the Power BI Service as a Power BI Admin user and complete the following steps:
- Login to https://app.powerbi.com
- Click the Settings icon in the top right and click Admin Portal
- In the Tenant settings tab, scroll down to find Admin API settings
- Enable Specific Security Groups and enter the AD created in the step earlier
- Click Apply
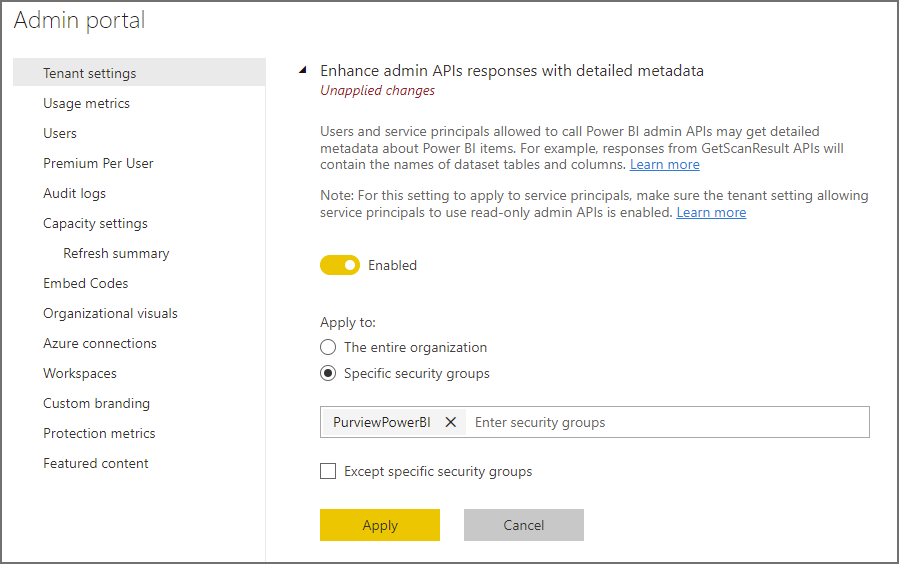
- Then expand Enhance admin APIs responses with detailed metadata
- Set Enabled to on
- If you wish to limit the users/groups that have access to this feature then enter the relevant users and groups
- Click Apply
Now that we’ve added the AD group to Power BI, we can use Purview to scan the Power BI tenant.
Register and Scan Power BI in Purview
We’ll now go back to the Purview portal and register Power BI to initiate a scan.
- Open the Purview portal created earlier
- Ensure you are logged in as a user that has been assigned to the Data source admins and Data readers role
- Click Data Map on the left-hand menu then click the Sources tab
- Click Register
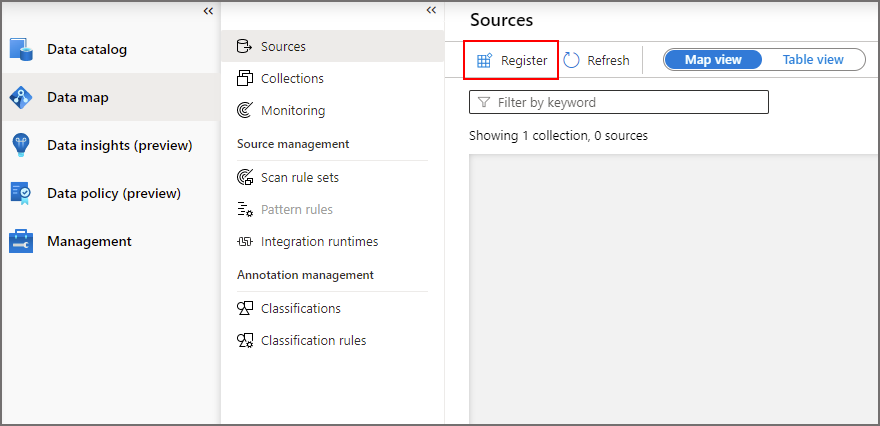
- Search for Power BI and select once found
- Enter a name to give the Power BI tenant in Purview, E.G. PowerBIUKSouth
- Keep the Tenant ID and Collection as defaults
- Click Register
Once the Power BI tenant has been registered, we can setup a scan. In the following steps we’ll setup a scan which will perform a Full Scan.
- Click Data Map on the left-hand menu then click the Sources tab
- If in Map view, click the scan icon on the Power BI source
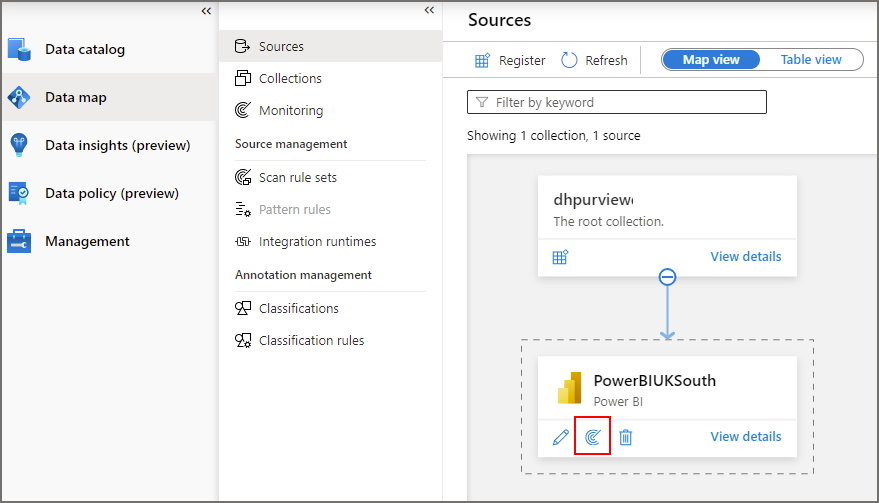
- If in Table view, either hover over the Power BI source name and click the scan icon, or click the New Scan link.

- Enter a name for the scan
- You can then select whether Personal workspaces in Power BI are included or excluded in the scan.
- In this scenario, leave Connect via integration runtime and Credential as the default Azure Runtime and the Managed Identity respectively.
- Leave the Select a collection as the default root collection.
- Click Test connection and if it succeeds then click Continue. If you receive an error please check the steps earlier to ensure the Managed Identity has the appropriate access to Power BI.
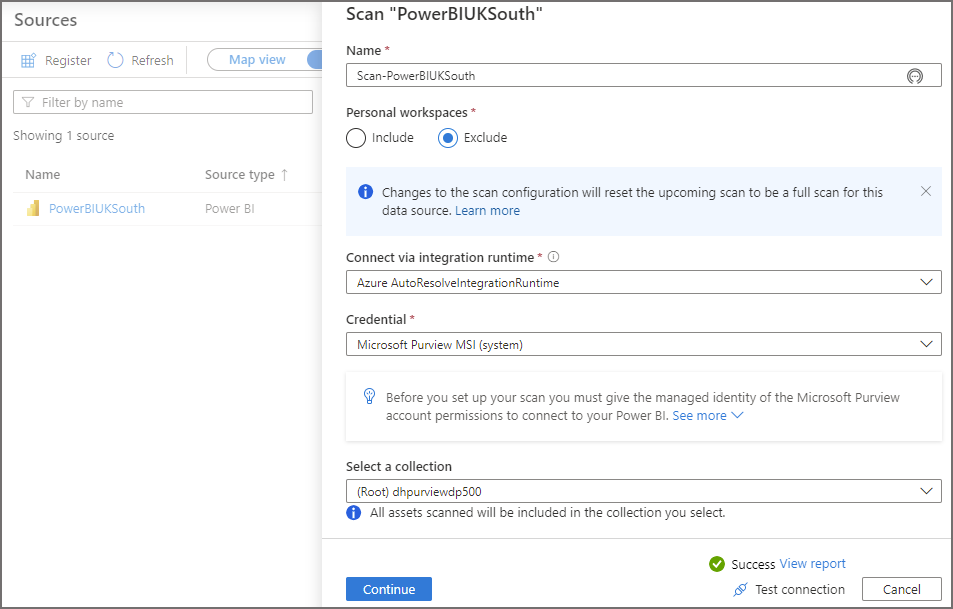
- We are then able to set a reoccurring scan as Power BI is supported as an incremental source. For this scenario we’ll select Once.
- Click Continue then Save and Run
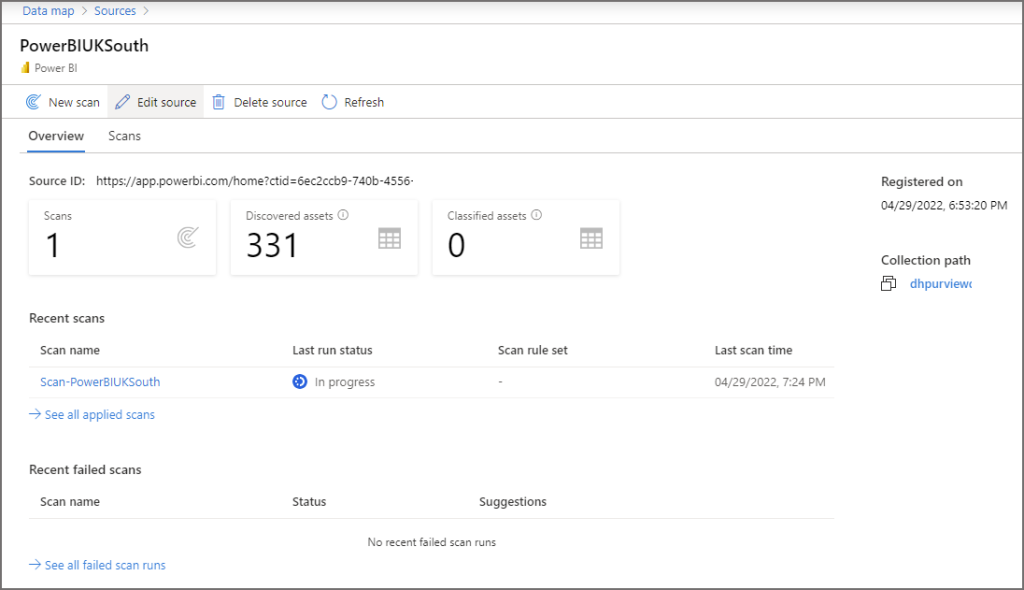
- Once the scan is initiated, you will be back on the Sources tab. To see the status of the scan, on Map view click View Details on the Power BI source, or on Table view click on the Power BI source name itself
- You can click Refresh while the scan runs to check the Last run status
- Classified Assets will always show as 0 as this is currently not supported with Power BI.
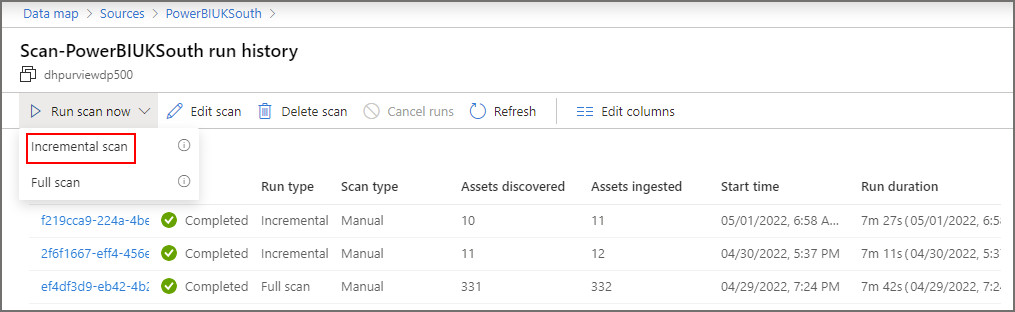
Incremental Scan
We can initiate an incremental scan, which scans for objects changes, by clicking the Power BI source in the Map view, clicking Run Scan Now and selecting Incremental Scan. The image below shows the first full scan, then 2 further incremental scans.
Once Purview has scanned the Power BI tenant, we can browse the assets that have been identified.
Browse Data Glossary
We can now view and search for Power BI assets along with visualising the lineage between Power BI assets. The following objects are currently supported:
- Dashboards
- Reports
- Datasets
- Data Flows
- Paginated Reports (show as Reports but do not support lineage)
Viewing Assets
- Click Data Catalog on the left menu
- Click Browse Assets on the main window
- There are now 2 options:
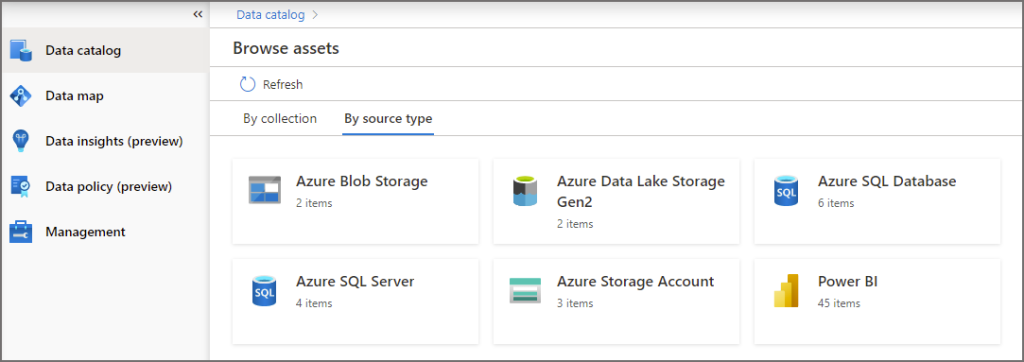
- By Collection: Browse assets which are grouped into collections and sub-collections
- By Source Type: Browse assets which are grouped by their data source type, EG Power BI, Azure SQL Databases etc.
- In this scenario we’ll select By Source Type and select Power BI
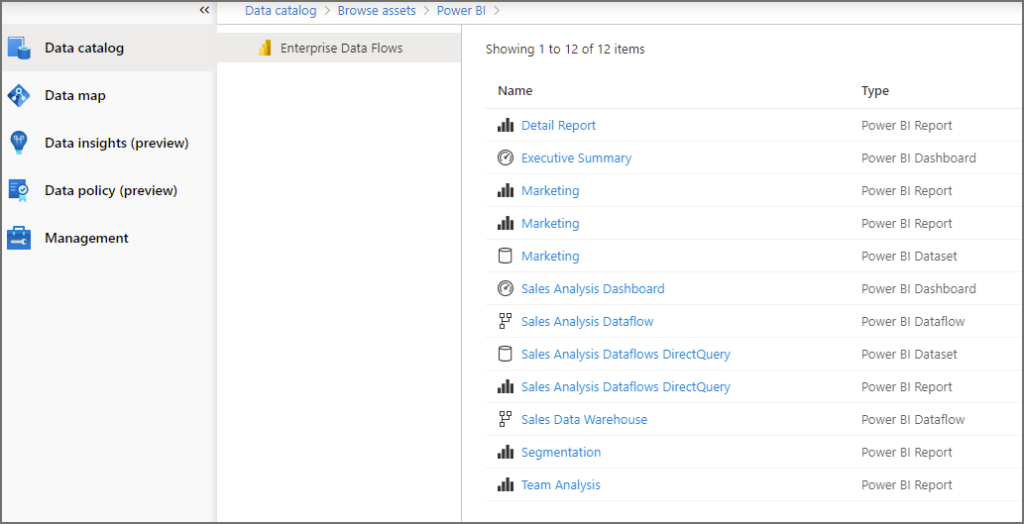
After clicking on Power BI, you will first see a list of Power BI Workspaces, by clicking on a workspace we can view the objects that Purview has scanned and added to the asset library.
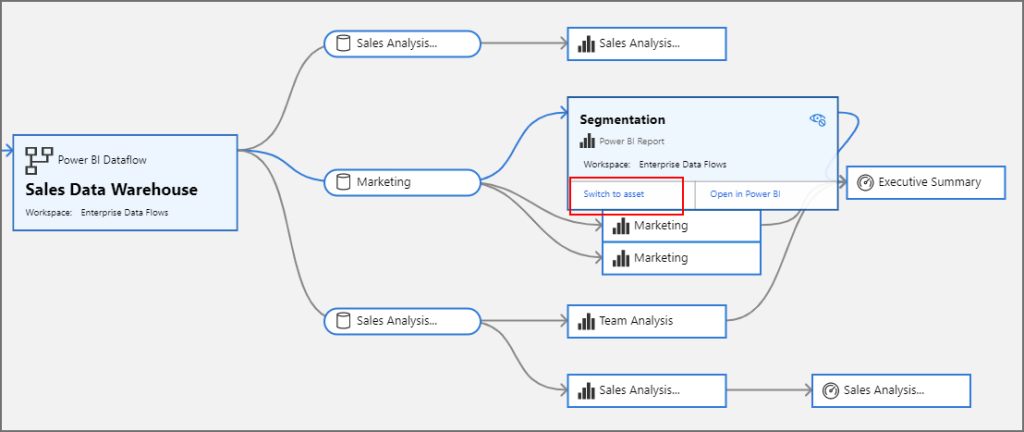
View Lineage
If we select an object, in this scenario if we click the Sales Data Warehouse dataflow and select the Lineage tab, we can see the object dependencies. In this example, the dataflow feeds into 3 datasets, those datasets feed into 6 reports, 4 of those reports feed into 2 dashboards.
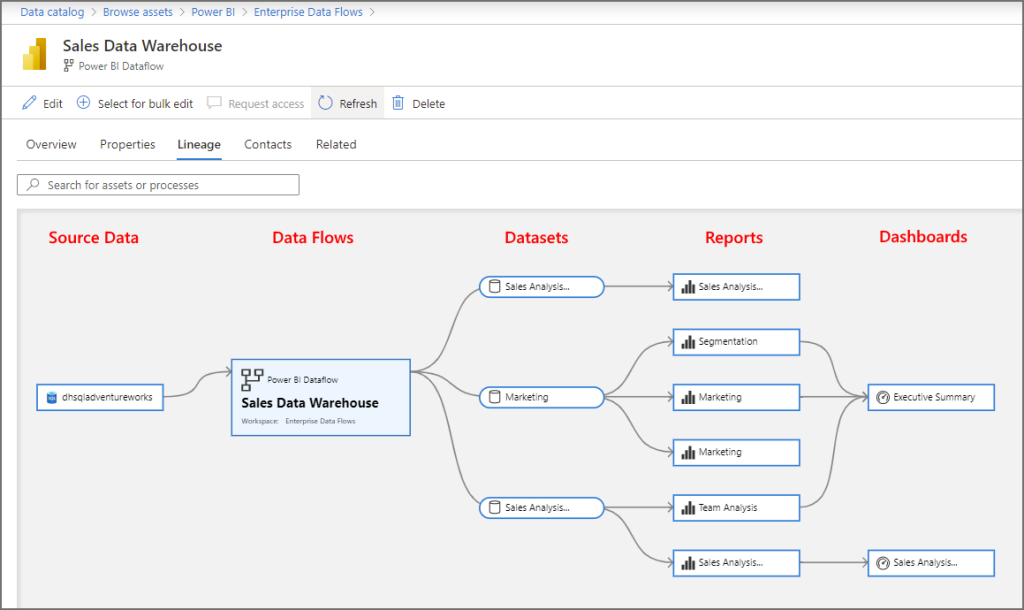
We can change focus on an object by clicking on the object and selecting Switch to asset.
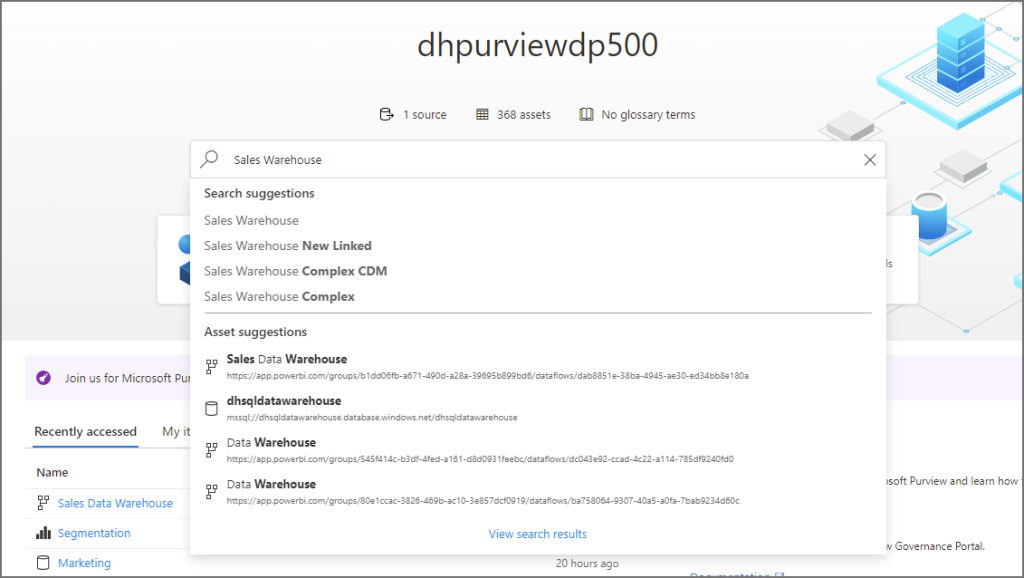
Searching For Assets
We can enter search terms to search for assets rather than using Browse assets.
- Click on Data Catalog in the left menu
- Enter a search term into the text box
- From the results, select either:
- Search Suggestion: Takes you to a list of assets that match the filter
- Asset Suggestion : Takes you direct to the actual asset page
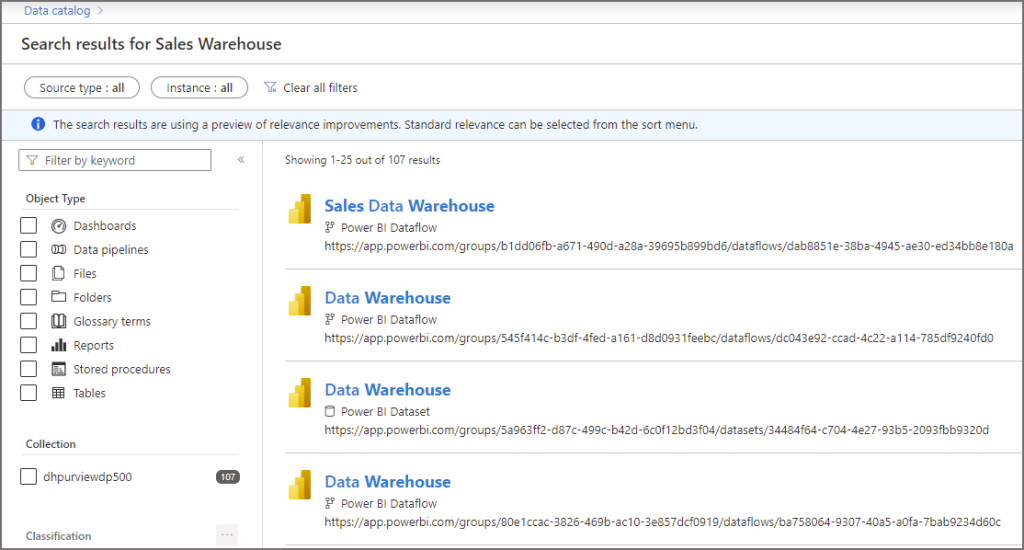
If we select the Sales Warehouse in Search Suggestion, we’ll go to the results page. From here we can filter on specific asset types to narrow down the search.
References
- Connect to and manage a Power BI tenant – Azure Purview | Microsoft Docs
- Metadata and Lineage from Power BI – Azure Purview | Microsoft Docs
- Understand access and permissions – Microsoft Purview | Microsoft Docs
- Create a basic group and add members – Azure Active Directory | Microsoft Docs
- Introduction to Azure Purview – Learn | Microsoft Docs
- Metadata and Lineage from Power BI – Microsoft Purview | Microsoft Docs
 Andy
Andy
[…] Integrating Microsoft Purview with Power BI […]
I know that this is beyond the DP-500, but could you cover a ruleset that doesn’t scan personal workspaces?